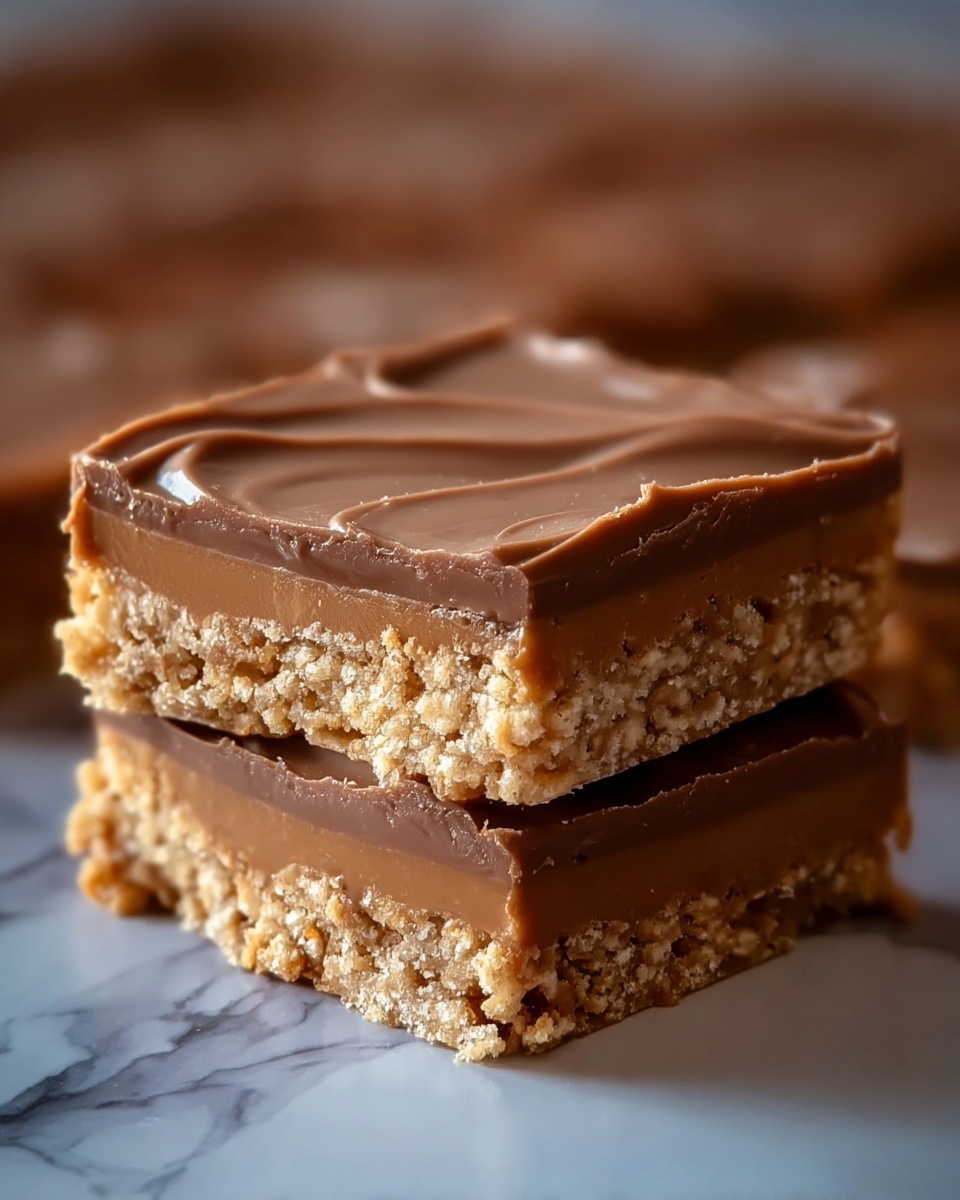
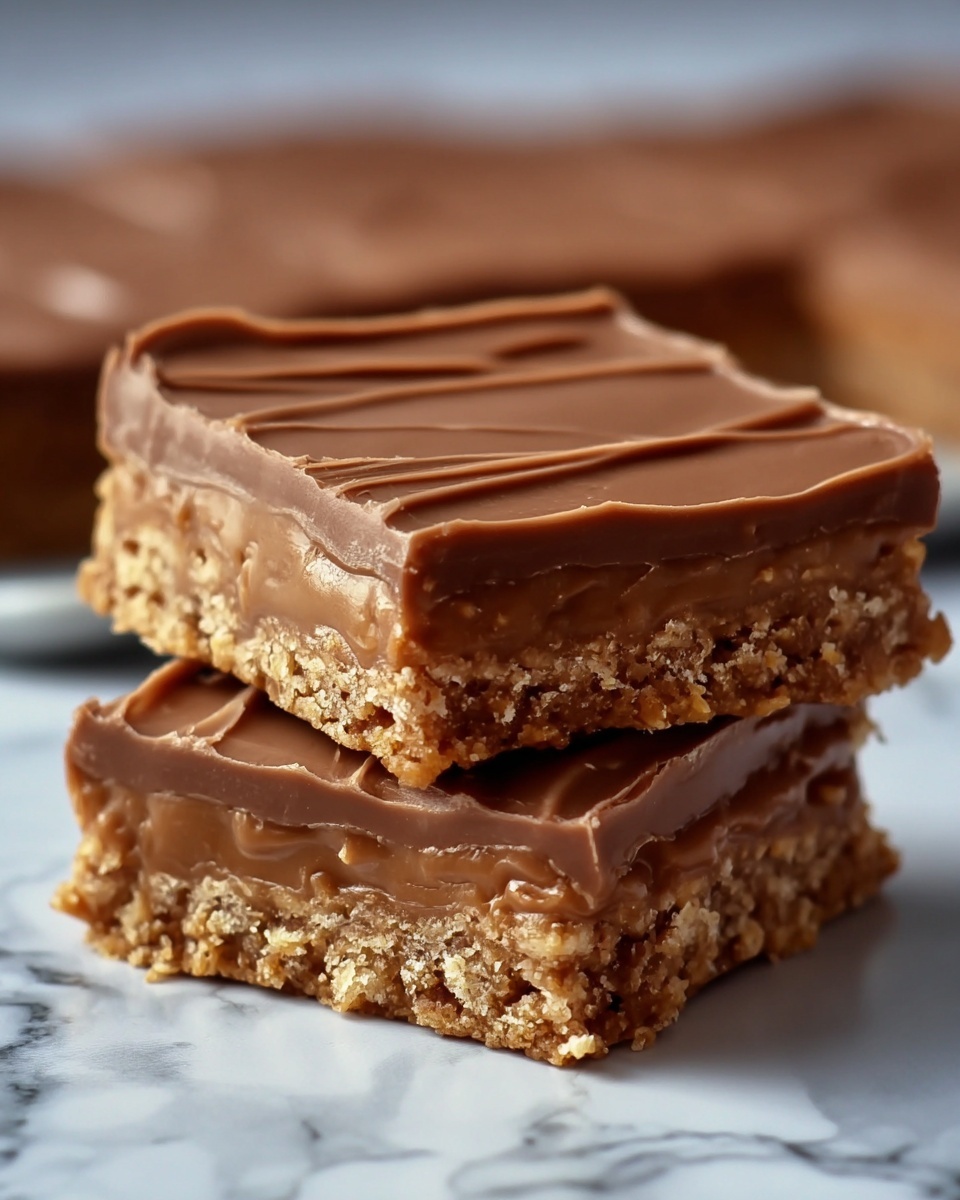
If you’re craving a nostalgic treat that brings a bit of magic to your kitchen, you’re going to adore making Disneyland’s Peanut Butter Sandwich Bars Recipe. These bars combine creamy peanut butter, a perfect balance of sweetness, and the delightful chewiness of oats, all layered with an irresistible double dose of chocolate chips. They capture the spirit of Disneyland’s classic desserts but with a homemade touch that will warm your heart and satisfy every sweet tooth craving. Once you try this recipe, it might just become your new favorite go-to for sharing smiles and creating fun memories.
Ingredients You’ll Need
The beauty of Disneyland’s Peanut Butter Sandwich Bars Recipe is in its simple yet carefully chosen ingredients. Each one plays a crucial role, from the creamy texture of the peanut butter to the rich sweetness of the brown sugar and the comforting chewiness of rolled oats. Together, they create a marvelous blend of flavors and textures.
- Creamy peanut butter: The star ingredient that adds richness and a luscious, nutty flavor.
- Unsalted butter (softened): Provides a smooth base and enhances the buttery taste without overpowering.
- Brown sugar: Offers a deep molasses flavor and moistness that keeps the bars chewy.
- Granulated sugar: Adds that perfect touch of sweetness and helps with texture.
- Large eggs: Bind everything together and contribute to the tender crumb.
- Vanilla extract: Boosts the overall flavor with a warm, aromatic note.
- All-purpose flour: The foundation of the bars, giving structure and stability.
- Baking soda: Helps the bars rise gently while keeping them tender.
- Salt: Enhances all the flavors and balances the sweetness.
- Old-fashioned rolled oats: Bring heartiness and chewy texture that makes every bite satisfying.
- Semisweet chocolate chips: Add a rich, slightly bittersweet contrast to the peanut butter.
- Milk chocolate chips: For creamy, melty pockets of sweetness throughout.
- Creamy peanut butter (for drizzle, optional): A finishing touch that amps up the peanut flavor and looks inviting.
How to Make Disneyland’s Peanut Butter Sandwich Bars Recipe
Step 1: Prepare Your Baking Pan and Preheat the Oven
Start by preheating your oven to 350°F and greasing a 9×13-inch baking pan or lining it with parchment paper. This ensures your bars will bake evenly and come out cleanly when you’re ready to slice.
Step 2: Cream Butter, Peanut Butter, and Sugars
In a large bowl, beat together the softened butter, creamy peanut butter, brown sugar, and granulated sugar until the mixture is light and fluffy. This step is key because it incorporates air, giving your bars a tender texture that melts in your mouth.
Step 3: Add Eggs and Vanilla Extract
Beat in the eggs and vanilla extract until everything is well combined, making the batter smooth and flavorful. The vanilla really elevates the peanut butter’s natural aroma, making the bars smell incredible right from the start.
Step 4: Mix Dry Ingredients
In a separate bowl, whisk together the flour, baking soda, and salt. This ensures these ingredients are evenly distributed so your bars rise uniformly and maintain a lovely texture.
Step 5: Combine Wet and Dry Mixtures
Gradually add the dry ingredients to the wet ingredients, mixing gently until just combined. Overmixing can lead to tough bars, so stop as soon as everything is blended.
Step 6: Stir in Rolled Oats
Fold in the rolled oats until evenly distributed throughout the batter. These oats add a comforting chew and rustic feel that balances the creamy peanut butter and smooth chocolate chips.
Step 7: Layer the Batter and Chocolate Chips
Press two-thirds of the oat and peanut butter mixture evenly into the bottom of your prepared pan. Then, sprinkle the semisweet and milk chocolate chips over this base layer. Finally, crumble the remaining dough over the top and press lightly. This layering creates the iconic sandwich effect with pockets of melty chocolate.
Step 8: Bake and Cool
Bake for 25 to 30 minutes or until the top turns a beautiful golden brown and the center feels set. Let the bars cool completely in the pan, which will help them firm up for clean slicing.
Step 9: Optional Peanut Butter Drizzle
For an extra peanut butter kick, gently melt 2 tablespoons of creamy peanut butter and drizzle it over the cooled bars before cutting. It’s a little flourish that makes these bars look as delightful as they taste.
How to Serve Disneyland’s Peanut Butter Sandwich Bars Recipe

Garnishes
A light sprinkle of flaky sea salt over the top can bring out the peanut butter’s natural sweetness and add a sophisticated touch. Alternatively, a dusting of powdered sugar makes for a charming presentation, perfect for sharing with friends and family.
Side Dishes
These bars go wonderfully with a cold glass of milk or a cup of rich hot chocolate. For a more indulgent spread, serve alongside fresh berries or a dollop of whipped cream to balance the richness with fruity brightness.
Creative Ways to Present
Cut the bars into bite-sized squares to create a fun, shareable dessert platter for parties or picnics. You can also sandwich them between layers of vanilla ice cream for a decadent peanut butter bar ice cream sandwich that everyone will rave about.
Make Ahead and Storage
Storing Leftovers
Disneyland’s Peanut Butter Sandwich Bars Recipe keeps wonderfully in an airtight container at room temperature for up to five days. Keeping them out of the fridge lets them stay perfectly chewy and soft, just like freshly baked.
Freezing
If you want to make these bars in advance, they freeze beautifully. Wrap individual bars tightly in plastic wrap and place them in a freezer-safe bag. They can be stored for up to three months and thaw at room temperature when you’re ready to enjoy.
Reheating
To bring back that fresh-baked warmth, pop a bar into the microwave for 10 to 15 seconds, or warm gently in a low oven. This melts the chocolate chips slightly and revives the bars’ soft, gooey texture.
FAQs
Can I substitute crunchy peanut butter for creamy in Disneyland’s Peanut Butter Sandwich Bars Recipe?
Absolutely! Crunchy peanut butter will add a bit of extra texture and nutty crunch, which can be a delightful twist. Just be aware that it may slightly alter the smoothness of the bars.
Are these bars gluten-free?
This recipe calls for all-purpose flour, which contains gluten. To make a gluten-free version of Disneyland’s Peanut Butter Sandwich Bars Recipe, you can substitute the flour with a gluten-free all-purpose blend, but results may vary slightly in texture.
Can I use other types of chocolate chips?
Yes! Feel free to swap in white chocolate, dark chocolate, or even peanut butter chips to customize these bars to your taste. Just keep the total amount similar to avoid disturbing the balance of the recipe.
Is it necessary to use both brown and granulated sugar?
Using both sugars is important because brown sugar adds moisture and chewiness while granulated sugar helps with structure and crispness. Together, they create the perfect texture contrast in Disneyland’s Peanut Butter Sandwich Bars Recipe.
How do I know when the bars are done baking?
The top should be a lovely golden brown and the center should feel set but not hard. A toothpick inserted near the middle might come out with a few moist crumbs, but it should not be wet with raw batter.
Final Thoughts
I wholeheartedly encourage you to give Disneyland’s Peanut Butter Sandwich Bars Recipe a try. It’s the kind of recipe that brings joy with every bite, combining comfort, nostalgia, and an irresistible peanut butter and chocolate combo. Whether you’re baking for a weeknight treat or a special occasion, this recipe is sure to become a beloved staple on your dessert menu.
Print
Disneyland’s Peanut Butter Sandwich Bars Recipe
- Prep Time: 15 minutes
- Cook Time: 30 minutes
- Total Time: 45 minutes
- Yield: 16 bars
- Category: Dessert
- Method: Baking
- Cuisine: American
- Diet: Vegetarian
Description
Disneyland’s Peanut Butter Sandwich Bars offer a deliciously chewy and chocolatey dessert packed with creamy peanut butter, oats, and two types of chocolate chips. These bars combine the nostalgic flavors of a classic peanut butter cookie with the convenience of a handheld treat perfect for snacking or sharing. Made with simple pantry ingredients and baked to golden perfection, these bars feature a delightful contrast of textures and a rich peanut butter drizzle for an irresistible finish.
Ingredients
Base Mixture
- 1 cup creamy peanut butter
- 1/2 cup unsalted butter, softened
- 1 cup packed brown sugar
- 1/2 cup granulated sugar
- 2 large eggs
- 2 teaspoons vanilla extract
- 1 1/4 cups all-purpose flour
- 1/2 teaspoon baking soda
- 1/2 teaspoon salt
- 1 1/2 cups old-fashioned rolled oats
Chocolate Layer
- 1 cup semisweet chocolate chips
- 1 cup milk chocolate chips
Finishing Touch
- 2 tablespoons creamy peanut butter (for drizzle, optional)
Instructions
- Preheat and Prepare Pan: Preheat your oven to 350°F and grease a 9×13-inch baking pan or line it with parchment paper to prevent sticking.
- Cream Wet Ingredients: In a large bowl, use a mixer to cream together softened butter, creamy peanut butter, brown sugar, and granulated sugar until the mixture is light and fluffy, ensuring good air incorporation for texture.
- Add Eggs and Vanilla: Beat in the eggs and vanilla extract to the creamed mixture until fully combined, which helps bind the dough and adds flavor.
- Combine Dry Ingredients: In a separate bowl, whisk together the all-purpose flour, baking soda, and salt to distribute the leavening and seasoning evenly.
- Mix Dry into Wet: Gradually add the dry flour mixture to the wet ingredients, mixing just until combined to avoid overworking the dough and toughening the bars.
- Add Oats: Stir in the rolled oats until they are evenly incorporated, which contributes to the bars’ chewy texture and hearty bite.
- Form Base Layer: Press about two-thirds of the dough evenly into the bottom of the prepared baking pan to create the base layer for the bars.
- Add Chocolate Chips: Sprinkle the semisweet and milk chocolate chips evenly over the pressed dough layer, adding rich chocolate flavor and pockets of gooey sweetness.
- Add Top Crumble Layer: Crumble the remaining dough over the chocolate chip layer and press it lightly to create a textured topping that will bake to a golden finish.
- Bake: Bake the bars in the preheated oven for 25 to 30 minutes, or until the top turns golden brown and the center is set, indicating the bars are cooked through.
- Cool Completely: Allow the bars to cool fully in the pan on a wire rack; this ensures they firm up for clean slicing.
- Optional Peanut Butter Drizzle: If desired, melt 2 tablespoons of creamy peanut butter and drizzle it over the cooled bars for added flavor and decoration before cutting into 16 bars.
Notes
- Store the bars in an airtight container at room temperature for up to 5 days to maintain freshness.
- For a firmer texture, chill the bars in the refrigerator before slicing.
- You can substitute crunchy peanut butter if you prefer texture variation in the bars.
- Feel free to use parchment paper for easy removal of bars from the pan.
- Make sure not to overmix the dough to keep the bars tender.

