If you love the cozy feeling of a warm drink during chilly days but want a fun, portable twist, the Hot Cocoa Cupcake Mugs Recipe will absolutely delight you. These charming cupcakes capture the comforting flavors of hot chocolate in a deliciously moist chocolate cake, topped with fluffy whipped cream, mini marshmallows, and festive sprinkles. What’s more, each cupcake looks like a tiny mug, some even featuring candy cane handles, making them perfect for holiday parties or just cozying up at home with a sweet treat.
Ingredients You’ll Need
Gathering the right ingredients is the first step to nailing this recipe. Each component is simple but essential, working together to create the perfect balance of rich chocolate flavor, creamy texture, and delightful decoration reminiscent of hot cocoa in mug form.
- Chocolate cake mix: The base that delivers a moist and tender cupcake with classic chocolate flavor.
- Eggs, oil, and water: Necessary for preparing the cake batter smoothly and keeping the cupcakes light.
- Mini marshmallows: Add that authentic hot cocoa touch and a fun, gooey texture on top.
- Chocolate chips: Melt during baking for extra pockets of rich chocolate in every bite.
- Heavy cream: Whipped to create the fluffy, dollop-like topping that mimics whipped cream on hot cocoa.
- Powdered sugar: Sweetens the whipped cream while giving it a smooth finish.
- Vanilla extract: Adds depth and warmth to the whipped cream topping.
- Mini candy canes (optional): Perfect for forming adorable handles on each cupcake mug, boosting the festive vibe.
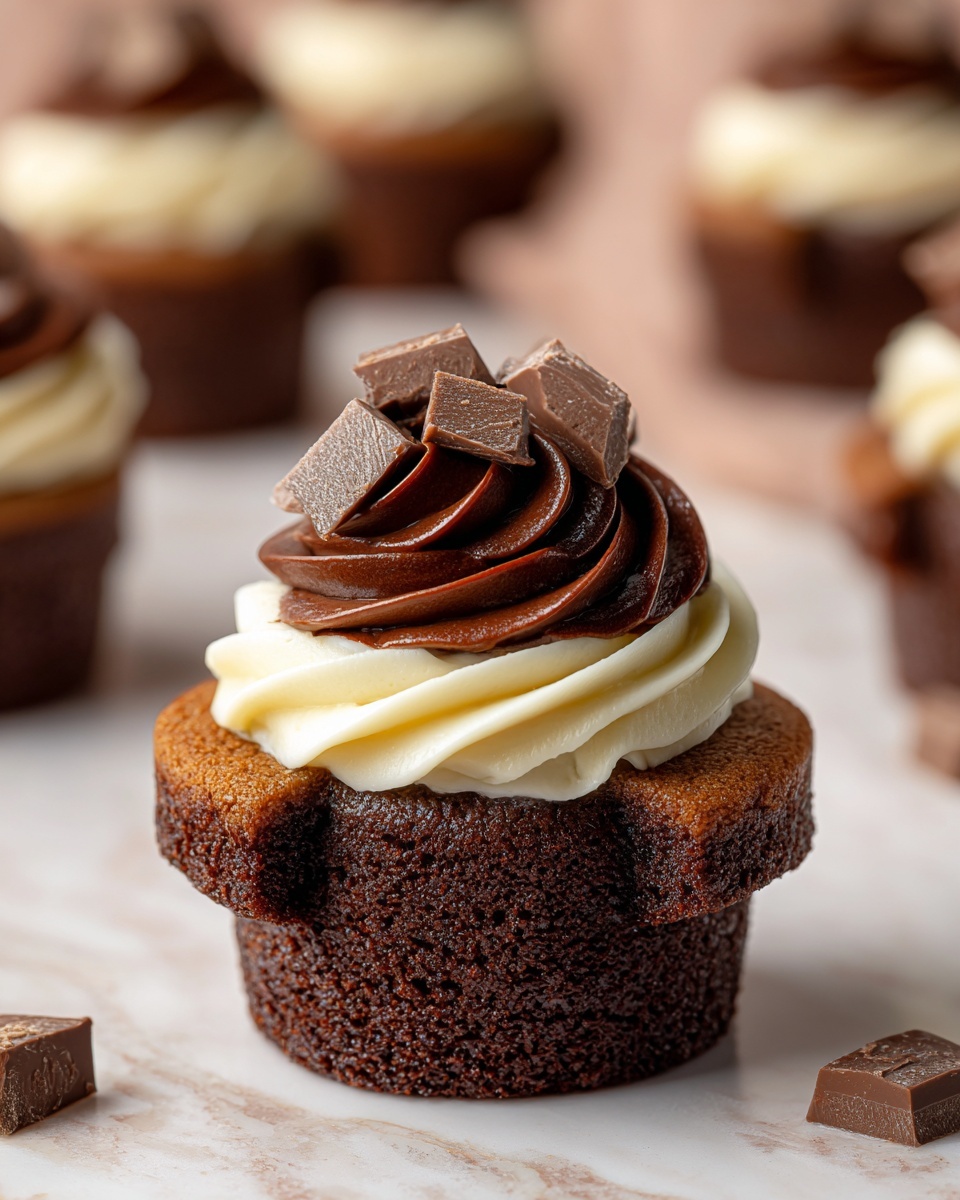
- Chocolate frosting: Acts as the cupcake’s rim, making it look like a real mug filled with cocoa.
- Festive sprinkles: Joyful little bursts of color that make the cupcakes truly holiday-ready.
- Chocolate syrup or hot cocoa mix (optional): Adds extra flair and flavor when drizzled or dusted on top.
How to Make Hot Cocoa Cupcake Mugs Recipe
Step 1: Prepare the Cupcake Batter
Preheat your oven to 350°F (175°C) and line a muffin tin with cupcake liners—mug-style liners make this recipe extra charming. Follow the package instructions to prepare your chocolate cake mix, then gently fold in the chocolate chips. This little addition melts inside the cupcakes, creating irresistible gooey pockets of chocolate.
Step 2: Bake to Perfection
Fill each cupcake liner about two-thirds full with the batter and bake for 18 to 20 minutes. You’ll know they’re done when a toothpick inserted in the center comes out clean or with a few moist crumbs attached. Once baked, allow the cupcakes to cool completely—patience is key here, as you want your toppings to stay beautifully intact.
Step 3: Whip Up the Creamy Topping
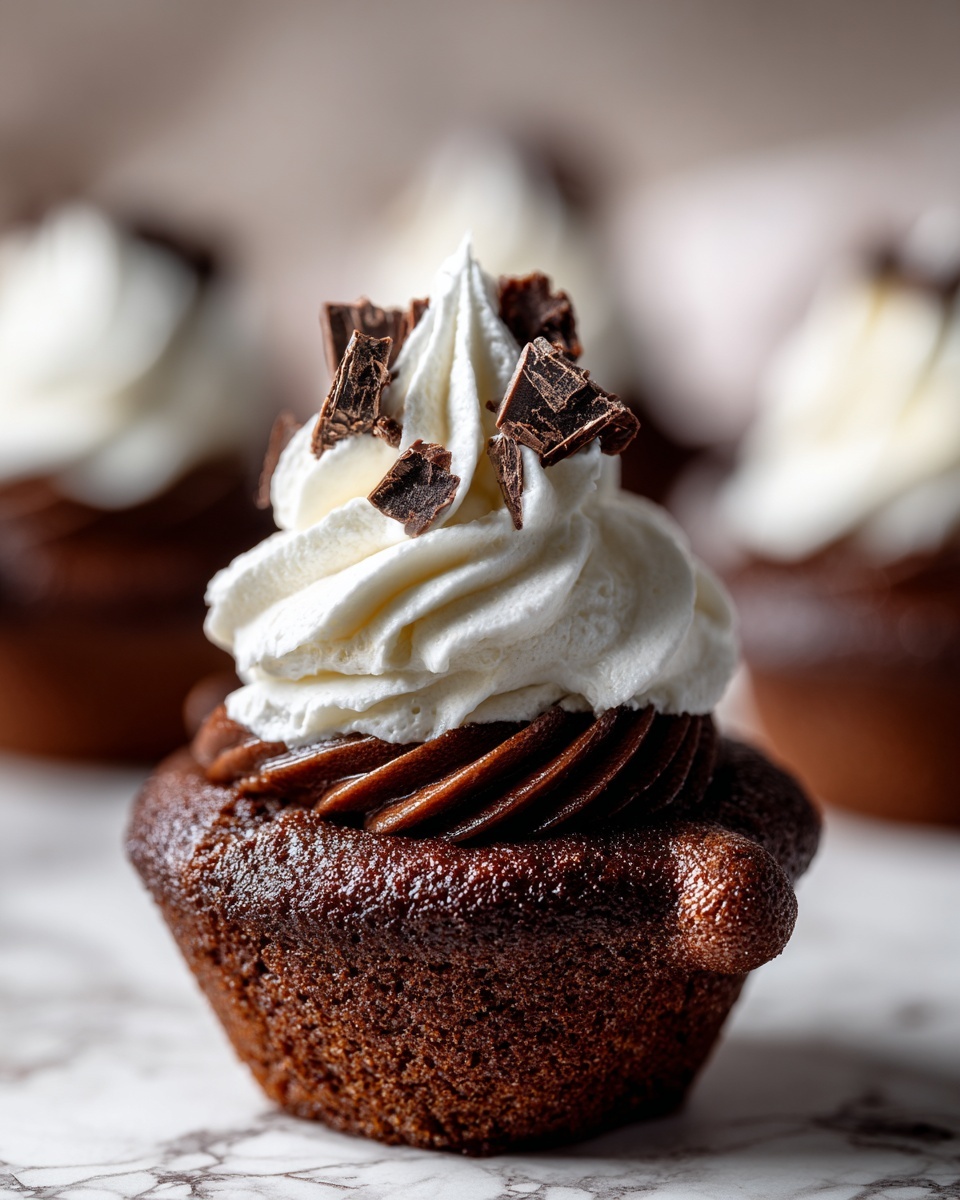
While the cupcakes cool, whip together the heavy cream, powdered sugar, and vanilla extract until stiff peaks form. This whipped cream acts as the luscious whipped topping you’d expect on a mug of hot cocoa, making these cupcakes feel extra indulgent and authentic.
Step 4: Frost and Decorate
Spread a thin layer of chocolate frosting on the cooled cupcakes to resemble a mug’s rim. Then, swirl a generous dollop of your freshly whipped cream on top. Sprinkle on mini marshmallows and festive sprinkles to evoke that classic hot cocoa charm.
Step 5: Add Candy Cane Handles (Optional)
For a whimsical, mug-like appearance, gently break mini candy canes into curved handles and press one into the side of each cupcake. This simple touch transforms your cupcakes into delightful cups of hot cocoa you can hold in your hand (almost), and is sure to wow guests!
Step 6: Final Touches
Before serving, feel free to dust with a bit of hot cocoa mix or drizzle chocolate syrup on top for an extra boost of chocolate goodness. This finishing touch makes your Hot Cocoa Cupcake Mugs Recipe absolutely irresistible.
How to Serve Hot Cocoa Cupcake Mugs Recipe

Garnishes
Garnishing these cupcake mugs is part of the fun! Fresh mini marshmallows add a pillowy softness on each bite, while festive sprinkles bring in eye-catching color and cheer. For an even fancier presentation, a light dusting of cocoa powder or a drizzle of chocolate syrup adds to the decadent look and taste.
Side Dishes
These cupcake mugs are sweet enough to stand alone, but they pair beautifully with simple beverages like hot tea or a creamy glass of milk. If you’re serving at a party, consider fresh fruit or light cookies on the side to balance the sweetness.
Creative Ways to Present
Use holiday-themed cupcake liners to boost the festive spirit. Place each cupcake on a small plate with a mini spoon for easy topping enjoyment. If you want to impress, present them in a decorative mug or box to mimic the hot cocoa mug experience and elevate your display for any special occasion.
Make Ahead and Storage
Storing Leftovers
These cupcakes keep well when stored in an airtight container at room temperature for up to 2 days. Just be sure your decorations, especially the whipped cream topping, are fresh and not soggy for the best experience.
Freezing
To freeze, bake the cupcakes and allow them to cool fully. Wrap each cupcake tightly without frosting or toppings to prevent sogginess, then freeze for up to 2 months. Thaw in the refrigerator before frosting and decorating to keep them tasting fresh.
Reheating
Since these cupcakes shine cold or room temperature with their whipped toppings, reheating isn’t essential. However, if you want a warm cupcake, gently microwave for 10 to 15 seconds, then add freshly whipped cream and decorations right before serving.
FAQs
Can I use homemade chocolate cake instead of mix?
Absolutely! A homemade chocolate cake recipe works perfectly if you prefer from-scratch baking. Just ensure your batter is slightly thick to hold the chocolate chips and maintain cupcake structure.
What if I don’t have heavy cream?
Heavy cream is great for whipping, but if unavailable, chilled coconut cream or full-fat cream cheese whipped with a bit of sugar can substitute with a slightly different texture and flavor.
Can I make these cupcakes dairy-free?
You can! Use a dairy-free chocolate cake mix, non-dairy whipped topping alternatives, and vegan chocolate chips for a delicious dairy-free version of the Hot Cocoa Cupcake Mugs Recipe.
How far in advance can I prepare these cupcakes?
You can bake the cupcakes a day ahead and refrigerate uniced. Whip the cream and decorate just before serving to keep everything fresh and looking its best.
Why add candy canes as handles?
Candy cane handles add an adorable, festive visual that turns your cupcakes into charming ‘mugs.’ Plus, they offer a sweet peppermint bite that complements the chocolate wonderfully.
Final Thoughts
There is something downright magical about turning a traditional winter favorite like hot cocoa into a cupcake form, and the Hot Cocoa Cupcake Mugs Recipe does exactly that with flair and taste. This recipe is a crowd-pleaser, perfect for bringing warmth and smiles whether you’re celebrating holidays or simply craving a cozy treat. I encourage you to try making these delightful cupcakes—you’ll find they make any day extra special.
Print
Hot Cocoa Cupcake Mugs Recipe
- Prep Time: 20 minutes
- Cook Time: 20 minutes
- Total Time: 40 minutes
- Yield: 12 cupcakes
- Category: Dessert
- Method: Baking
- Cuisine: American
- Diet: Vegetarian
Description
These Hot Cocoa Cupcake Mugs are a delightful winter treat, combining moist chocolate cupcakes with a whipped cream topping and festive decorations. Perfect for holiday gatherings, they mimic the look of hot cocoa mugs with optional candy cane handles, mini marshmallows, and sprinkles, offering both a fun presentation and comforting flavor.
Ingredients
Cake
- 1 box chocolate cake mix (plus required eggs, oil, and water according to package)
- ½ cup chocolate chips
Topping and Decoration
- 1 cup mini marshmallows
- 1 cup heavy cream
- ½ cup powdered sugar
- 1 teaspoon vanilla extract
- 1 cup chocolate frosting (store-bought or homemade)
- 6–8 mini candy canes (optional, for handles)
- Festive sprinkles for topping
- Optional: chocolate syrup or hot cocoa mix for garnish
Instructions
- Preheat the oven: Set your oven to 350°F (175°C) and line a muffin tin with cupcake liners to prepare for baking.
- Prepare the cake batter: Follow the instructions on the chocolate cake mix box to make the batter, including adding eggs, oil, and water as specified. Fold the chocolate chips gently into the batter to distribute them evenly.
- Fill and bake: Spoon the batter into the lined muffin tin, filling each cupcake liner about two-thirds full. Bake for 18 to 20 minutes, or until a toothpick inserted into the center comes out clean.
- Cool cupcakes: Remove the cupcakes from the oven and allow them to cool completely on a wire rack before decorating.
- Make whipped cream topping: In a mixing bowl, whip the heavy cream with powdered sugar and vanilla extract until stiff peaks form, creating a light and fluffy topping.
- Frost the cupcakes: Spread a thin layer of chocolate frosting on top of each cooled cupcake to serve as the base for the whipped cream.
- Add whipped cream and garnish: Pipe or spoon a swirl of whipped cream on top of each cupcake to resemble whipped topping. Sprinkle mini marshmallows and festive sprinkles generously over the whipped cream.
- Attach candy cane handles (optional): Carefully break mini candy canes into curved pieces and press one into the side of each cupcake, creating the look of a mug handle.
- Final touches: Optionally dust the tops with hot cocoa mix or drizzle with chocolate syrup to enhance the hot cocoa mug effect before serving.
Notes
- Use mug-style cupcake wrappers for a festive and fun presentation.
- For deeper chocolate flavor, stir in a teaspoon of instant coffee or extra cocoa powder into the cake batter.
- These cupcakes can be baked a day ahead and decorated just before serving to save time.

