
If you love crisp, tangy, and deeply flavorful pickles, you are about to fall head over heels for this Traditional Kosher Dill Pickles Recipe. This classic fermented delight brings together the perfect marriage of garlic, fresh dill, and simple, natural ingredients to create pickles that are juicy, crunchy, and full of character. Whether you’re a pickle enthusiast or just curious about homemade ferments, this recipe offers both a delicious snack and a fun kitchen adventure that connects you to generations of cherished culinary tradition.
Ingredients You’ll Need
These ingredients are straightforward yet indispensable for creating authentic, crave-worthy pickles. Each one plays a crucial role in building the perfect balance of flavor, crunch, and fermentation magic.
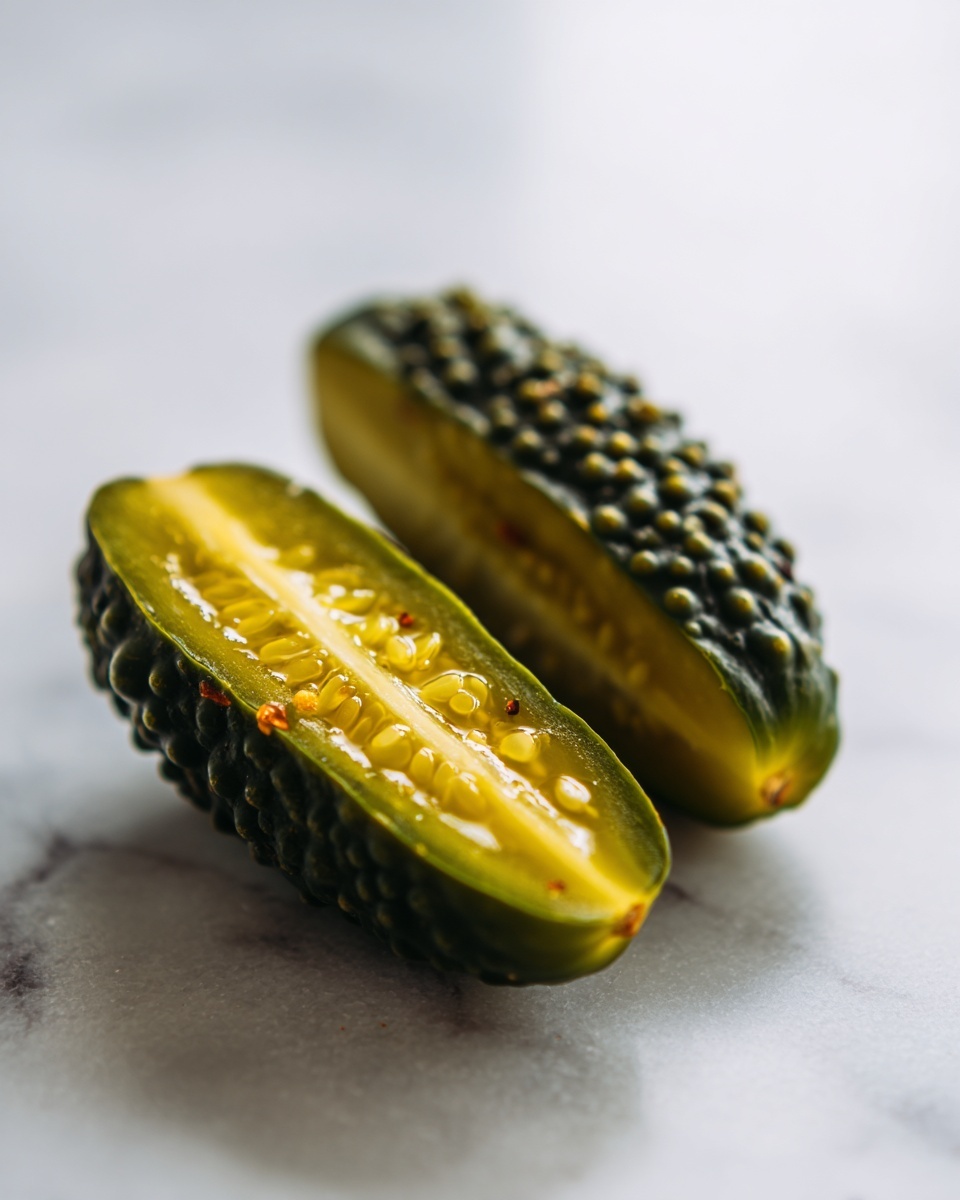
- Small cucumbers (Kirby or pickling cucumbers): These varieties hold up best during fermentation, staying crisp and flavorful.
- Garlic cloves, smashed: Adds a bold, savory punch that’s signature to kosher pickles.
- Fresh dill heads or sprigs: Imparts that unmistakable aromatic herbaceousness responsible for the “dill” in dill pickles.
- Whole black peppercorns: Offers subtle heat and complexity to the brine.
- Mustard seeds (optional): A gentle spice that complements the overall profile without overpowering.
- Red pepper flakes (optional): For a touch of warmth to balance the tang.
- Kosher salt (non-iodized): Essential for proper fermentation and preserving the crisp texture.
- Filtered or dechlorinated water: Chlorine can inhibit fermentation, so clean water is key.
- Grape leaf or bay leaf (optional): Helps maintain the pickles’ crunch by releasing natural tannins.
- Wide-mouth jar (1 quart or larger): Needed for packing the cucumbers and allowing room for fermentation gases.
How to Make Traditional Kosher Dill Pickles Recipe
Step 1: Prepare the Brine
Start by dissolving kosher salt into filtered water, stirring gently until completely dissolved. This simple salty solution is the heart of your pickle brine and sets the stage for the natural fermentation process that transforms cucumbers into tangy, flavorful pickles.
Step 2: Prepare the Cucumbers
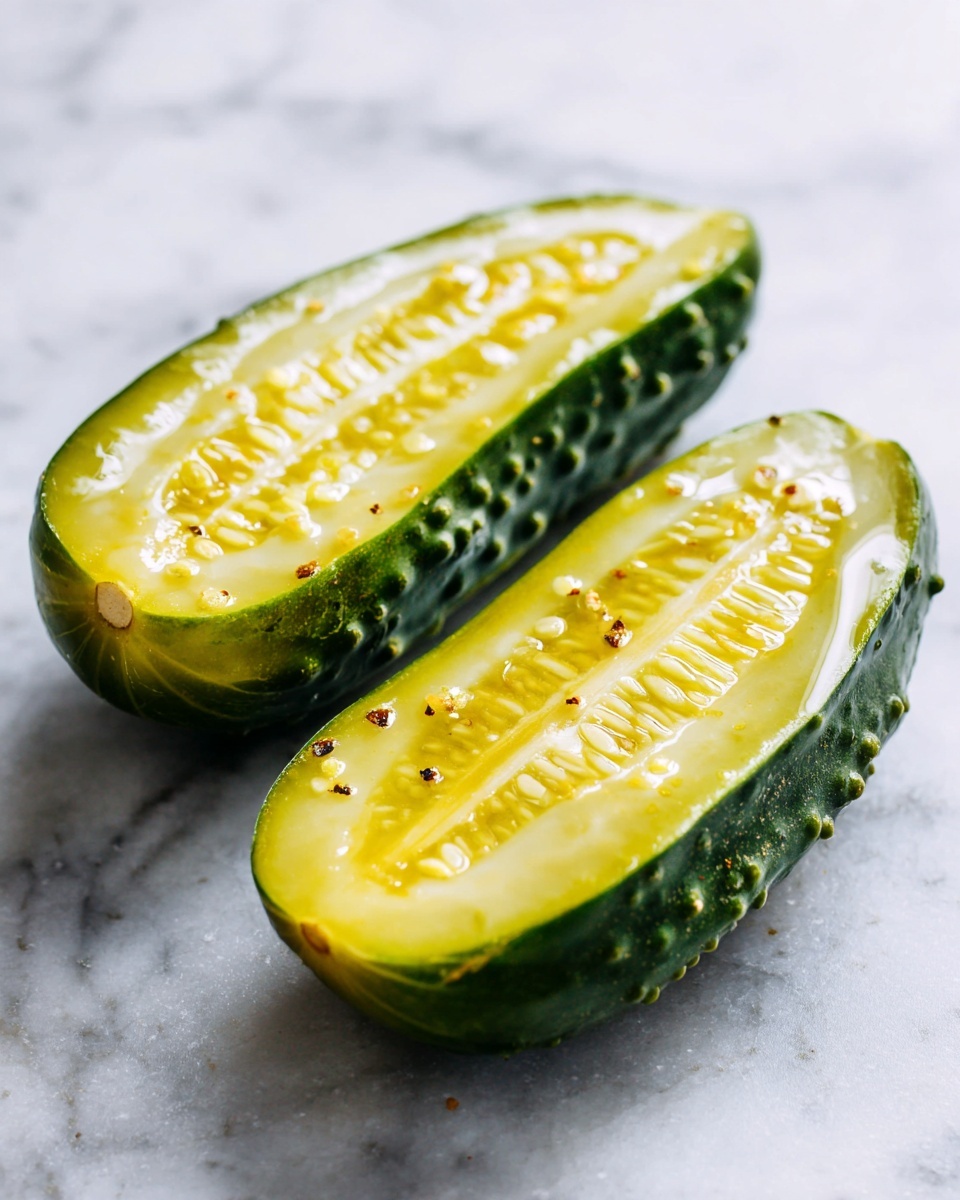
Wash your cucumbers thoroughly to remove any dirt and debris. Then trim only the blossom end; leaving the stem end intact helps keep the pickles firm and crunchy throughout their fermentation journey.
Step 3: Pack the Jar
Layer smashed garlic cloves, fresh dill heads or sprigs, black peppercorns, and any optional spices like mustard seeds or red pepper flakes into the bottom of your wide-mouth jar. These aromatics infuse the pickles with the unmistakable flavor that makes this Traditional Kosher Dill Pickles Recipe so beloved.
Step 4: Add Cucumbers
Now, tightly pack the cucumbers into your jar, standing them vertically if they fit that way or arranging them snugly in any other orientation. The tighter they fit, the less air space inside, which promotes even fermentation and preserves their crispness.
Step 5: Add Brine
Pour your prepared brine over the cucumbers, making sure they are fully submerged. This step is absolutely crucial – exposure to air can spoil the batch, so total submersion is key to safe and successful fermentation.
Step 6: Weigh Down
Place a fermentation weight or a smaller jar inside your big jar to hold the cucumbers beneath the brine. This prevents mold formation and keeps your pickles perfectly immersed throughout the fermenting period.
Step 7: Cover
Cover the jar loosely with a lid or a breathable cloth fastened with a rubber band. This allows carbon dioxide to escape during fermentation while protecting the pickles from dust and insects.
Step 8: Ferment
Let the jar sit at room temperature, ideally between 65 and 75 degrees Fahrenheit. Fermentation time varies between 4 to 7 days depending on your taste preferences; begin tasting at day 3 or 4. When the pickles reach your desired tanginess, move the jar to the refrigerator to slow fermentation and enjoy them for weeks.
How to Serve Traditional Kosher Dill Pickles Recipe
Garnishes
To elevate your homemade Traditional Kosher Dill Pickles Recipe, sprinkle chopped fresh dill or a pinch of crushed red pepper flakes over sliced pickles just before serving. This adds fresh herbal brightness or a bit of spice that complements the tangy bite beautifully.
Side Dishes
These pickles shine alongside deli sandwiches, grilled meats, or creamy potato salads. Their crisp acidity cuts through rich, heavy flavors, helping to refresh your palate and add an exciting crunch to many meals.
Creative Ways to Present
Try slicing pickles lengthwise as a garnish on burgers, chop them finely as a zesty addition to tuna or chicken salad, or serve whole as part of a charcuterie board with cheeses and cured meats. The vibrant flavors of this Traditional Kosher Dill Pickles Recipe make it a versatile star in countless dishes.
Make Ahead and Storage
Storing Leftovers
Once your pickles reach the desired fermentation level, store the jar tightly sealed in the refrigerator. They can keep their delicious crunch and flavor for up to several weeks, so you’ll have plenty of time to nibble at your leisure.
Freezing
Freezing is not recommended for fermented pickles because it compromises their texture. To enjoy your Traditional Kosher Dill Pickles Recipe at its best, stick to refrigeration.
Reheating
Pickles are traditionally enjoyed cold or at room temperature, and reheating is unnecessary. Warming them up can alter their crispness and flavor, so it’s best to serve them straight from the fridge.
FAQs
Can I use regular table salt instead of kosher salt?
It’s best to use kosher salt for fermentation because it’s free from additives that might interfere with the process. Table salt often contains iodine or anti-caking agents, which can affect flavor and the activity of beneficial bacteria.
How do I know when my pickles are done fermenting?
Start tasting after 3 to 4 days; they’re done when they have a pleasant, tangy flavor you enjoy. If you want tangier pickles, ferment longer but keep an eye on their texture so they don’t get too soft.
Can I add sugar to this Traditional Kosher Dill Pickles Recipe?
Traditional recipes typically don’t include sugar because fermentation naturally balances flavors. Adding sugar might feed unwanted bacteria and result in an overly sweet or off-tasting pickle.
Why do some recipes recommend a grape leaf?
Grape leaves contain tannins that help keep pickles crunchy during fermentation. Adding one to your jar is an old trick to maintain that satisfying snap.
Is it safe to eat fermented pickles that have a bit of white scum on top?
A thin layer of white scum, known as kahm yeast, is harmless but can affect flavor. It’s safe to remove it gently; however, if you notice mold or off smells, it’s best to discard the batch.
Final Thoughts
Making your own Traditional Kosher Dill Pickles Recipe is such a rewarding experience—from the satisfying crunch to the complex tangy flavor. It’s a beautiful way to connect with food heritage while treating yourself to a homemade snack that’s bursting with freshness and character. I can’t wait for you to try this recipe and savor every bite of your own creation!
Print
Traditional Kosher Dill Pickles Recipe
- Prep Time: 15 minutes
- Cook Time: 0 minutes
- Total Time: 4 to 7 days (fermentation time)
- Yield: Approximately 1 quart of pickles
- Category: Pickling
- Method: Fermentation
- Cuisine: Jewish (Kosher)
Description
This recipe for Traditional Kosher Dill Pickles guides you through the process of naturally fermenting crisp, tangy pickles using simple ingredients like fresh cucumbers, garlic, dill, and spices. The pickles develop flavor over several days of fermentation, resulting in a classic, crunchy, and flavorful condiment perfect for snacking or accompanying your meals.
Ingredients
Primary Ingredients
- Small cucumbers (Kirby or pickling cucumbers work best) – amount depending on jar size
- Garlic cloves, smashed – 2 to 4 cloves
- Fresh dill heads or sprigs – 2 to 3 sprigs
- Whole black peppercorns – 1 teaspoon
- Kosher salt (non-iodized) – 3 tablespoons
- Filtered or dechlorinated water – 4 cups
Optional Ingredients
- Mustard seeds – 1 teaspoon
- Red pepper flakes – 1/2 teaspoon
- Grape leaf or bay leaf – 1 leaf
Equipment
- Wide-mouth jar (1 quart or larger, depending on batch size)
- Fermentation weight or small jar for weighing down cucumbers
Instructions
- Prepare the Brine: Dissolve the kosher salt completely in filtered or dechlorinated water by stirring thoroughly. This creates the salty liquid essential for fermenting the cucumbers.
- Prepare the Cucumbers: Wash the cucumbers thoroughly under running water. Trim only the blossom end of each cucumber carefully to help prevent the pickles from becoming soft during fermentation.
- Pack the Jar: Place smashed garlic cloves, fresh dill heads or sprigs, whole black peppercorns, and any optional spices such as mustard seeds, red pepper flakes, or a grape or bay leaf at the bottom of your wide-mouth jar.
- Add Cucumbers: Pack the cucumbers tightly into the jar, arranging them vertically or in whatever way fits best to maximize the number of cucumbers while maintaining space for brine to cover them.
- Add Brine: Pour the prepared brine over the packed cucumbers until they are completely submerged. Ensuring full submersion is critical for proper fermentation and to prevent mold.
- Weigh Down: Use a fermentation weight or place a small jar inside the larger jar to keep the cucumbers submerged below the brine level throughout the fermentation.
- Cover: Loosely cover the jar with a lid or a clean cloth secured by a rubber band. This allows gases produced during fermentation to escape, preventing pressure buildup while keeping contaminants out.
- Ferment: Leave the jar at room temperature, ideally between 65–75°F (18–24°C), for 4 to 7 days. Begin sampling the pickles after 3 to 4 days to check for your preferred level of tanginess and crunchiness. Once ready, transfer the jar to the refrigerator to slow the fermentation and preserve the pickles.
Notes
- Use non-iodized kosher salt to avoid cloudiness and off-flavors in the brine.
- Filter or dechlorinate water to prevent chemical interference with fermentation.
- Trimming only the blossom end helps keep pickles firm because the blossom end contains enzymes that promote softness.
- Make sure cucumbers stay submerged under the brine at all times to prevent mold growth.
- Fermentation times vary based on room temperature; warmer temperatures speed up fermentation.
- Once refrigerated, pickles will continue to develop flavor slowly and can be stored for several weeks.
- Optional spices can be adjusted for taste or omitted.


