
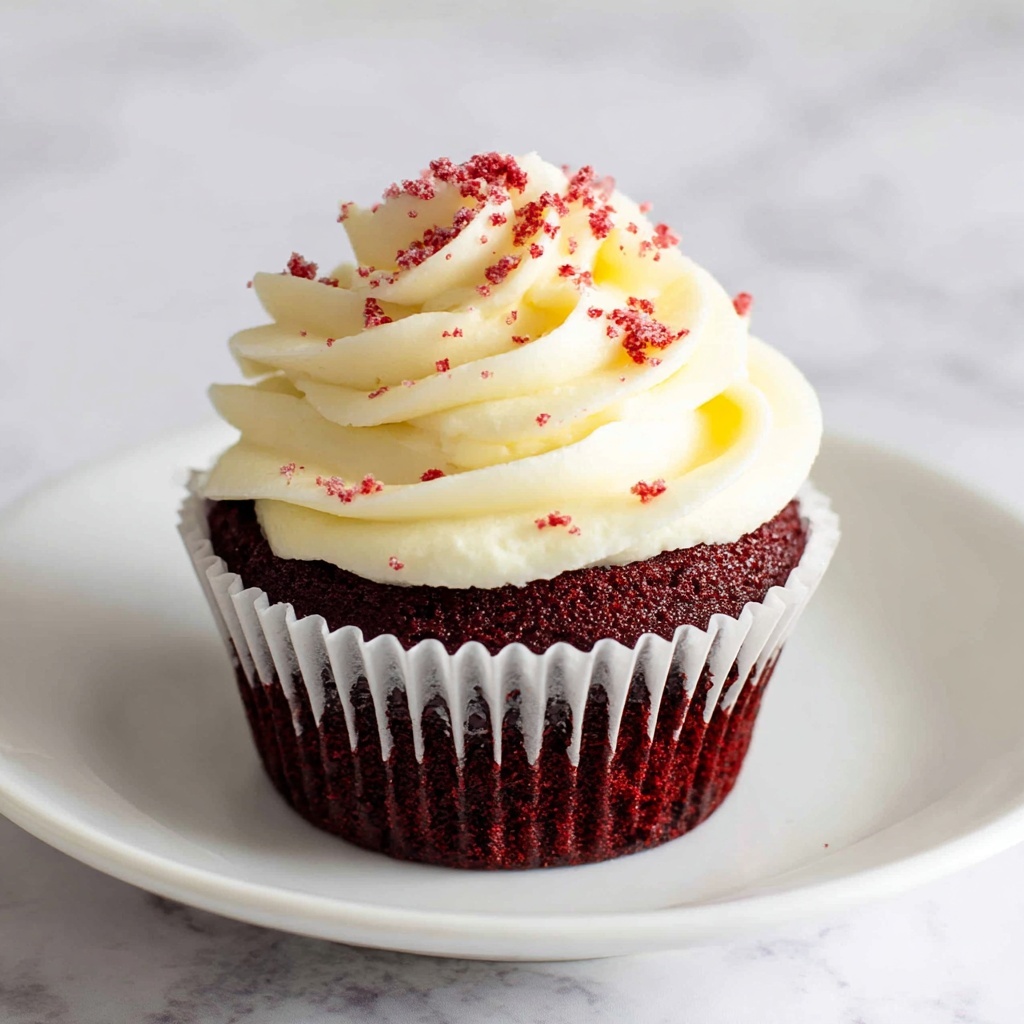
If you’ve been hunting for a dessert that marries the rich, velvety smoothness of cheesecake with the classic, deep-flavored charm of red velvet cake, then you’re going to adore this Red Velvet Cheesecake Cupcake Recipe. These cupcakes deliver a perfect balance of tangy cream cheese filling, moist red velvet cake, and luscious cream cheese frosting, all in a fun, handheld form. They’re delightful for celebrations or simply to brighten your day with a treat that feels both special and comforting.
Ingredients You’ll Need
Gathering the right ingredients is key to nailing this recipe, but don’t worry—they’re simple staples that pack a serious punch in flavor and texture. Each one plays a vital role, whether it’s helping the cupcakes rise just right, defining that signature red velvet color, or making the cheesecake filling irresistibly creamy.
- 2½ cups all-purpose flour: Provides the structure for the cupcakes, ensuring they’re tender but sturdy enough for the cheesecake layer.
- 1½ cups granulated sugar: Sweetens the cupcakes perfectly without overpowering the cocoa and cream cheese.
- 2 tsp unsweetened cocoa powder: Adds that subtle chocolaty depth typical of red velvet.
- 1 tsp salt: Enhances all the flavors and balances the sweetness.
- 1 tsp baking soda: Helps the cupcakes rise light and fluffy.
- 2 eggs: Bind the ingredients together and contribute to moistness.
- 1 cup vegetable oil: Keeps the cupcakes tender and moist without adding extra flavor.
- 1 cup buttermilk (or 1 tsp vinegar + milk to make 1 cup): Adds acidity that reacts with baking soda for lift and creates a tender crumb.
- 1 tsp white vinegar: Amplifies the tanginess and helps intensify the red color.
- 1 Tbsp vanilla extract: Adds warm aromatic notes that enrich the overall flavor.
- 1 Tbsp red food coloring: Gives the cupcakes their vibrant signature red hue.
- 8 oz cream cheese, room temperature (for filling): The creamy base of the luscious cheesecake filling.
- ⅓ cup sour cream: Makes the cheesecake filling extra smooth and tangy.
- ¼ cup sugar (for filling): Sweetens the cheesecake layer just right.
- 8 oz cream cheese, softened (for frosting): Ensures the frosting is rich and creamy.
- ½ cup unsalted butter, softened: Adds silky texture and richness to the frosting.
- 4 cups powdered sugar: Sweetens and thickens the frosting to pipeable perfection.
- ½ tsp salt (or to taste): Balances the sweetness in the frosting.
- 1 Tbsp vanilla extract (for frosting): Rounds out the flavor with a fragrant finish.
How to Make Red Velvet Cheesecake Cupcake Recipe
Step 1: Prepare Your Oven and Muffin Tin
Preheat your oven to 350 °F (175 °C) to ensure it’s just right when you’re ready to bake. Line a 12-cup muffin tin with cupcake liners to prevent sticking and make cleanup a breeze. This sets the stage perfectly for flawless cupcakes.
Step 2: Mix the Dry Ingredients
In a large bowl, whisk together the all-purpose flour, granulated sugar, cocoa powder, salt, and baking soda until well combined. This blend is the backbone for that classic red velvet flavor and texture — smooth, slightly chocolaty, and sweet perfection.
Step 3: Combine the Wet Ingredients
In a separate bowl, beat the eggs with vegetable oil, buttermilk (or milk with vinegar), white vinegar, vanilla extract, and red food coloring. This mixture brings moisture, tang, and the iconic red tint that makes red velvet cupcakes so irresistibly appealing.
Step 4: Make the Cheesecake Filling
In a third bowl, beat the cream cheese, sour cream, sugar, and vanilla extract until the texture is fluffy and smooth. This creamy, tangy cheesecake filling adds a surprise layer of decadence inside each cupcake.
Step 5: Combine Wet and Dry, Then Layer Batter and Cheesecake
Pour the wet mixture into the dry ingredients, stirring until the batter is smooth and free of lumps. Fill each cupcake liner about one third full with the red velvet batter, then spoon approximately 1 to 2 tablespoons of the cheesecake filling on top. Finally, cover the filling with more red velvet batter until the liners are three-quarters full. This layering ensures every bite has that perfect balance of cake and creamy cheesecake.
Step 6: Bake and Cool
Bake the cupcakes for 22 to 25 minutes, checking doneness by inserting a toothpick into the cake portion (not the filling)—it should come out clean. Let the cupcakes cool in the tin for 10 minutes before transferring them to a wire rack to cool completely. Cooling fully is essential for the frosting step.
Step 7: Make the Cream Cheese Frosting
Beat the softened cream cheese and butter until creamy and combined. Gradually add powdered sugar, salt, and vanilla extract, beating until you get a smooth, fluffy frosting that’s perfect for piping or spreading over the cupcakes.
Step 8: Frost the Cupcakes
Once the cupcakes have cooled, pipe or spread the cream cheese frosting generously on top. For best results, chill the frosted cupcakes to let the frosting set before serving. The final product? A cupcake that’s as gorgeous as it is delicious.
How to Serve Red Velvet Cheesecake Cupcake Recipe

Garnishes
To elevate the presentation and add a little extra flavor, consider sprinkling the cupcakes with toasted pecans, shaved white chocolate, or a few fresh berries. These garnishes add a lovely textural contrast and a pop of color that make the cupcakes irresistible.
Side Dishes
These cupcakes pair beautifully with a cup of fresh brewed coffee or a creamy latte for a perfect afternoon treat. For celebrations, serve alongside a light glass of sparkling wine or champagne to make the occasion shine.
Creative Ways to Present
Try serving the cupcakes in themed cupcake wrappers or on a beautiful tiered dessert stand to highlight their luscious layers. Another fun idea is to top each cupcake with an edible flower or a drizzle of white chocolate to add a bit of elegance and wow-factor for guests.
Make Ahead and Storage
Storing Leftovers
Keep leftover cupcakes fresh by storing them in an airtight container in the refrigerator. They’ll stay moist and flavorful for up to 3 days, making it easy to enjoy these beauties over a few days without sacrificing quality.
Freezing
If you want to make the Red Velvet Cheesecake Cupcake Recipe ahead of time, these cupcakes freeze wonderfully. Freeze them un-frosted in a single layer on a baking sheet, then transfer to a sealed container or bag for up to 2 months. Thaw overnight in the fridge before frosting for best results.
Reheating
When ready to enjoy, bring frozen cupcakes to room temperature and if desired, warm slightly in the microwave for about 10-15 seconds to refresh that just-baked softness. Be sure to frost them after reheating to keep the frosting stable and creamy.
FAQs
Can I use regular milk instead of buttermilk?
Yes! If you don’t have buttermilk on hand, simply add 1 teaspoon of white vinegar or lemon juice to a cup of regular milk, stir, and let it sit for 5 minutes. This homemade “buttermilk” will work just as well in your Red Velvet Cheesecake Cupcake Recipe.
What’s the best way to get the red color vibrant?
Using gel or liquid red food coloring helps achieve that iconic bright red velvet color. Adding a little white vinegar boosts the red tone by reacting with the cocoa powder, making the color pop even more.
Can I make these cupcakes gluten-free?
Absolutely! Substitute the all-purpose flour with a gluten-free flour blend that measures cup-for-cup. Just make sure the blend contains xanthan gum or add some for structure, and you’ll still get fantastic texture and flavor.
How do I prevent the cheesecake filling from leaking during baking?
Keep the cheesecake filling thick by using room temperature cream cheese and sour cream, and don’t overfill the cupcakes. Layering the batter and filling as directed helps contain the cheesecake inside, preventing any leakage.
Can I use store-bought frosting?
You can, but homemade cream cheese frosting offers the perfect balance of sweetness and tang that complements the cupcakes best. Store-bought versions tend to be sweeter and less creamy, so if you’re after the classic Red Velvet Cheesecake Cupcake Recipe experience, making your own is worth the effort.
Final Thoughts
This Red Velvet Cheesecake Cupcake Recipe is a treasured find that combines the best of two beloved desserts into one delightful package. Once you make your first batch, it’s hard not to fall in love with the moist cake, creamy cheesecake surprise, and luscious frosting that make these cupcakes stand out. Whether it’s for a party or a cozy night in, these cupcakes will bring joy to anyone lucky enough to take a bite. Give this recipe a try—you’ll be so glad you did!
Print
Red Velvet Cheesecake Cupcake Recipe
- Prep Time: 15 minutes
- Cook Time: 22-25 minutes
- Total Time: 37-40 minutes
- Yield: 12 servings
- Category: Dessert
- Method: Baking
- Cuisine: American
Description
These Red Velvet Cheesecake Cupcakes combine the rich, moist texture of classic red velvet cake with a creamy cheesecake filling, topped with a smooth cream cheese frosting. Perfect for any celebration, these cupcakes deliver a delightful blend of flavors and textures in each bite.
Ingredients
Cupcake Batter
- 2½ cups all-purpose flour
- 1½ cups granulated sugar
- 2 tsp unsweetened cocoa powder
- 1 tsp salt
- 1 tsp baking soda
- 2 eggs
- 1 cup vegetable oil
- 1 cup buttermilk (or 1 tsp vinegar + milk to make 1 cup)
- 1 tsp white vinegar
- 1 Tbsp vanilla extract
- 1 Tbsp red food coloring
Cheesecake Filling
- 8 oz cream cheese, room temperature
- ⅓ cup sour cream
- ¼ cup sugar
- 1 tsp vanilla extract
Cream Cheese Frosting
- 8 oz cream cheese, softened
- ½ cup unsalted butter, softened
- 4 cups powdered sugar
- ½ tsp salt (or to taste)
- 1 Tbsp vanilla extract
Instructions
- Preheat Oven and Prepare Pan: Preheat your oven to 350 °F (175 °C). Line a 12-cup muffin tin with cupcake liners to prevent sticking and for easy removal.
- Mix Dry Ingredients: In a large bowl, whisk together the all-purpose flour, granulated sugar, unsweetened cocoa powder, salt, and baking soda until thoroughly combined.
- Combine Wet Ingredients: In a separate bowl, mix the eggs, vegetable oil, buttermilk (or milk with vinegar), white vinegar, vanilla extract, and red food coloring until well blended.
- Make Cupcake Batter: Pour the wet ingredients into the dry ingredients and mix until the batter is smooth and evenly combined, with no visible lumps.
- Prepare Cheesecake Filling: In another bowl, beat the cream cheese, sour cream, sugar, and vanilla extract together until the mixture is fluffy and smooth.
- Assemble Cupcakes: Scoop the cupcake batter into the liners filling them about one-third full. Add about 1 to 2 tablespoons of the cheesecake filling on top of the batter. Cover the cheesecake layer with more cupcake batter until the liners are about three-quarters full.
- Bake: Place the muffin tin in the preheated oven and bake the cupcakes for 22 to 25 minutes. Check doneness by inserting a toothpick into the cake portion (avoid the cheesecake center). It should come out clean when done.
- Cool Cupcakes: Let the cupcakes cool in the muffin tin for about 10 minutes, then transfer them to a wire rack to cool completely before frosting.
- Make Frosting: Beat the softened cream cheese and butter together until creamy. Gradually add the powdered sugar, salt, and vanilla extract, beating until the frosting is smooth and spreadable.
- Frost and Chill: Pipe or spread the cream cheese frosting onto the cooled cupcakes. Chill the frosted cupcakes in the refrigerator to set the frosting before serving.
Notes
- Make sure the cream cheese and butter are softened to room temperature for a smoother frosting.
- Use good-quality red food coloring for vibrant color without affecting flavor.
- Do not overfill the cupcake liners to avoid batter overflow during baking.
- Chilling the cupcakes after frosting helps the frosting hold its shape and enhances flavor.
- You can store the cupcakes in an airtight container in the refrigerator for up to 3 days.
- Bring refrigerated cupcakes to room temperature before serving for best taste.


