
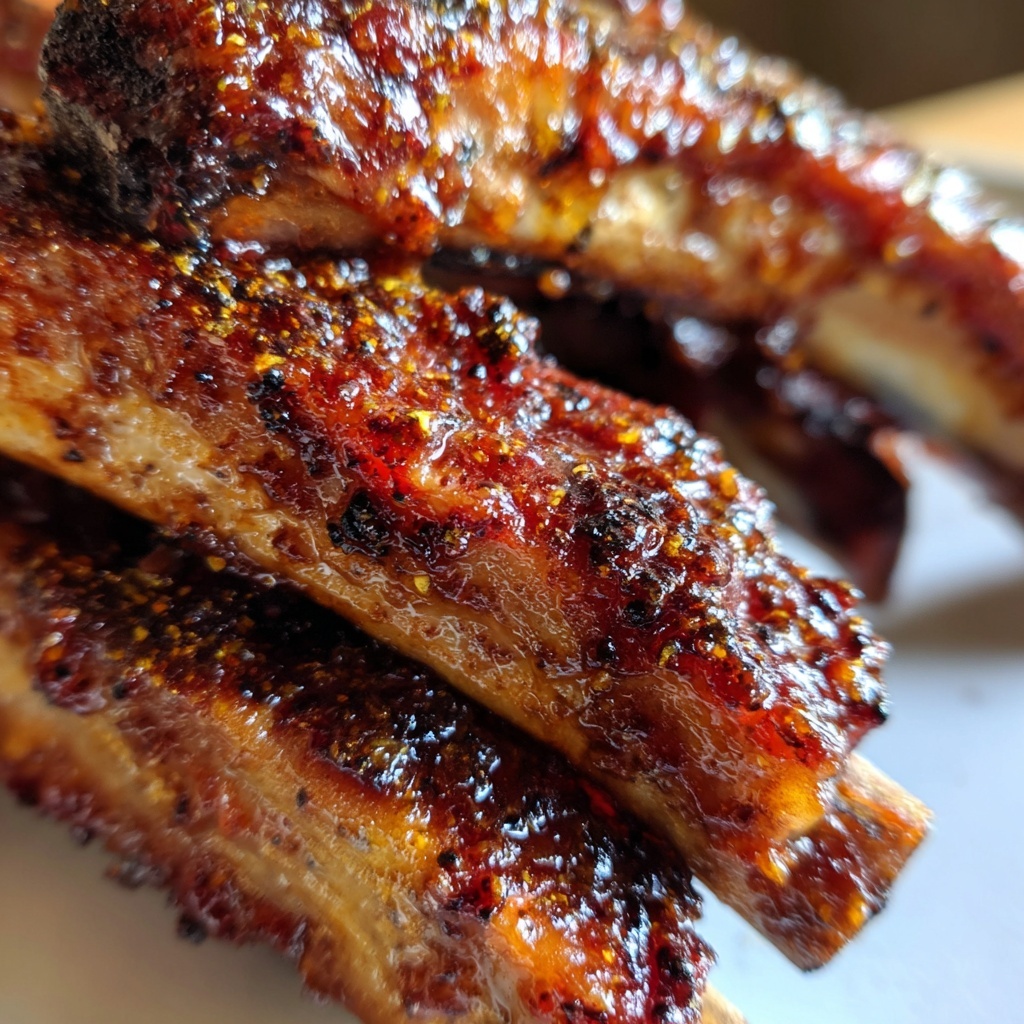
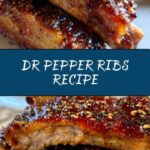
If you are craving ribs that deliver a perfect balance of sweet, tangy, and smoky flavors, this Dr Pepper Ribs Recipe is going to become your new go-to. Imagine tender baby back ribs slowly cooked to fall-off-the-bone perfection and glazed with a luscious sauce made from Dr Pepper soda and a few pantry staples, creating a caramelized finish that’s utterly irresistible. This recipe turns an ordinary rack of ribs into a mouthwatering showstopper that’s perfect for any casual dinner or weekend barbecue.
Ingredients You’ll Need
All the ingredients in this Dr Pepper Ribs Recipe are simple yet essential. Each one plays a unique role, from tenderizing the meat and adding depth to the glaze, to giving the ribs that irresistible color and richness.
- 2 racks of baby back ribs: The star of the show, these ribs are tender and cook evenly for the best texture.
- 1 can (12 oz) Dr Pepper soda: Adds a subtle sweetness and unique flavor that makes the glaze truly stand out.
- 1/2 cup brown sugar, packed: Sweetens the sauce and helps create a sticky caramelized finish.
- 1/4 cup apple cider vinegar: Provides a tangy punch to balance the sweetness perfectly.
- 1/4 cup ketchup: Adds thickness and classic BBQ flavor to the glaze.
- 2 tbsp Worcestershire sauce: Brings umami depth and some savory notes.
- 2 tbsp soy sauce: Enhances the overall flavor with a touch of saltiness.
- 1 tbsp Dijon mustard: Gives the glaze a subtle bite and sharpness.
- 1 tsp garlic powder: Adds a warm, aromatic punch.
- 1 tsp onion powder: Compliments the garlic for a full-bodied taste.
- 1/2 tsp smoked paprika: Infuses a smoky flavor that makes the ribs taste grilled even if you bake them.
- 1/4 tsp ground black pepper: Adds a hint of heat that brings the flavors together.
- 1/4 tsp salt: Enhances every flavor without overpowering.
- 1/2 cup BBQ sauce (for glazing): Used at the end for an extra layer of deliciousness and shine.
How to Make Dr Pepper Ribs Recipe
Step 1: Prepare Your Cooking Method
Begin by preheating your grill or oven to 300°F (150°C). For grilling, set it up for indirect heat, which means the ribs won’t be placed directly above the flames but will still cook slowly and evenly. This setup is key to tender ribs that aren’t dry or burnt.
Step 2: Remove the Silver Skin
This step is crucial for getting tender ribs. Flip your racks over and run a knife under the thin membrane on the back, then peel it away. Removing this “silver skin” helps the seasonings and glaze penetrate the meat better, while also improving texture after cooking.
Step 3: Make the Dr Pepper Glaze
In a medium saucepan, pour in the entire can of Dr Pepper along with the brown sugar, apple cider vinegar, ketchup, Worcestershire sauce, soy sauce, Dijon mustard, garlic powder, onion powder, smoked paprika, black pepper, and salt. Bring this mixture to a simmer over medium heat, stirring occasionally so everything melds beautifully. Let it reduce for 20 to 25 minutes until it thickens up into a sticky, luscious glaze that smells heavenly.
Step 4: Season the Ribs
While your glaze simmers, season the ribs simply with salt and pepper or use your favorite dry rub. The simplicity allows the Dr Pepper glaze to truly shine as the main flavor highlight.
Step 5: Cook Low and Slow
If grilling, place ribs bone-side down on the cooler part of the grill, cover it, and cook for 2 to 3 hours until they are tender and juicy. For oven baking, place the ribs on a baking sheet, cover them tightly with foil, and bake for 2 to 2.5 hours. This slow cooking method breaks down the connective tissues, ensuring every bite melts with flavor.
Step 6: Glaze and Finish Cooking
In the final 15 minutes, brush the ribs generously with the thickened Dr Pepper glaze and continue cooking. This step caramelizes the sauce beautifully, creating that shiny, sticky coating everyone loves.
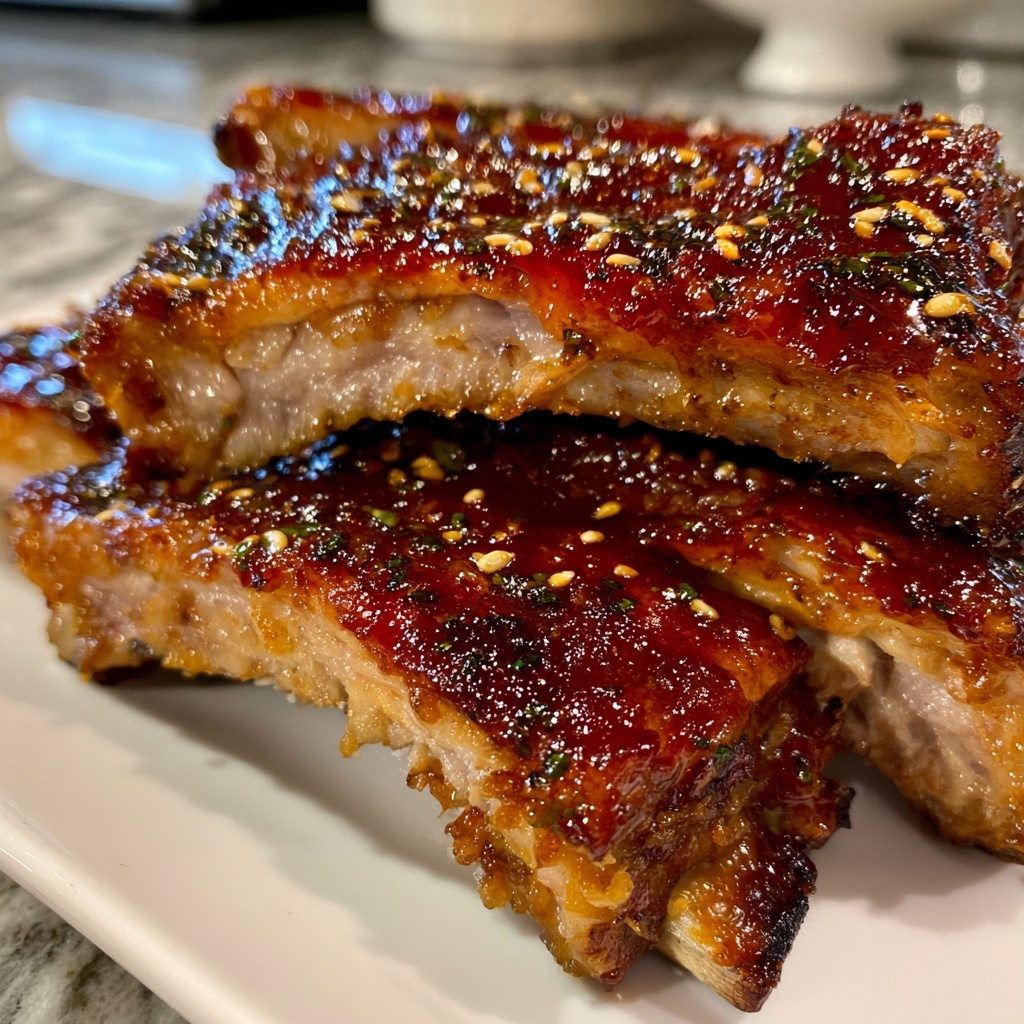
Step 7: Rest and Serve
Once cooked, let your ribs rest for 5 minutes to allow juices to redistribute. Then slice between the bones, serve hot, and don’t forget to offer some extra BBQ sauce on the side for dipping or drizzling!
How to Serve Dr Pepper Ribs Recipe
Garnishes
A sprinkle of chopped fresh parsley or green onions adds a pop of color and fresh taste that contrasts the rich glaze. For a little extra zing, some pickled jalapeños or a squeeze of lime can brighten the plate.
Side Dishes
Classic pairings with the Dr Pepper Ribs Recipe include creamy coleslaw for crunch and coolness, grilled corn on the cob for smokiness, and baked beans to complement that sweet-and-savory profile. A simple potato salad or garlic mashed potatoes work wonderfully too, soaking up any extra sauce.
Creative Ways to Present
For parties, consider serving the ribs family-style on a large wooden board with sides arranged around. Or get playful by turning leftovers into sliders with coleslaw and a drizzle of extra Dr Pepper glaze. Either way, this ribs recipe is always a crowd-pleaser that looks as appetizing as it tastes.
Make Ahead and Storage
Storing Leftovers
Once cooled, wrap any leftover Dr Pepper ribs tightly in foil or place them in airtight containers. Keep them in the refrigerator for up to 3 days to maintain tenderness and flavor.
Freezing
If you want to save ribs for later, freezing is a great option. Wrap them well in plastic wrap followed by foil or use freezer bags to prevent freezer burn. They will keep in the freezer for up to 2 months while preserving their delicious taste.
Reheating
For reheating, the best way is to warm the ribs slowly in an oven at 275°F (135°C) wrapped in foil. This prevents drying out and helps rehydrate the glaze. Microwaving is quicker but can cause the ribs to become tough, so the oven method is worth the wait.
FAQs
Can I use a different soda besides Dr Pepper?
Absolutely! While Dr Pepper gives a unique blend of flavors, you can experiment with other sodas like cola or root beer, but expect a slightly different sweetness and depth.
Do I have to remove the silver skin from the ribs?
Yes, removing the silver skin is highly recommended because it allows the glaze to soak in and helps the ribs cook more tenderly without that tough membrane.
Can I make this recipe in the oven only?
Definitely. Baking the ribs wrapped in foil at 300°F for 2 to 2.5 hours is a foolproof way to achieve tender ribs without a grill.
How thick should the glaze be before applying?
The glaze should be syrupy and thick enough to coat the back of a spoon generously. This ensures it caramelizes nicely on the ribs during the last stage of cooking.
Is this recipe spicy?
This Dr Pepper Ribs Recipe leans more toward sweet and smoky with just a subtle peppery kick, so it’s gentle on the palate and kid-friendly, but you can always add cayenne or hot sauce to up the heat if you like.
Final Thoughts
If you haven’t tried the Dr Pepper Ribs Recipe yet, you are in for a real treat that combines simplicity with bold, finger-licking flavor. Slow-cooked ribs glazed in a sweet and tangy sauce make a perfect meal any day of the week. Invite friends or family over, fire up your grill or oven, and let this recipe be your next delicious celebration on a plate.
Print
Dr Pepper Ribs Recipe
- Prep Time: 15 minutes
- Cook Time: 2 hours 25 minutes
- Total Time: 2 hours 40 minutes
- Yield: 4 servings
- Category: Main Course
- Method: Grilling
- Cuisine: American
Description
These tender and flavorful Dr Pepper Ribs are slow-cooked to perfection, infused with a sweet and tangy homemade Dr Pepper glaze. Easy to prepare on the grill or in the oven, this recipe combines the rich taste of baby back ribs with a unique soda-based sauce for a mouthwatering dish perfect for any occasion.
Ingredients
Main Ingredients
- 2 racks of baby back ribs
Dr Pepper Glaze
- 1 can (12 oz) Dr Pepper soda
- 1/2 cup brown sugar, packed
- 1/4 cup apple cider vinegar
- 1/4 cup ketchup
- 2 tbsp Worcestershire sauce
- 2 tbsp soy sauce
- 1 tbsp Dijon mustard
- 1 tsp garlic powder
- 1 tsp onion powder
- 1/2 tsp smoked paprika
- 1/4 tsp ground black pepper
- 1/4 tsp salt
- 1/2 cup BBQ sauce (for glazing and serving)
Instructions
- Preheat: Preheat your grill or oven to 300°F (150°C). If using a grill, set it up for indirect heat to ensure slow and even cooking of the ribs.
- Prepare Ribs: Remove the silver skin from the ribs by sliding a knife under the membrane attached to the bone side, then pull it off to ensure tenderness.
- Make Glaze: In a medium saucepan, combine Dr Pepper, brown sugar, apple cider vinegar, ketchup, Worcestershire sauce, soy sauce, Dijon mustard, garlic powder, onion powder, smoked paprika, black pepper, and salt.
- Simmer Sauce: Bring the mixture to a simmer over medium heat, stirring occasionally. Let it simmer for 20-25 minutes until it thickens to a glaze-like consistency.
- Season Ribs: While the glaze simmers, season the ribs with your favorite dry rub or simply salt and pepper to taste.
- Cook Ribs: For grilling, place the ribs bone-side down on the cooler side of the grill, cover, and cook for 2-3 hours until tender. For oven baking, place ribs on a baking sheet, cover with foil, and bake for 2 to 2.5 hours until ribs are cooked through.
- Glaze Ribs: During the last 15 minutes of cooking, brush the ribs generously with the Dr Pepper glaze, then continue cooking so the glaze caramelizes beautifully.
- Rest and Serve: Remove ribs from the heat, let them rest for 5 minutes to retain juiciness, slice between the bones, and serve with extra BBQ sauce on the side.
Notes
- Removing the silver skin from ribs helps the glaze penetrate better and the ribs become more tender.
- You can adjust the sweetness or tanginess of the glaze by adding more brown sugar or vinegar according to your preference.
- Cooking times may vary depending on your grill or oven, so check ribs for tenderness near the end of cooking.
- If you prefer a spicier glaze, add a pinch of cayenne pepper or chili powder during simmering.
- Leftover glaze can be stored in the refrigerator for up to a week and used for other BBQ dishes.