
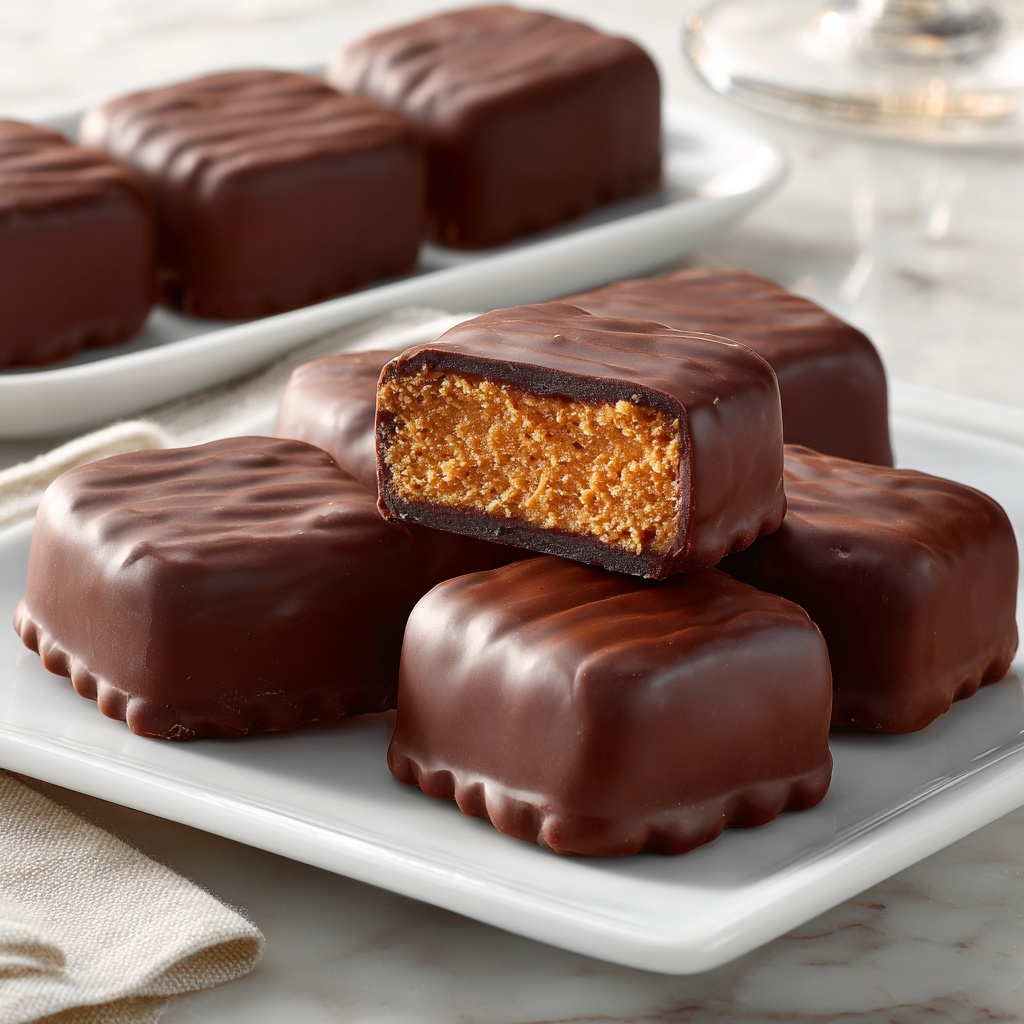
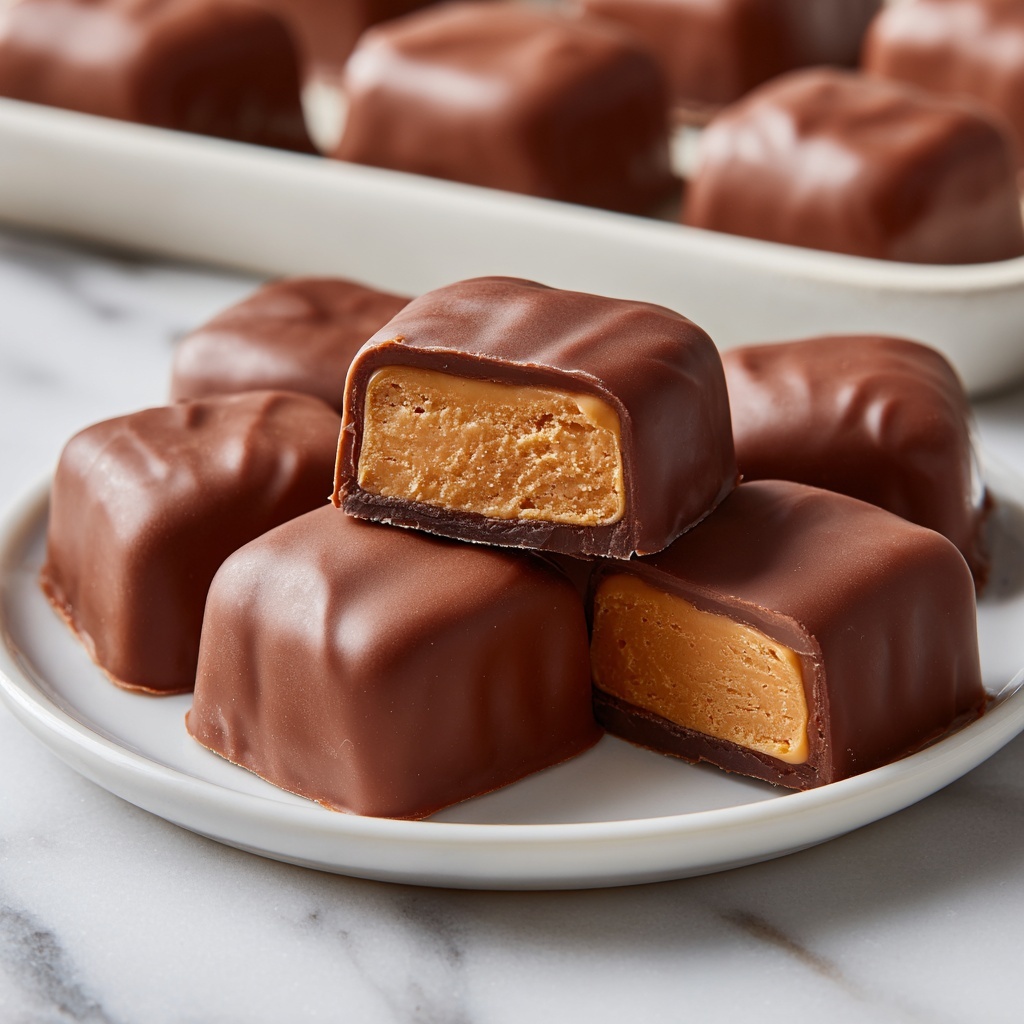
If you’re anything like me and have an unstoppable love for that perfect combination of sweet chocolate and creamy peanut butter, then this Chocolate Peanut Butter Candies Recipe is going to become your new obsession. These little bites of heaven blend smooth, rich peanut butter with luscious semi-sweet chocolate in a way that just melts in your mouth. Not only are they incredibly delicious, but they’re no-bake, easy to make, and perfect for any occasion when you want a quick, satisfying treat that feels homemade and utterly decadent.
Ingredients You’ll Need
This Chocolate Peanut Butter Candies Recipe is wonderfully simple, relying on just a handful of pantry staples that each plays an essential role. The creamy peanut butter forms the fudge-like center, while the powdered sugar adds sweetness and body, and the chocolate coating delivers that irresistible exterior. Each ingredient is straightforward but crucial to achieving the perfect balance.
- 1 cup creamy peanut butter: Use smooth peanut butter for a soft, melt-in-your-mouth texture in the candy center.
- ¼ cup unsalted butter (softened): Adds creaminess and helps bind the peanut butter mixture.
- 1 teaspoon vanilla extract: Enhances the flavor, giving the candies a subtle aromatic depth.
- 2 cups powdered sugar: Provides sweetness and helps create a dough-like consistency.
- 2 cups semi-sweet chocolate chips: Forms the rich, glossy chocolate coating that contrasts perfectly with the peanut butter filling.
- 1 tablespoon coconut oil or shortening (optional): Makes the melted chocolate smoother and easier to dip the candies.
How to Make Chocolate Peanut Butter Candies Recipe
Step 1: Prepare the Peanut Butter Mixture
Start by combining the creamy peanut butter, softened unsalted butter, and vanilla extract in a large bowl. Mix them until you get a smooth and creamy consistency with no lumps, which sets the perfect base. This mixture is the heart of your candies, so take your time to get it just right.
Step 2: Add the Powdered Sugar
Gradually sprinkle in the powdered sugar and mix thoroughly until the mixture forms a thick dough. This step is key because you want a dough firm enough to shape into balls but still soft enough to bite into. The powdered sugar sweetens and stabilizes the filling perfectly.
Step 3: Shape the Candies
Using your hands or a small scoop, roll the peanut butter dough into 1-inch balls. Place these onto a baking sheet lined with parchment paper. This size gives you a perfect bite-sized candy that’s just right—not too big or too small!
Step 4: Chill the Peanut Butter Balls
Pop the baking sheet into the freezer for 20 to 30 minutes. Chilling firms up the peanut butter centers and makes it easier to dip them into the chocolate without losing their shape. This little chill time means smooth and neat finished candies.
Step 5: Melt the Chocolate
While the peanut butter balls chill, melt your semi-sweet chocolate chips with the optional coconut oil in a microwave-safe bowl. Heat in 30-second intervals, stirring after each, until the chocolate is silky, glossy, and completely smooth. The coconut oil helps the chocolate coat the candies evenly and gives a beautiful shine.
Step 6: Dip the Peanut Butter Balls
Using a fork or toothpick, dip each chilled peanut butter ball into the melted chocolate. Let the excess chocolate drip off before placing them back on the parchment paper. This coating step is where your candies take their signature look and delicious chocolate shell.
Step 7: Set the Chocolate
Refrigerate the dipped candies for 15 to 20 minutes, or until the chocolate has fully set. Once firm, they’re ready to enjoy or store. This finishing step ensures a perfect snap when you bite into these rich treats.
How to Serve Chocolate Peanut Butter Candies Recipe
Garnishes
A light sprinkle of flaky sea salt on top of the candies right after dipping adds a brilliant burst of flavor that beautifully contrasts the sweetness. You could also try crushed peanuts or a drizzle of white chocolate for a fun twist. These tiny touches elevate the candies from simple snacks to irresistible gourmet bites.
Side Dishes
Though these candies are perfect on their own, I love serving them alongside a cold glass of milk or a cup of strong coffee. If it’s a festive gathering, pair them with other bite-sized treats like fresh fruit or mini marshmallows to create a diverse dessert plate that keeps everyone happily nibbling.
Creative Ways to Present
For gift-giving or parties, arrange your Chocolate Peanut Butter Candies Recipe in cute paper liners inside a decorative box or jar tied with a ribbon. You can also stack them in layers separated by parchment paper to keep them neat and easy to share. Presentation makes these little candies feel extra special!
Make Ahead and Storage
Storing Leftovers
Store any leftover candies in an airtight container in the refrigerator. They will keep well for up to two weeks, allowing you to enjoy their freshness whenever the craving hits. Just bring them to room temperature for a few minutes before eating if you like them softer.
Freezing
These candies freeze beautifully, making them a perfect make-ahead treat. Place them in a freezer-safe container, separated by parchment, and freeze for up to two months. When you want one, simply thaw in the refrigerator or at room temperature — they hold their shape and flavor wonderfully.
Reheating
There’s no need to reheat chocolate peanut butter candies before enjoying them, but if you prefer them slightly softer, let them sit at room temperature for about 10 minutes. Avoid microwaving as it can alter the texture of the chocolate coating and the peanut butter center.
FAQs
Can I use crunchy peanut butter instead of creamy?
You can, and it will add a delightful texture, but keep in mind that the candies won’t be as smooth. The crunchy bits will give extra bite, which some people really enjoy!
Is it necessary to add coconut oil or shortening when melting the chocolate?
Not strictly necessary, but adding coconut oil or shortening helps make the melted chocolate smoother and shinier, making dipping easier and the finish more professional-looking.
Can I use milk chocolate or dark chocolate instead of semi-sweet?
Absolutely! Feel free to experiment with your favorite chocolate type. Milk chocolate will make the candies sweeter and creamier, while dark chocolate will add a rich, slightly bitter contrast to the peanut butter.
How long does it take to make these candies from start to finish?
The actual prep is quick—about 25 minutes—but including chilling and setting time, expect around 55 minutes total before they’re ready to enjoy.
Are these candies gluten-free?
Yes! This recipe uses simple, naturally gluten-free ingredients, making these candies safe for anyone avoiding gluten. Just double-check your peanut butter and chocolate for any additives if you have severe sensitivities.
Final Thoughts
I’m so excited for you to try this Chocolate Peanut Butter Candies Recipe because it’s truly one of those recipes that combines simplicity and deliciousness in the most satisfying way. Whether you’re making them for a quick pick-me-up or as a thoughtful homemade gift, these candies never fail to impress. Grab your ingredients, embrace the fun of no-bake candy making, and get ready to fall in love with a timeless treat that always hits the spot.
Print
Chocolate Peanut Butter Candies Recipe
- Prep Time: 25 minutes
- Cook Time: 0 minutes
- Total Time: 55 minutes
- Yield: 24 candies
- Category: Dessert
- Method: No-Cook
- Cuisine: American
- Diet: Gluten Free
Description
Indulge in these delightful Chocolate Peanut Butter Candies, a no-bake treat combining creamy peanut butter with rich chocolate. Perfect for a quick homemade dessert, these candies require minimal ingredients and effort, delivering a sweet and satisfying snack that’s especially great for holidays or anytime you’re craving a rich, nutty chocolate bite.
Ingredients
Peanut Butter Mixture
- 1 cup creamy peanut butter
- ¼ cup unsalted butter, softened
- 1 teaspoon vanilla extract
- 2 cups powdered sugar
Chocolate Coating
- 2 cups semi-sweet chocolate chips
- 1 tablespoon coconut oil or shortening (optional, for smoother melting)
Instructions
- Prepare the Peanut Butter Dough: In a large bowl, combine the creamy peanut butter with the softened unsalted butter and vanilla extract. Mix until the mixture is smooth and creamy, ensuring all ingredients are well incorporated.
- Add the Powdered Sugar: Gradually blend in the powdered sugar to the peanut butter mixture, stirring continuously until a thick, dough-like consistency forms that can be easily shaped by hand.
- Form the Candy Balls: Scoop out portions of the peanut butter dough and roll them into 1-inch balls. Place these balls onto a baking sheet lined with parchment paper, spacing them evenly to prevent sticking.
- Chill the Peanut Butter Balls: Place the baking sheet with the balls into the freezer for 20–30 minutes, allowing them to firm up, which will make dipping easier.
- Melt the Chocolate: While the peanut butter balls chill, melt the semi-sweet chocolate chips in a microwave-safe bowl. Heat in 30-second intervals, stirring thoroughly after each, until the chocolate is smooth and fully melted. Add coconut oil or shortening if desired to achieve a silkier texture.
- Dip the Balls in Chocolate: Using a fork or toothpick, dip each chilled peanut butter ball into the melted chocolate, making sure it is completely coated. Lift and allow any excess chocolate to drip back into the bowl.
- Set the Coated Candies: Return the coated candies to the parchment-lined baking sheet. Once all are coated, place the sheet in the refrigerator for 15–20 minutes until the chocolate hardens and sets firmly around the peanut butter centers.
- Storage: Store the finished candies in an airtight container in the refrigerator for up to two weeks or freeze for longer preservation, up to two months.
Notes
- For a sweet-salty variation, sprinkle a pinch of sea salt on the peanut butter balls just before the chocolate coating sets.
- Use parchment paper to make cleanup easier and to prevent candies from sticking to the baking sheet.
- These candies can be made vegan by using dairy-free butter and chocolate chips.
- Allow candies to come to room temperature for a few minutes before serving if refrigerated.
- Freezing the peanut butter balls before dipping ensures they hold their shape and makes dipping cleaner and easier.


