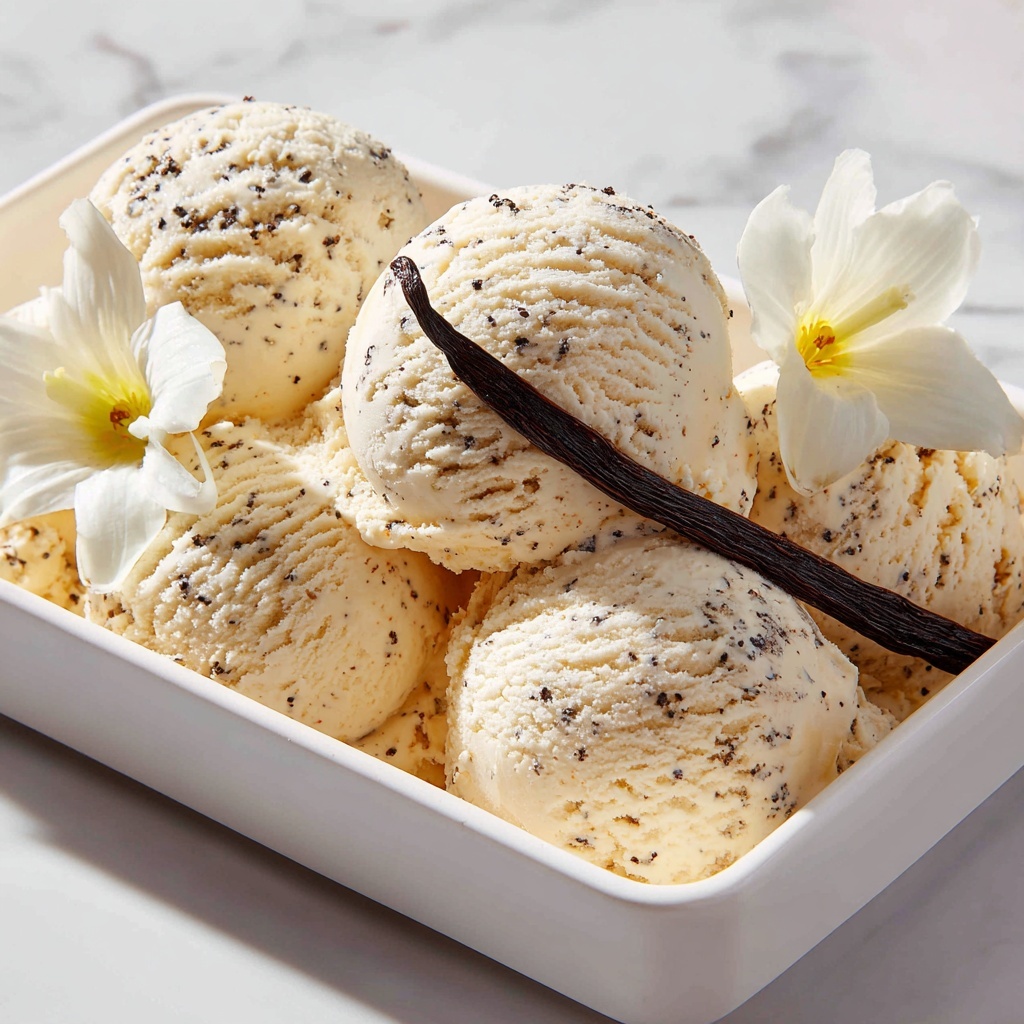
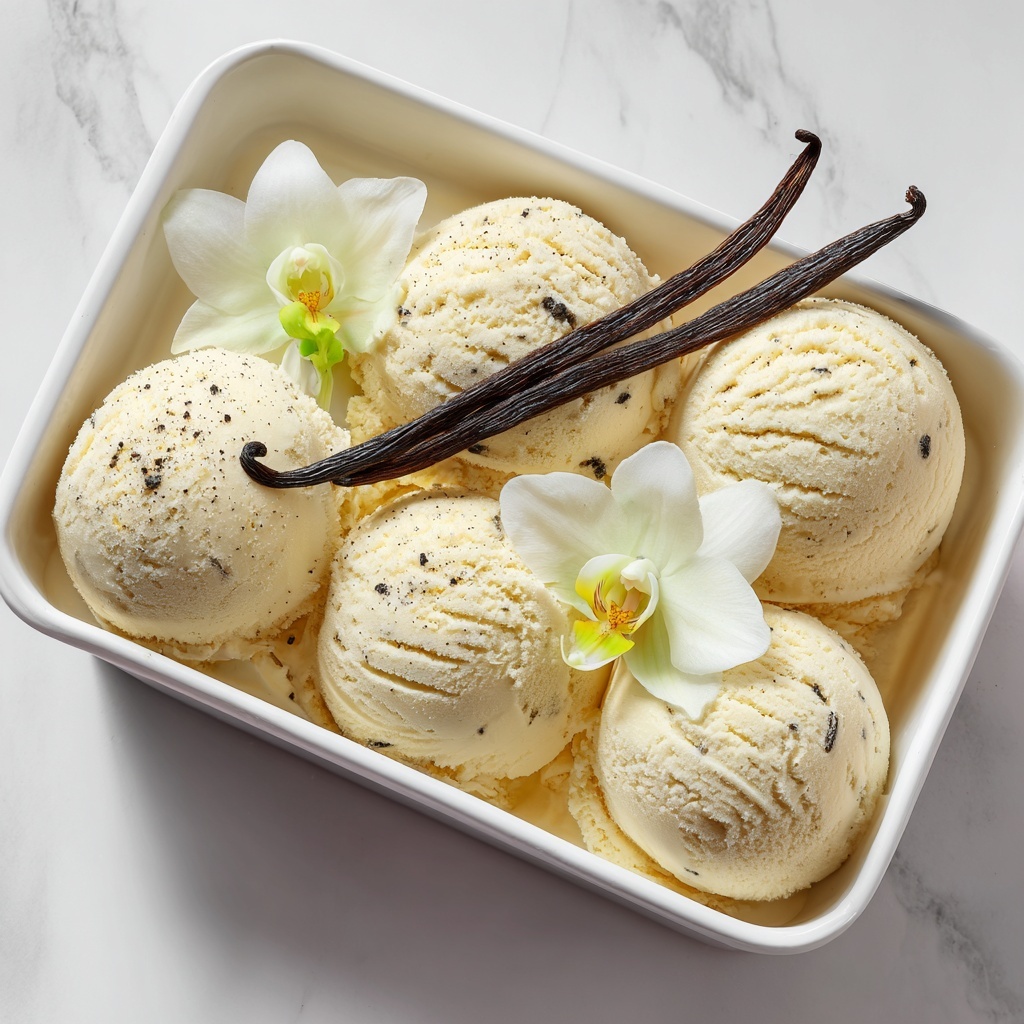
If you have been on the lookout for a luscious, smooth, and entirely plant-based treat that doesn’t compromise on flavor or creaminess, you must try this Creamy Vegan Vanilla Ice Cream (Nut Free & GF) Recipe. It’s a game-changer for anyone craving indulgence without the usual allergens, combining simple wholesome ingredients into a silky, dreamy dessert that everyone can enjoy. With no nuts and gluten-free ingredients, this ice cream delivers on tradition and taste, turning your kitchen into a vegan ice cream parlor in just a few hours.
Ingredients You’ll Need
These straightforward ingredients work together to create the perfect balance of creaminess, sweetness, and classic vanilla flavor. Each one plays an essential role to give your ice cream that smooth texture and heavenly taste.
- Soy milk (520 ml): Acts as the low-fat base, providing a subtle creaminess without overpowering flavors.
- Granulated sugar (100 g): Sweetens the mixture perfectly and aids in the smooth texture.
- Cornstarch or arrowroot starch (45 g): Helps thicken the ice cream custard, giving it that luscious, creamy mouthfeel.
- Vanilla pod (1): Provides intense, aromatic vanilla flavor that makes this ice cream so irresistibly fragrant.
- Sea salt (¼ teaspoon): Enhances the sweetness and rounds out all the flavors wonderfully.
- Vegan condensed milk (200 g): Adds richness and extra creaminess, making the dessert decadently smooth without dairy.
- Chilled full-fat canned coconut milk or coconut cream (200 g): Provides natural fattiness and a velvety texture, essential for that perfect scoopable ice cream.
- Vanilla extract (1 tablespoon): Boosts the vanilla profile and deepens the overall flavor.
How to Make Creamy Vegan Vanilla Ice Cream (Nut Free & GF) Recipe
Step 1: Prepare Your Ice Cream Bowl
Start by freezing the ice cream bowl from your ice cream machine for at least 12 to 24 hours before you begin. This step is crucial because it ensures the mixture churns evenly and firms up beautifully without melting too quickly. Patience here means perfection later!
Step 2: Make the Custard Base
Into a saucepan, whisk together soy milk, sugar, and cornstarch to remove any lumps—smooth is the name of the game here. Split the vanilla pod and scrape out those fragrant seeds, adding both seeds and pod into the pan. Gently heat over medium, stirring regularly to avoid sticking. When the mixture thickens after about 5 minutes of simmering, you’ll know your custard is ready. Remove from the heat, take out the vanilla pod, and stir in the sea salt to enhance all the flavors.
Step 3: Cool the Custard
Cover the custard immediately with cling film, pressing it right onto the surface to avoid any skin from forming. Let it sit for 10 minutes at room temperature, then transfer to the fridge for at least an hour. Cooling this base thoroughly ensures your ice cream churns into a luxuriously creamy texture instead of icy crystals.
Step 4: Combine the Creamy Ingredients
In a large bowl, whisk the vegan condensed milk, chilled coconut milk or cream, and vanilla extract together with an electric whisk until silky and smooth. Then fold in the chilled soy custard and whisk everything once more until fully blended. This mixture is the magic that makes your vegan vanilla ice cream irresistibly creamy and smooth.
Step 5: Churn the Ice Cream
Transfer the mixture to your chilled ice cream machine and churn following the manufacturer’s guidelines—usually around 30 to 40 minutes. This slow churning incorporates air, creating that light and creamy texture that ice cream lovers crave.
Step 6: Freeze and Firm Up
After churning, spoon the ice cream into a loaf pan or airtight container. Cover tightly with a lid or plastic wrap and place it in the freezer for at least 2 hours. This chilling step helps the ice cream firm up so you can scoop perfect, creamy portions every time.
How to Serve Creamy Vegan Vanilla Ice Cream (Nut Free & GF) Recipe

Garnishes
Enhance the experience of your creamy vegan vanilla ice cream with simple yet delightful garnishes. Fresh berries add a burst of color and a hint of tartness, toasted coconut flakes provide a bit of crunch and tropical flair, and a drizzle of maple syrup or vegan caramel can elevate sweetness naturally. Even a sprinkle of cinnamon or nutmeg can bring out deeper vanilla notes in every bite.
Side Dishes
This ice cream pairs brilliantly with warm, soft desserts like vegan apple pie, gluten-free brownies, or spiced fruit cobbler. The contrast of hot and cold, crispy and creamy, elevates the entire dessert experience to something truly special. For a lighter option, fresh fruit salad drizzled with mint syrup is a refreshing companion to this indulgence.
Creative Ways to Present
Presentation makes all the difference when serving your Creamy Vegan Vanilla Ice Cream (Nut Free & GF) Recipe. Try scooping the ice cream into elegant glass cups topped with colorful edible flowers or chopped nuts (if allergies are not an issue). You can also put it inside homemade waffle cones or pair with vegan chocolate sauce drizzled in a pattern on the plate. Layering it in parfait glasses with fresh fruit or vegan granola creates a stunning, Instagram-worthy treat.
Make Ahead and Storage
Storing Leftovers
Leftover ice cream can be stored in an airtight container in the freezer for up to 2 months. To prevent ice crystals forming, press a piece of parchment paper directly on the surface before sealing. When stored properly, your creamy vegan vanilla ice cream retains its delightful texture and flavor for weeks.
Freezing
If you want to prepare this recipe ahead of a party or special occasion, make the ice cream completely and freeze it as directed. Because it’s nut-free and gluten-free, it holds up wonderfully in the freezer and won’t separate or harden excessively like some dairy-free versions can. Just be sure to freeze it well before serving time for the best scoopable consistency.
Reheating
This ice cream is best enjoyed cold, so reheating is not necessary. Instead, if it’s too firm from freezing, simply leave it at room temperature for 10 to 15 minutes beforehand to soften. Using a scoop warmed in hot water will help effortlessly serve perfectly shaped scoops without any damage to the texture.
FAQs
Is this ice cream truly nut free?
Yes! This Creamy Vegan Vanilla Ice Cream (Nut Free & GF) Recipe exclusively uses soy milk and coconut cream instead of nut-based milks, making it safe for those with nut allergies.
Can I substitute soy milk with another plant milk?
You can experiment with oat or rice milk, but soy milk provides the best creaminess and stability for this recipe. Avoid almond or cashew milk if nut-free is your priority.
What if I don’t have an ice cream machine?
Although the recipe is designed for an ice cream machine, you can freeze the mixture in a shallow container and stir every 30 minutes to break up ice crystals until smooth. The texture won’t be quite as silky but still delicious.
Why is cornstarch important here?
Cornstarch thickens the custard base, which gives the ice cream a creamy texture and helps prevent iciness. It’s a simple ingredient that makes a big difference.
Can this recipe be made sugar-free?
Yes, you can substitute the granulated sugar with a natural sugar alternative like erythritol or coconut sugar, but keep in mind this may slightly affect texture and sweetness balance.
Final Thoughts
There is nothing quite as satisfying as serving up a batch of homemade, dreamy Creamy Vegan Vanilla Ice Cream (Nut Free & GF) Recipe to loved ones, knowing you crafted something healthy and indulgent all at once. This recipe strikes the perfect balance of allergy-friendly ingredients and classic creamy flavor. Trust me, once you try it, you’ll be making it again and again for all those moments that call for a little extra sweetness in life.
Print
Creamy Vegan Vanilla Ice Cream (Nut Free & GF) Recipe
- Prep Time: 15 minutes
- Cook Time: 10 minutes
- Total Time: 4 hours 25 minutes
- Yield: 8 servings
- Category: Dessert
- Method: Ice Cream Machine (Churning)
- Cuisine: Vegan, Dairy-Free
- Diet: Vegan, Gluten Free, Nut Free
Description
This creamy vegan vanilla ice cream recipe is a delightful dairy-free and nut-free treat that is both gluten-free and rich in vanilla flavor. Made using soy milk, coconut cream, and a homemade custard base thickened with cornstarch, this ice cream is smooth, luscious, and perfect for those seeking a plant-based dessert option. The recipe requires an ice cream machine and includes careful preparation steps to ensure a silky texture and deep vanilla aroma.
Ingredients
Custard Base
- 520 ml soy milk
- 100 g granulated sugar
- 45 g cornstarch (or arrowroot starch)
- 1 vanilla pod
- ¼ teaspoon sea salt
Ice Cream Mixture
- 200 g vegan condensed milk
- 200 g chilled full-fat canned coconut milk (thick part from the top or coconut cream)
- 1 tablespoon vanilla extract
Instructions
- Freeze the Ice Cream Bowl: Place the bowl of your ice cream machine in the freezer at least 12 to 24 hours before making the ice cream to ensure it is thoroughly chilled for optimal churning.
- Prepare the Custard Base: In a saucepan, combine soy milk, granulated sugar, and cornstarch. Whisk thoroughly to remove any lumps. Split the vanilla pod lengthwise and scrape out the seeds; add both the seeds and the pod to the saucepan.
- Cook the Custard: Heat the mixture over medium heat until it reaches a simmer. Stir continuously for about 5 minutes using a whisk and rubber spatula alternately to prevent sticking. Once thickened, remove from heat and discard the vanilla pod. Stir in the sea salt.
- Cool the Custard: Cover the saucepan with clingfilm to prevent skin formation and let the custard cool for 10 minutes at room temperature. Transfer it to the fridge and cool fully for at least one hour.
- Mix the Ice Cream Base: In a large bowl, whisk together vegan condensed milk, chilled coconut milk, and vanilla extract using an electric whisk until creamy. Add the chilled custard and whisk again for one minute to combine everything thoroughly.
- Churn the Ice Cream: Pour the mixture into the frozen ice cream machine bowl and churn according to the manufacturer’s instructions, typically about 30 to 40 minutes, until it reaches a thick, creamy consistency.
- Freeze and Set: Transfer the churned ice cream into a loaf pan, cover tightly with a lid or plastic wrap, and freeze for a minimum of 2 hours to firm up.
- Storage and Serving: Store the vegan vanilla ice cream in an airtight container in the freezer for up to 2 months. Before serving, remove the ice cream about 15 minutes in advance to allow it to soften slightly. Use a warm wet ice cream scoop for easy serving.
Notes
- Use soy milk as a non-dairy base; almond milk or oat milk can be alternatives but may alter texture slightly.
- Granulated sugar assists in sweetness and texture; coconut sugar could be used as a substitute.
- Use only the thick part of canned coconut milk or coconut cream for richness.
- Ensure the ice cream machine’s bowl is adequately frozen to achieve proper churning and texture.
- For best results, do not skip chilling the custard completely before mixing with other ingredients.
- Serve with vegan toppings like fresh fruit, chocolate chips, or nuts if desired (ensure nut allergy consideration).


