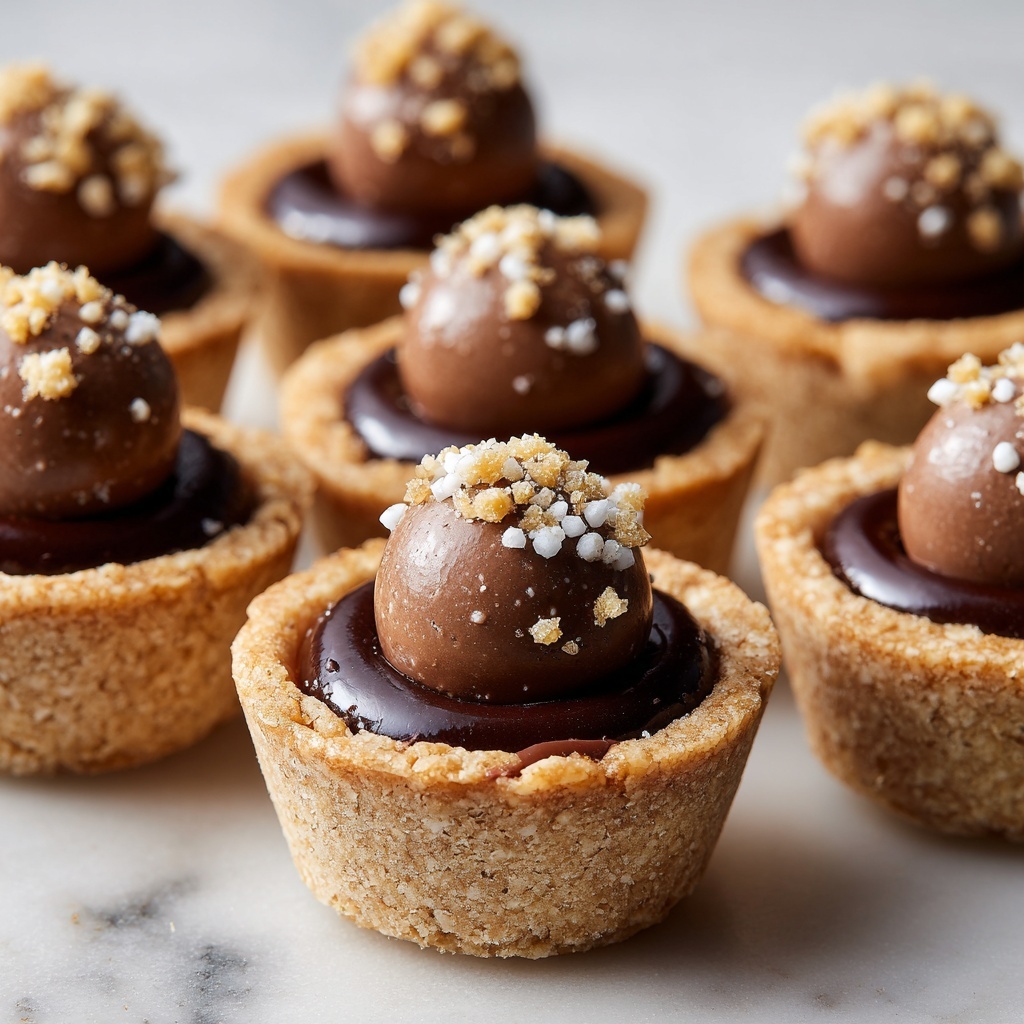
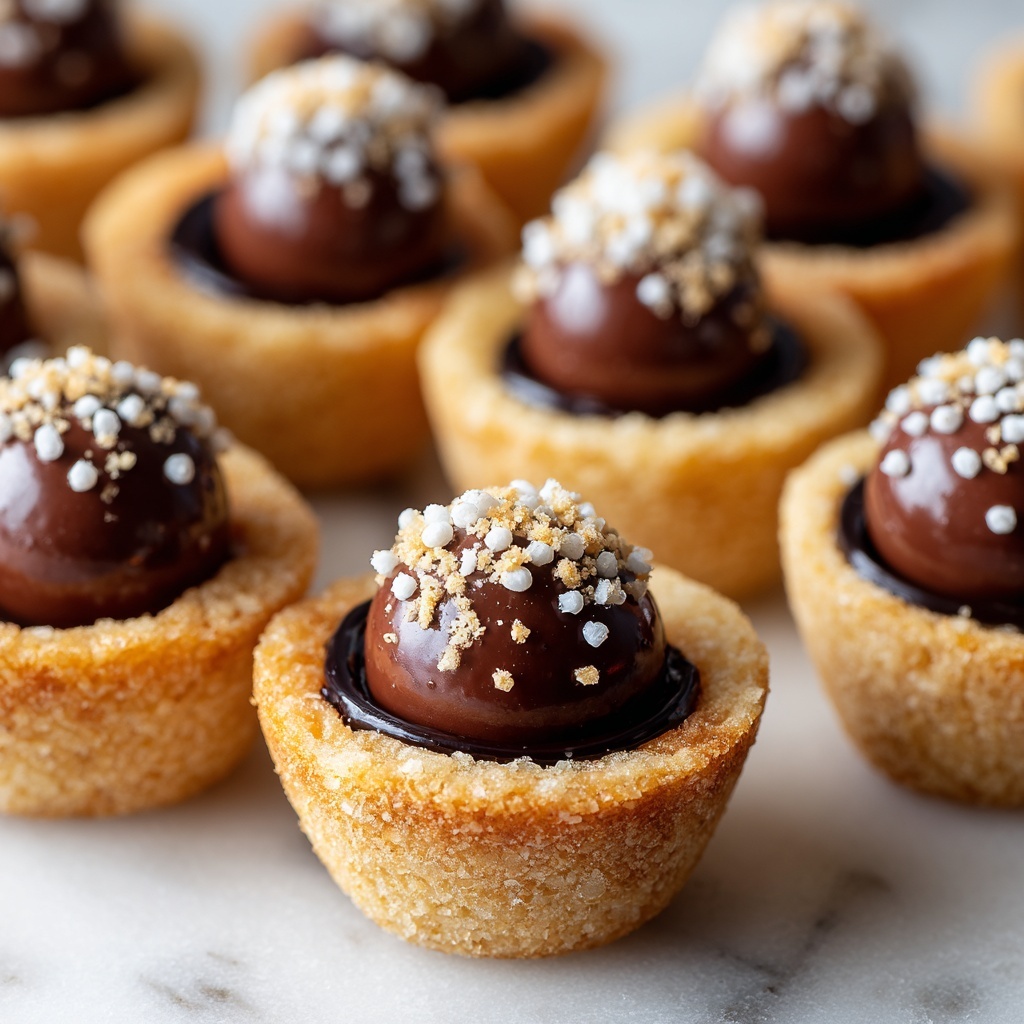
Get ready to indulge in the ultimate treat with our Twix Cookie Cups: An Amazing Ultimate Recipe for Sweet Tooth Lovers Recipe. These delightful mini cookie cups are packed with gooey caramel centers and topped with smooth milk chocolate, delivering every flavor your sweet tooth dreams about. Crafted from simple ingredients, this recipe transforms your kitchen into a haven of irresistible aromas and scrumptious bites that combine the best of cookie, caramel, and chocolate into a single heavenly dessert cup.
Ingredients You’ll Need
Ingredients You’ll Need
Every ingredient in this recipe plays an essential role in crafting the perfect Twix Cookie Cups. From the soft butter that ensures a tender crumb to the rich caramel and luscious chocolate topping, these components come together simply yet flawlessly.
- 1 cup unsalted butter (softened): Provides a creamy richness and tender texture to the cookie base.
- 1/2 cup granulated sugar: Adds crisp sweetness and helps with the cookie’s structure.
- 1 cup brown sugar (packed): Brings a deep, molasses flavor and chewy moisture.
- 2 large eggs: Binds everything together, giving the cookie its soft chew.
- 2 teaspoons vanilla extract: Enhances the overall flavor with a warm, aromatic note.
- 2 1/2 cups all-purpose flour: The sturdy base that supports all the gooey deliciousness.
- 1 teaspoon baking soda: Helps the cookies rise and stay light.
- 1/2 teaspoon salt: Balances the sweetness and intensifies flavors.
- 30 soft caramel candies (or 1 cup soft caramel bits): The star of the show, melted to create ooey-gooey centers.
- 2 tablespoons heavy cream: Adds creaminess to the caramel for a luscious texture.
- 1 1/2 cups milk chocolate chips: Melts perfectly into a silky chocolate topping.
How to Make Twix Cookie Cups: An Amazing Ultimate Recipe for Sweet Tooth Lovers Recipe
Step 1: Prepare the Cookie Dough
Start by preheating your oven to 350°F (175°C) and lightly greasing a mini muffin pan, which will shape your cookie cups perfectly. Cream together the softened butter, granulated sugar, and brown sugar until your mixture looks light and fluffy—that’s the secret to tender cookies. Next, one at a time, beat in the eggs followed by the vanilla extract, ensuring every bit is fully combined with the buttery sweetness.
Step 2: Combine Dry Ingredients
In a separate bowl, whisk the all-purpose flour with the baking soda and salt. This dry mixture provides balance and structure to the cookies and helps activate the rising process. Gradually fold the dry ingredients into your wet mixture, mixing just until combined to avoid overworking the dough and keeping the cookie cups soft and tender.
Step 3: Form and Bake the Cookie Cups
Scoop tablespoon-sized portions of dough into each cavity of your prepared mini muffin pan. Gently press down the centers of each portion to create small wells where the caramel will soon go. Bake these for 10 to 12 minutes, or until the edges turn golden but the centers remain soft—this contrast is what makes these cookie cups so magical.
Step 4: Add the Caramel Filling
While your cookie cups bake, melt the caramel candies and heavy cream together in a small pan over low heat. Stir continuously until you achieve a smooth, creamy caramel sauce. Once the cookies come out of the oven, immediately press their centers gently with the back of a spoon to reinforce the wells, then spoon generous dollops of warm caramel into each cup for that luscious middle layer.
Step 5: Top with Melty Chocolate
Allow the caramel to set for about 10 minutes. Meanwhile, melt your milk chocolate chips in the microwave in short bursts, stirring well between bursts to ensure silky smoothness. Spoon or pipe this melted chocolate over each caramel-filled cookie cup, creating a stunning chocolate topping that seals in all the gooey goodness. Let them cool completely at room temperature or pop them in the fridge for quicker setting.
How to Serve Twix Cookie Cups: An Amazing Ultimate Recipe for Sweet Tooth Lovers Recipe
Garnishes
Elevate these cookie cups by sprinkling flaky sea salt on top of the chocolate before it hardens—it creates a delightful contrast that makes each bite even more addictive. For a festive touch, sprinkle crushed Twix bars or caramel bits on top. These little additions add crunch and visual appeal.
Side Dishes
Pair your Twix Cookie Cups with a cold glass of milk or a scoop of vanilla ice cream for a comforting dessert combo. A hot cup of coffee or a creamy latte also pairs beautifully, balancing the sweet with a touch of bitterness.
Creative Ways to Present
For a party or gathering, arrange the cookie cups on a decorative platter with colorful cupcake liners to add charm. You can even serve them with mini spoons for an elegant bite-sized treat. Another fun idea is to layer them in a clear jar as a gift—ready to wow friends and family!
Make Ahead and Storage
Storing Leftovers
Store any leftover Twix Cookie Cups in an airtight container at room temperature to keep their perfect texture. They remain soft, gooey, and utterly tasty for up to five days—perfect for enjoying little treats over the course of the week.
Freezing
If you want to save these delights for later, freeze your cookie cups in a single layer on a baking sheet first. Once frozen solid, transfer them to a freezer-safe container or bag. They stay delicious for up to two months and thaw quickly at room temperature.
Reheating
To bring back that freshly baked warmth, microwave a cookie cup for about 15 seconds. The caramel and chocolate will get wonderfully melty again, making each bite just as dreamy as when freshly made.
FAQs
Can I use dark chocolate instead of milk chocolate?
Absolutely! Dark chocolate adds a richer, slightly bitter contrast to the sweet caramel and cookie, enhancing the overall flavor for those who prefer less sweetness.
What if I don’t have mini muffin pans?
If mini muffin tins aren’t in your kitchen arsenal, you can use regular muffin pans but increase baking time slightly and press the wells more deeply to hold the caramel properly.
Are store-bought soft caramels the best option?
Yes, using store-bought soft caramels like Kraft or Werther’s makes melting easy and ensures consistent gooeyness; homemade caramel can work but requires more practice and attention.
Can I make these cookie cups gluten-free?
With a gluten-free all-purpose flour blend that measures cup-for-cup like regular flour, you can enjoy these cookie cups without gluten. Just be sure your baking soda and other ingredients are gluten-free certified.
How long does it take for the chocolate to set?
At room temperature, expect around 30 minutes for the chocolate to harden. Refrigerating them reduces this time to about 10 minutes, perfect when you’re eager to dive in faster.
Final Thoughts
There is something truly joyful about making and sharing the Twix Cookie Cups: An Amazing Ultimate Recipe for Sweet Tooth Lovers Recipe. Each bite is a perfect balance of buttery cookie, silky caramel, and creamy chocolate that feels like a warm hug for your taste buds. Whether you’re baking for a special occasion or a simple treat to brighten your day, this recipe is guaranteed to satisfy and impress. Don’t wait to try it—you’ll soon see why it’s a beloved favorite for sweet tooth lovers everywhere!
Print
Twix Cookie Cups: An Amazing Ultimate Recipe for Sweet Tooth Lovers Recipe
- Prep Time: 20 minutes
- Cook Time: 12 minutes
- Total Time: 32 minutes (plus cooling time)
- Yield: 24 cookie cups
- Category: Dessert
- Method: Baking
- Cuisine: American
- Diet: Vegetarian
Description
Twix Cookie Cups are a delightful twist on the classic candy bar, combining a soft, buttery cookie base with gooey caramel and a smooth milk chocolate topping. Perfect for satisfying your sweet tooth, these mini cookie desserts are easy to make and packed with rich, indulgent flavors that will please any dessert lover.
Ingredients
Cookie Dough
- 1 cup unsalted butter (softened)
- 1/2 cup granulated sugar
- 1 cup brown sugar (packed)
- 2 large eggs
- 2 teaspoons vanilla extract
- 2 1/2 cups all-purpose flour
- 1 teaspoon baking soda
- 1/2 teaspoon salt
Caramel Layer
- 30 soft caramel candies (or 1 cup soft caramel bits)
- 2 tablespoons heavy cream
Chocolate Topping
- 1 1/2 cups milk chocolate chips
Instructions
- Preheat and Prepare Pan: Preheat your oven to 350°F (175°C) and lightly grease a mini muffin pan to prevent sticking.
- Cream Butter and Sugars: In a large bowl, cream together softened butter, granulated sugar, and brown sugar until the mixture is light and fluffy, which creates a smooth dough base.
- Add Eggs and Vanilla: Incorporate eggs one at a time into the creamed mixture, then mix in the vanilla extract thoroughly for flavor.
- Combine Dry Ingredients: In a separate bowl, whisk together all-purpose flour, baking soda, and salt to evenly distribute leavening and seasoning.
- Mix Wet and Dry Ingredients: Gradually add the dry ingredients to the wet mixture, mixing just until combined; avoid overmixing to keep the cookies tender.
- Fill Muffin Pan: Scoop tablespoon-sized portions of dough into each muffin cavity and gently press the dough to form a shallow well at the center.
- Bake: Bake the cookie cups for 10–12 minutes until the edges turn golden and the centers remain soft.
- Melt Caramel: While baking, melt caramel candies with heavy cream in a small saucepan over low heat, stirring continuously until smooth and creamy.
- Form Wells and Add Caramel: Remove cookie cups from the oven and immediately press centers down gently with the back of a spoon to reinforce the wells, then spoon the warm caramel evenly into each well.
- Melt Chocolate: Melt the milk chocolate chips in the microwave in 30-second bursts, stirring between each interval until smooth.
- Top with Chocolate: Spoon or pipe the melted chocolate over the caramel layer in each cookie cup.
- Set and Serve: Allow the chocolate topping to set completely at room temperature or chill in the refrigerator for quicker setting before serving.
Notes
- Use store-bought soft caramels like Kraft or Werther’s for easy melting and consistent texture.
- You can substitute dark chocolate for milk chocolate if you prefer a richer flavor profile.
- Store the cookie cups in an airtight container at room temperature for up to 5 days to maintain freshness.


