
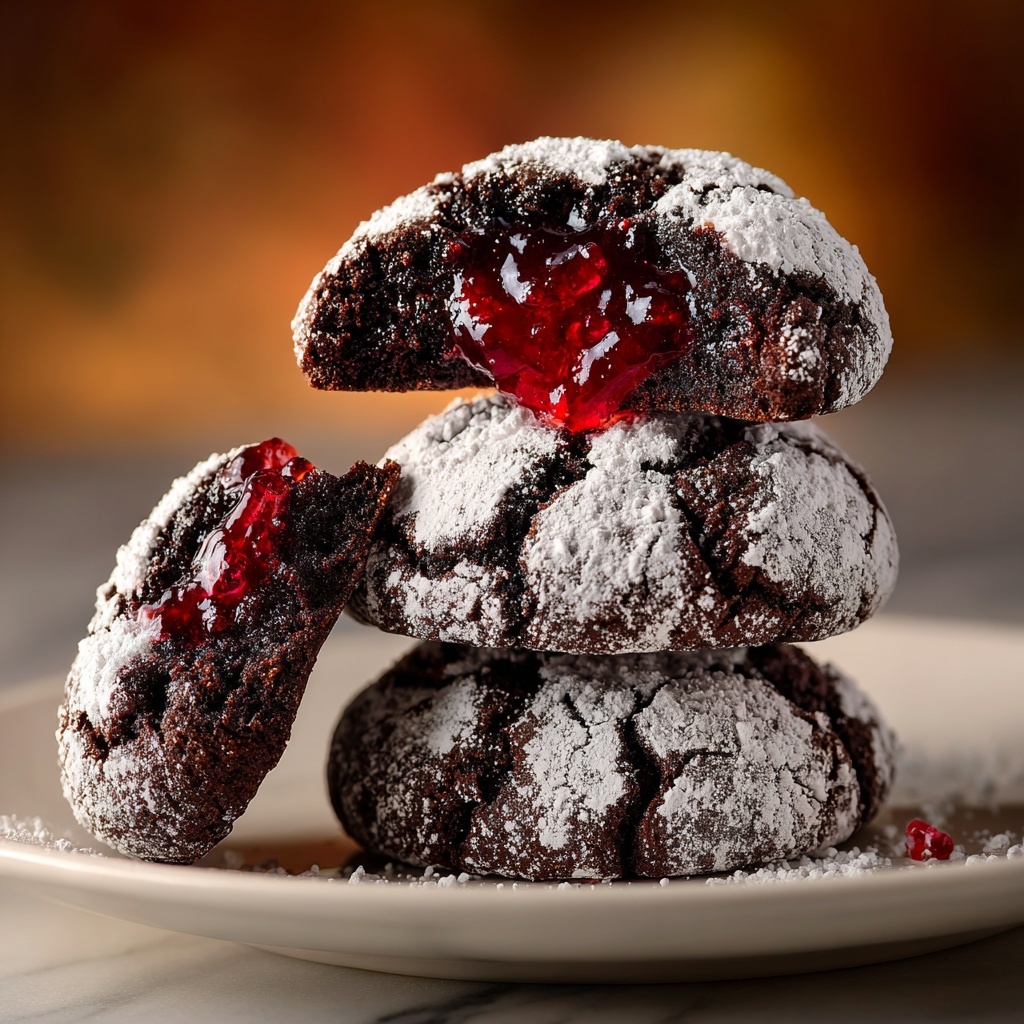
If you’re craving a classic holiday treat that just melts on your tongue with a burst of refreshing peppermint, you’re going to love this Peppermint Meltaway Cookies Recipe. These delicate, buttery cookies combine powdery softness with crushed peppermint candies for a festive crunch and a cool, minty zing. Perfectly complemented by a sweet, glossy peppermint glaze, this recipe is a joyous tribute to everything we adore about cozy winter baking. Whether you’re making them for a holiday party or an everyday treat, these cookies bring a little magic to any moment.
Ingredients You’ll Need
This Peppermint Meltaway Cookies Recipe relies on simple, well-chosen ingredients that each bring their own special something—whether it’s rich creaminess, that cool mint flavor, or the perfect soft crumb you dream about in a cookie. Here’s what you’ll gather:
- Unsalted butter (1 cup, softened): Provides the rich, creamy base that’s essential for tender, melt-in-your-mouth texture.
- Powdered sugar (1/2 cup plus 1 cup for glaze): Gives a smooth sweetness and helps create that soft, delicate crumb.
- Peppermint extract (1/2 teaspoon for dough, 1/4 teaspoon for glaze): The star flavor—use sparingly at first to keep the perfect minty balance.
- Vanilla extract (1 teaspoon for dough, optional 1/2 teaspoon for glaze): Adds subtle warmth that elevates every bite.
- All-purpose flour (2 cups): The structural backbone for the cookies, combined with cornstarch for softness.
- Cornstarch (1/4 cup): The secret behind the meltaway, lending that classic, tender texture.
- Fine salt (1/4 teaspoon in dough, pinch in glaze): Balances sweetness and enhances all flavors.
- Finely crushed peppermint candies or candy canes (1/2 cup plus extra for topping): Adds delightful crunch and visual charm.
- Milk or heavy cream (2 to 3 tablespoons for glaze): Creates a luscious, drizzle-friendly consistency for the glaze.
How to Make Peppermint Meltaway Cookies Recipe
Step 1: Prepare Your Oven and Tools
Start by preheating your oven to 350°F and lining two baking sheets with parchment paper. This ensures your cookies bake evenly and release effortlessly—perfect for maintaining their delicate shape.
Step 2: Cream Butter and Sugar
In a large bowl, beat the softened butter with the powdered sugar until the mixture is very light and fluffy—about 2 to 3 minutes. This step is key for a tender cookie because it incorporates air, giving your dough an irresistible lift.
Step 3: Add Flavor Essentials
Mix in the peppermint and vanilla extracts gently, letting the enchanting aroma fill your kitchen. These flavors give the cookies their unmistakable festive personality.
Step 4: Combine Dry Ingredients
In a separate bowl, whisk together the all-purpose flour, cornstarch, and fine salt. The cornstarch will deliver that signature meltaway texture you’re aiming for, so don’t skip it!
Step 5: Form the Dough
Slowly add the dry mix to the butter mixture and combine on low speed just until you see a soft and smooth dough forming. Then stir in the crushed peppermint candies carefully, distributing that minty crunch throughout.
Step 6: Shape the Cookies
Scoop out about one tablespoon of dough at a time, rolling each portion into a ball. Place them about two inches apart on your baking sheets. Gently flatten each ball with your fingertips—this helps the cookies bake evenly into perfect little pillows of delight.
Step 7: Bake to Perfection
Bake for 10 to 12 minutes until the cookie bottoms turn just lightly golden and the tops look set. Avoid overbaking to keep them soft and melt-in-your-mouth, not dry.
Step 8: Cool and Glaze
Let the cookies cool on the baking sheets for five minutes before transferring them to a wire rack to cool completely. Meanwhile, prepare the glaze by whisking powdered sugar, milk or cream, peppermint extract, vanilla, and salt until smooth. Adjust the milk to get a thick but drizzle-able consistency.
Step 9: Finish with Peppermint Magic
Drizzle or spoon the glaze over the cooled cookies. Sprinkle immediately with crushed peppermint candies for a festive crunch and visual sparkle. Let the glaze set for 30 to 60 minutes before serving or stacking your delicious creations.
How to Serve Peppermint Meltaway Cookies Recipe

Garnishes
Sprinkling a bit more crushed peppermint on top of the glaze not only adds texture but creates a festive look that delights the eyes and hints at the refreshing flavor inside. You can also add a light dusting of powdered sugar for a snowy holiday vibe.
Side Dishes
These meltaway cookies pair beautifully with a mug of hot cocoa, a peppermint-flavored latte, or even a simple glass of cold milk. Their delicate sweetness and cooling mint notes provide a perfect counterbalance to warm, creamy drinks.
Creative Ways to Present
For parties or gift-giving, arrange your peppermint meltaway cookies in decorative tins lined with tissue paper, or stack them in clear cellophane bags tied with red and white ribbons for charming, edible presents. For dessert tables, use a pretty platter accented with fresh mint leaves or candy canes for a festive touch.
Make Ahead and Storage
Storing Leftovers
Keep your leftover Peppermint Meltaway Cookies Recipe cookies fresh by storing them in an airtight container at room temperature. They stay soft and flavorful for up to five days, making them perfect for enjoying throughout the week or sharing with friends and family.
Freezing
If you want to make these cookies ahead of time, freeze the unglazed dough balls in a sealed container or freezer bag for up to two months. When you’re ready to bake, simply thaw slightly and proceed with baking and glazing. You can also freeze baked cookies without glaze for convenience.
Reheating
Since these cookies are best enjoyed soft and fresh, avoid microwaving as it can make them grainy. Instead, bring frozen or refrigerated cookies to room temperature naturally, or warm them briefly in a low oven (about 300°F for 5 minutes) to refresh their meltaway texture.
FAQs
Can I substitute peppermint extract with another flavor?
Absolutely! If peppermint isn’t your thing, try using vanilla or almond extract instead. Keep in mind that peppermint is key to the classic cookie flavor here, so switching flavors will change the character of the recipe.
What if I don’t have cornstarch on hand?
Cornstarch creates the meltaway texture that defines these cookies, so it’s best not to skip it. If you don’t have cornstarch, tapioca starch or arrowroot powder can be used as alternatives in equal amounts.
How can I make these cookies dairy-free?
You can substitute the unsalted butter with a quality dairy-free margarine or coconut oil, and use a non-dairy milk (like almond or oat) for the glaze. Just be mindful that the texture may vary slightly but will still be delicious.
What causes the cookies to be crumbly?
Overbaking or too much flour can lead to crumbly cookies. Make sure you bake just until the cookies are set and barely golden on the bottom, and measure your flour carefully—using the spoon-and-level method helps prevent excess flour.
Can I make these cookies gluten-free?
Yes! Substitute the all-purpose flour with a gluten-free flour blend that includes xanthan gum for structure. The texture might be slightly different, but the cookies will still be tasty and peppermint-y.
Final Thoughts
There’s just something so comforting about biting into a Peppermint Meltaway Cookies Recipe treat—the gentle crumble, the burst of peppermint, and that lovely glaze all come together to brighten any day. I hope you have as much fun making these as you will eating them. Trust me, once you try this recipe, it will become a beloved classic in your holiday baking repertoire. So grab your apron and peppermint candies, and get ready to create some magic in your kitchen!
Print
Peppermint Meltaway Cookies Recipe
- Prep Time: 20 minutes
- Cook Time: 12 minutes
- Total Time: 32 minutes
- Yield: 30 cookies
- Category: Dessert
- Method: Baking
- Cuisine: American
- Diet: Vegetarian
Description
Peppermint Meltaway Cookies are delicate, buttery cookies infused with refreshing peppermint flavor and topped with a sweet peppermint glaze. These melt-in-your-mouth treats feature a soft, tender texture thanks to cornstarch and are perfect for holiday celebrations or anytime you crave a festive cookie.
Ingredients
For the cookies:
- 1 cup unsalted butter (softened)
- 1/2 cup powdered sugar
- 1/2 teaspoon peppermint extract
- 1 teaspoon vanilla extract
- 2 cups all-purpose flour
- 1/4 cup cornstarch
- 1/4 teaspoon fine salt
- 1/2 cup finely crushed peppermint candies or candy canes (plus more for topping, optional)
For the glaze:
- 1 cup powdered sugar
- 2 to 3 tablespoons milk or heavy cream
- 1/4 teaspoon peppermint extract (or to taste)
- 1/2 teaspoon vanilla extract (optional)
- Pinch of salt
- 2 to 3 tablespoons crushed peppermint candies for sprinkling
Instructions
- Preheat and prepare baking sheets: Preheat your oven to 350°F (175°C) and line two baking sheets with parchment paper to prevent sticking and ensure even baking.
- Cream the butter and sugar: In a large bowl, beat the softened unsalted butter with the powdered sugar until the mixture is very light and fluffy, which typically takes about 2 to 3 minutes. This step is important for the cookie’s tender texture.
- Add extracts: Mix in the peppermint extract and vanilla extract thoroughly to infuse the dough with a festive peppermint and vanilla aroma.
- Combine dry ingredients: In a separate bowl, whisk together the all-purpose flour, cornstarch, and fine salt to evenly distribute the dry ingredients and cornstarch, which gives the cookies their characteristic meltaway texture.
- Mix dry ingredients into wet: Gradually add the dry ingredients into the butter mixture while mixing on low speed just until combined. The dough should be soft and smooth without overmixing to avoid tough cookies.
- Incorporate crushed peppermint candies: Stir in the finely crushed peppermint candies or candy canes to add crunchy peppermint bursts throughout the dough.
- Shape cookies: Scoop out dough in 1-tablespoon portions, roll each into a ball, and place them about 2 inches apart on the prepared baking sheets. Gently flatten each ball slightly with your fingertips for even baking.
- Bake: Bake the cookies for 10 to 12 minutes, or until the bottoms are just lightly golden and the tops look set. Be careful not to overbake to maintain the soft meltaway texture.
- Cool: Allow the cookies to cool on the baking sheet for 5 minutes before transferring them to a wire rack to cool completely. This step helps them firm up slightly while retaining softness.
- Prepare glaze: Whisk together the powdered sugar, 2 tablespoons milk or heavy cream, peppermint extract, vanilla extract (if using), and a pinch of salt until smooth. Add more milk as needed to achieve a thick but drizzleable consistency.
- Glaze and garnish: Spoon or drizzle the glaze over the cooled cookies, then immediately sprinkle with extra crushed peppermint candies for a festive look and added crunch.
- Set glaze: Let the glaze set at room temperature for 30 to 60 minutes before serving or stacking the cookies to prevent sticking.
Notes
- Cornstarch is essential for achieving the classic meltaway texture that makes these cookies so tender.
- For a milder peppermint flavor, start by using 1/4 teaspoon peppermint extract in both the cookie dough and glaze, then adjust to taste.
- If the cookie dough feels too soft to roll, chill it in the refrigerator for 15 to 20 minutes to make handling easier.
- Store cookies in an airtight container at room temperature for up to 5 days to maintain freshness.
- You can freeze the unglazed cookie dough for up to 2 months; glaze after baking and cooling.


