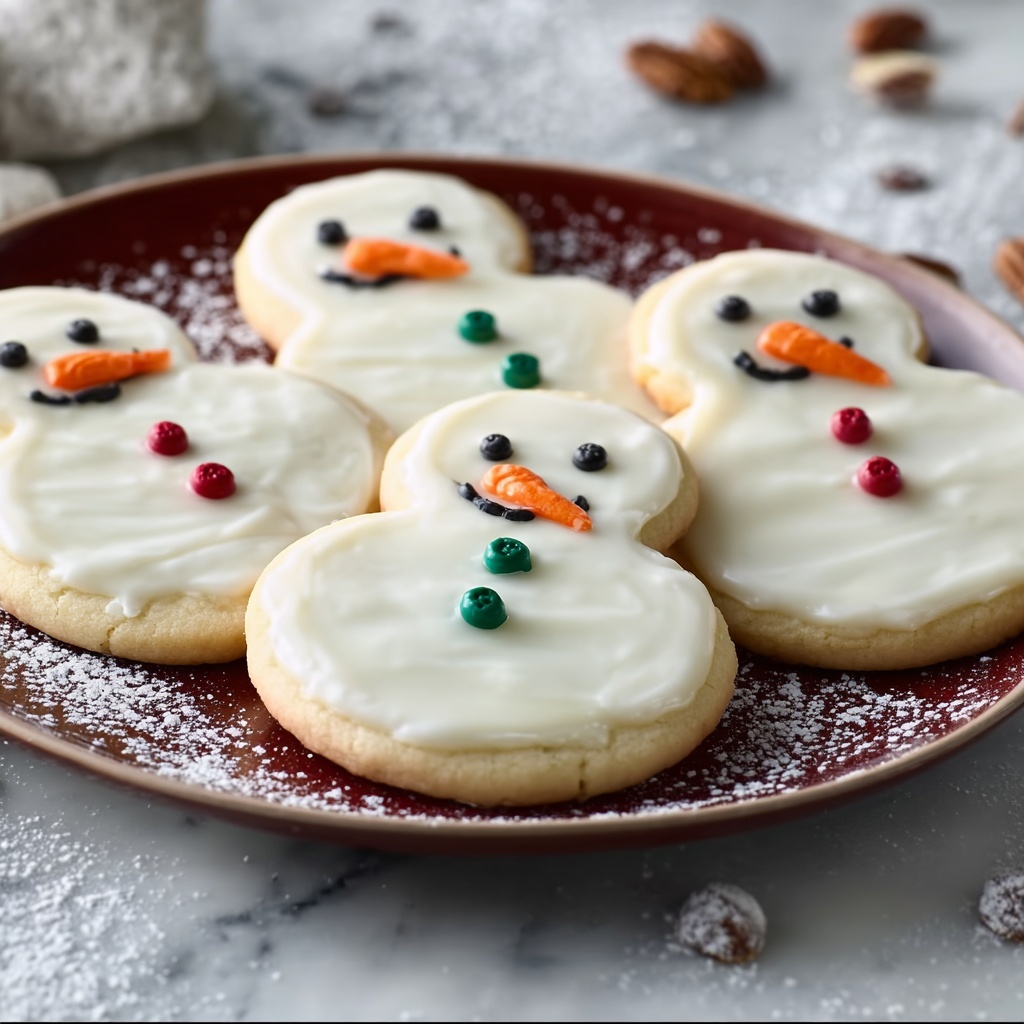
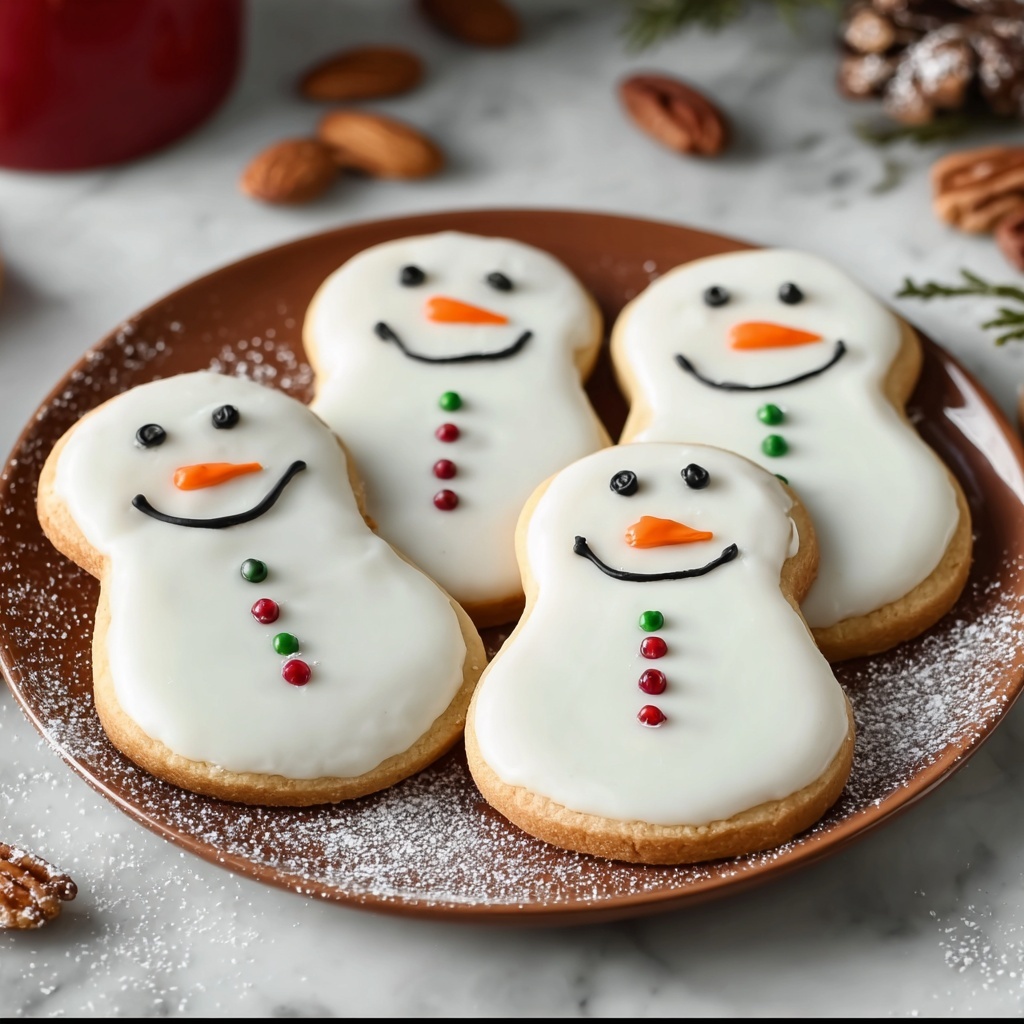
If you’re looking to sprinkle some festive fun into your baking adventures, the Melted Snowman Cookies Recipe is an absolute must-try. These charming treats combine the whimsy of a snowman with the gooey delight of marshmallows and vibrant royal icing to create cookies that are as delightful to look at as they are to eat. Whether you’re gifting them to friends, sharing at a holiday party, or just craving something sweet and cheerful, this recipe offers a perfect balance of textures and flavors that bring winter magic right into your kitchen.
Ingredients You’ll Need
The beauty of this recipe lies in its simplicity — each ingredient plays a vital role in building the playful look and delicious flavor profile of these cookies. From the classic sugar cookie base to the colorful accents that bring each snowman to life, you won’t need a pantry full of fancy items to get started.
- 12 sugar cookies: Store-bought or homemade, these form the sturdy base that holds all the fun decorations together.
- 2 cups royal icing: Essential for that smooth, glossy finish and for “melting” the snowman together on top of the cookie.
- 6 marshmallows, cut in half: These create the soft, puffy snowman bodies, adding a chewy texture that’s pure joy.
- Long orange sprinkles: The perfect colorful stand-in for the snowman’s carrot nose, adding a pop of visual appeal.
- M&Ms: Bright and fun, these are great for the snowman’s buttons, bringing a bit of chocolatey sweetness to the mix.
- Black gel food color: This lets you draw tiny eyes and a mouth with precision, making each snowman adorably expressive.
How to Make Melted Snowman Cookies Recipe
Step 1: Prepare Your Base Cookies
Begin with your sugar cookies, which need to be completely cooled before decorating. This prevents the icing from melting prematurely and ensures a neat finish for your Melted Snowman Cookies Recipe.
Step 2: Cut and Arrange the Marshmallows
Slice each marshmallow in half horizontally to create flat pieces that will stack beautifully. Position three halves on each cookie in a slightly tilted arrangement. This stacking forms the “melted” look of the snowman body, giving your cookies a playful, lopsided charm.
Step 3: Apply Royal Icing
Generously spread royal icing around and between the marshmallow halves to “glue” them to the cookie and to each other. This also gives the impression of melting snow, adding to the whimsical effect.
Step 4: Add the Snowman’s Features
Use the black gel food color to carefully dot on eyes and a mouth directly onto the marshmallows. Stick long orange sprinkles between the top marshmallow halves for noses, and press on M&Ms down the front for buttons. This step brings your snowman to life with that iconic look.
Step 5: Let the Cookies Set
Allow your Melted Snowman Cookies Recipe to dry completely—ideally for at least an hour—so that the icing hardens a bit and the decorations stay perfectly in place when served or packed up.
How to Serve Melted Snowman Cookies Recipe

Garnishes
Consider sprinkling powdered sugar lightly over the cookies to enhance their snowy appearance. A dusting of edible glitter adds a magical sparkle that makes these treats feel extra special for any winter occasion.
Side Dishes
These cookies pair wonderfully with a warm mug of hot chocolate topped with whipped cream. A side of spiced apple cider also complements the sweet and creamy notes while keeping with the cozy seasonal vibe.
Creative Ways to Present
Arrange your Melted Snowman Cookies Recipe on a platter lined with faux snow or white parchment paper for a winter wonderland effect. You can also package them individually in clear cellophane bags tied with colorful ribbons to make heartfelt homemade gifts that your friends and family will treasure.
Make Ahead and Storage
Storing Leftovers
Keep your cookies fresh by storing them in an airtight container at room temperature. They will stay delicious for up to 3 days, making them perfect for sharing throughout the week after baking.
Freezing
If you want to enjoy these Melted Snowman Cookies Recipe later, freeze them layered between parchment paper in an airtight container. When wrapped well, they can last in the freezer for up to a month without losing flavor or texture.
Reheating
Since these are best enjoyed at room temperature, simply remove frozen cookies from the freezer and thaw them in their container for an hour or so before serving. Avoid microwaving to preserve the integrity of the marshmallows and icing.
FAQs
Can I use a different type of cookie for the base?
Absolutely! While sugar cookies provide a neutral and sturdy base, you can get creative with gingerbread or shortbread if you want a different flavor or texture. Just make sure the cookie is firm enough to support the marshmallows and decorations.
What if I don’t have royal icing on hand?
Royal icing is ideal for hardening and sticking the marshmallows, but you can substitute with a thick glaze or even melted white chocolate for a different twist. Just keep in mind that the setting properties will vary.
How do I prevent the marshmallows from sliding off?
Applying a generous layer of royal icing between and around the marshmallows acts like glue. Make sure your cookies are on a flat surface while the icing dries to keep everything in place perfectly.
Can kids help make Melted Snowman Cookies Recipe?
Definitely! This recipe is a lot of fun for little hands, especially when it comes to decorating. Just supervise when handling sharp tools like cutters or gel food colors to ensure a safe and joyful baking session.
How do I make the black gel food color for eyes and mouth last without smudging?
Use a fine-tipped food-safe brush or a toothpick for precision, and allow the gel to dry fully before moving the cookies. Avoid touching the decorated sections until the icing is firm for the best results.
Final Thoughts
There’s something truly enchanting about the Melted Snowman Cookies Recipe that captures the spirit of the holidays in every bite. They are simple yet stunning, making them a delightful project for bakers of all skill levels. I can’t wait for you to try these joyful cookies and watch smiles light up around your kitchen table as soon as you pull them out of the oven!
Print
Melted Snowman Cookies Recipe
- Prep Time: 15 minutes
- Cook Time: 5 minutes (if baking homemade sugar cookies)
- Total Time: 20 minutes
- Yield: 12 cookies
- Category: Dessert
- Method: No-Cook
- Cuisine: American
- Diet: Vegetarian
Description
These Melted Snowman Cookies are a delightful and festive treat perfect for winter holidays. Featuring classic sugar cookies decorated with royal icing, marshmallows, colorful M&Ms, and a dash of fun details like long orange sprinkles for the snowman’s nose and black gel for facial features, these cookies bring a playful melted snowman look that’s sure to be a hit at any holiday gathering.
Ingredients
Cookies
- 12 sugar cookies (store-bought or homemade)
Decorations
- 2 cups royal icing
- 6 marshmallows, cut in half
- Long orange sprinkles (for the snowman’s nose)
- M&Ms (for buttons)
- Black gel food color
Instructions
- Prepare the Sugar Cookies: If you are using store-bought cookies, ensure they are plain sugar cookies. If homemade, bake sugar cookies and cool completely before decorating.
- Apply Royal Icing: Spread an even layer of royal icing over each sugar cookie to create a smooth white base that resembles snow.
- Attach Marshmallows: Cut each marshmallow in half and place them on the cookies to create the snowman’s head and body, layering them slightly to give a melted appearance.
- Add Snowman Details: Use long orange sprinkles to form the snowman’s nose on the top marshmallow, mimicking a carrot nose.
- Create Buttons: Press M&Ms into the icing below the marshmallows to represent the snowman’s buttons.
- Draw Facial Features and Details: Carefully use black gel food color to draw the eyes, mouth, and any additional details like arms or hats onto the marshmallows and icing.
- Let the Cookies Dry: Allow the decorated cookies to sit at room temperature until the royal icing and gel decorations set completely, usually about 1-2 hours.
Notes
- Use fresh royal icing for the best adherence and smooth finish.
- If you don’t have long orange sprinkles, finely grated carrot or orange-colored sugar crystals can substitute for the nose.
- These cookies are best enjoyed within 2-3 days for optimal freshness.
- Store decorated cookies in an airtight container at room temperature.
- Gel food coloring can be substituted with an edible marker if preferred for drawing fine details.


