
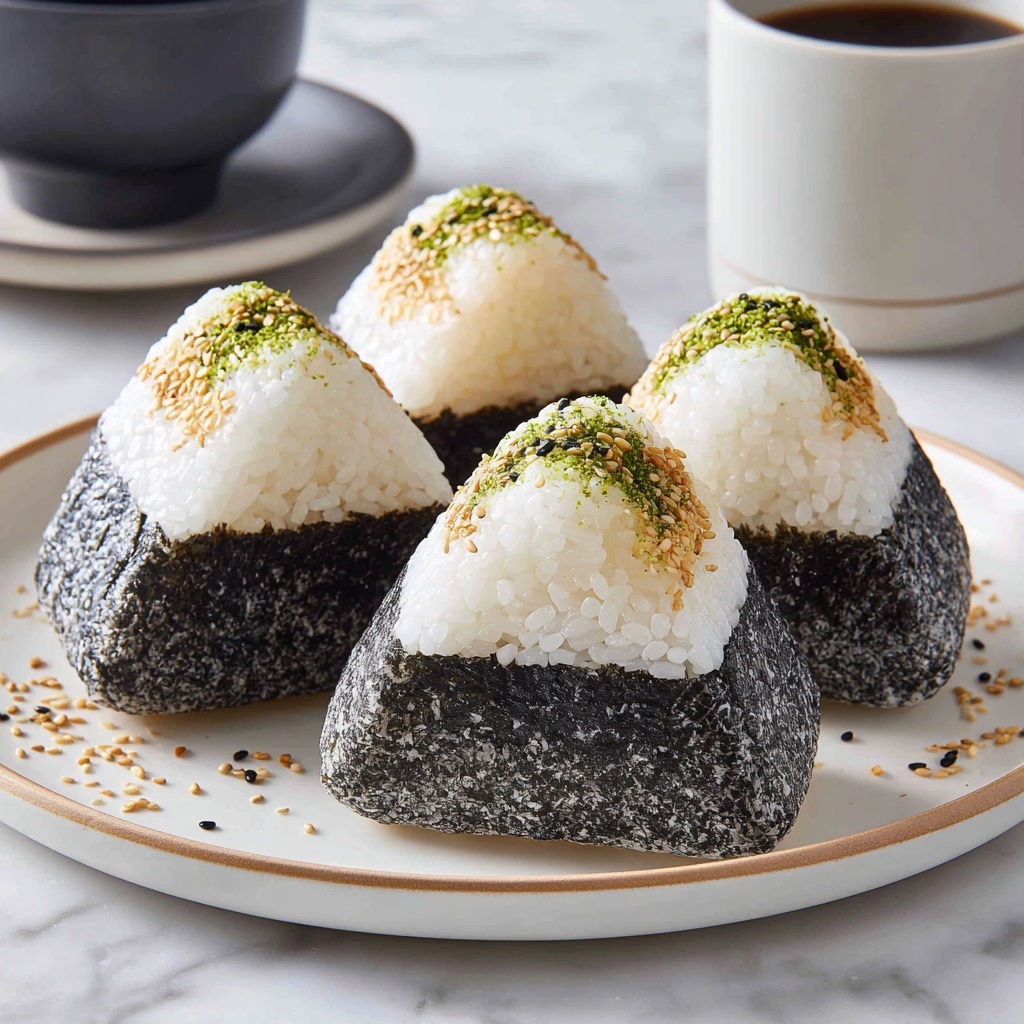
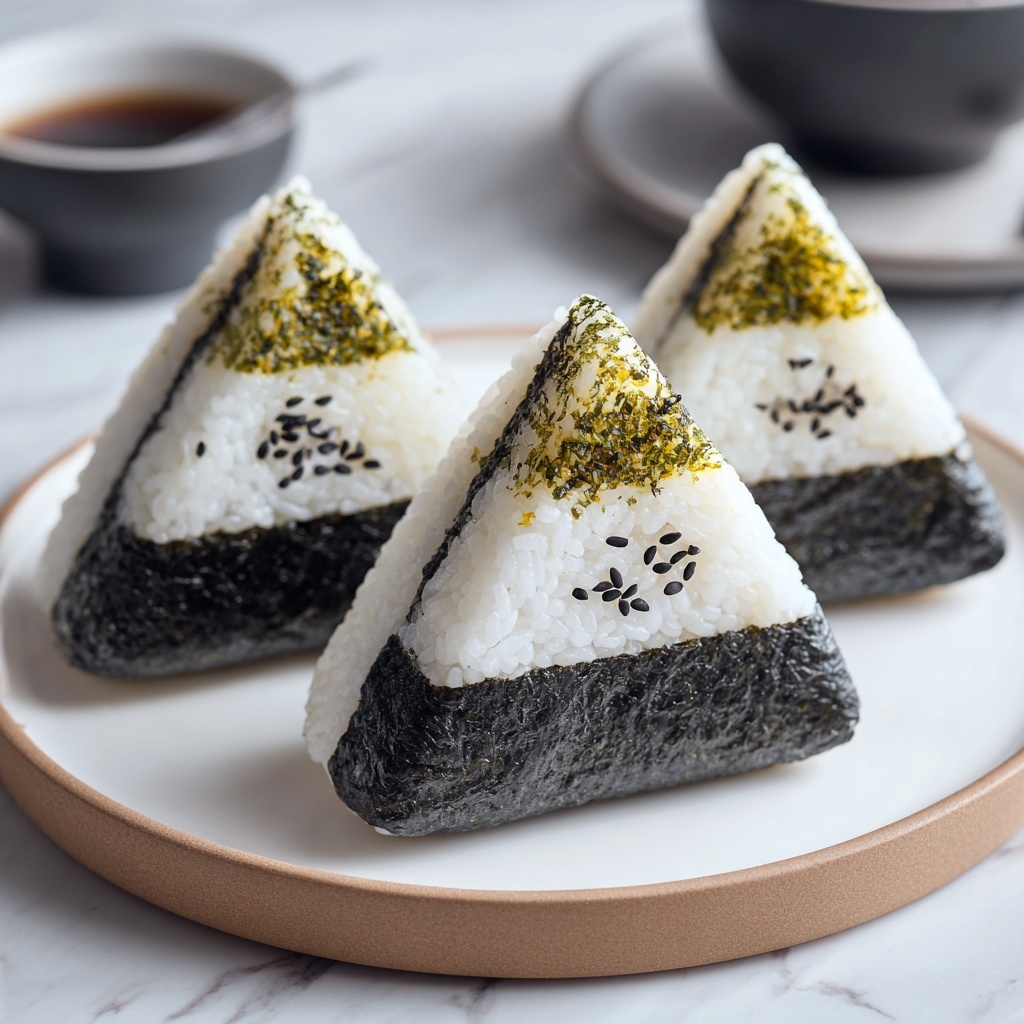
If you are craving a snack that is both satisfying and endlessly versatile, then you are about to fall in love with this Delicious Onigiri: Japanese Rice Balls You Can Customize Today Recipe. These little rice triangles are not just any rice balls—they’re a harmonious blend of perfectly seasoned sticky rice, savory furikake, and crisp nori creating a bite full of textures and flavors that can be adapted to whatever mood you’re in. Whether you want a quick lunch, a picnic treat, or a fun dish to share, this recipe is your ticket to easy, customizable happiness in every bite.
Ingredients You’ll Need
The magic of this recipe lies in its simplicity. With just a handful of ingredients, each one plays a pivotal role in giving the Delicious Onigiri: Japanese Rice Balls You Can Customize Today Recipe its authentic taste and texture that will have you coming back for more.
- 2 cups Cooked Rice: Use freshly cooked medium-grain rice for the perfect sticky texture that holds together beautifully.
- 2 tablespoons Furikake: A seasoning blend that infuses umami and a slight crunch, elevating the rice to new heights.
- 1 cup Water: Essential for wetting your hands so the rice doesn’t stick while shaping your onigiri perfectly.
- 1 teaspoon Kosher Salt: Just enough to enhance the natural flavor of the rice and balance the seasoning.
- 4 sheets Roasted Nori: Cut into strips; these seaweed sheets add a savory wrap and a little extra texture.
- 2 tablespoons Sesame Seeds (optional): For a subtle nutty crunch and a pretty finishing touch on your rice balls.
How to Make Delicious Onigiri: Japanese Rice Balls You Can Customize Today Recipe
Step 1: Season the Rice
Start by blending your freshly cooked medium-grain rice with the furikake seasoning in a mixing bowl. This step is crucial because the furikake imparts subtle flavors of seaweed, sesame, and fish flakes, turning simple rice into something irresistibly savory and aromatic.
Step 2: Prepare Your Hands
Wet your hands with water—this will keep the rice from sticking to your fingers—and sprinkle a small pinch of kosher salt over your palms. The salt not only seasons each rice ball but also creates a light barrier against stickiness, making shaping easier and the end result tastier.
Step 3: Shape the Onigiri
Scoop about half a cup of the seasoned rice and gently press it into a triangle shape. Take your time here to ensure it’s compact enough to hold but not so tight that it becomes dense. For an extra touch of polish, press the sides lightly against a flat surface to sharpen the triangle’s edges.
Step 4: Wrap with Nori and Add Sesame Seeds
Wrap a strip of roasted nori around the base of each rice triangle. The nori adds color, texture, and a pleasant saltiness that pairs beautifully with the rice. If you like, sprinkle a few sesame seeds on top for a bit of crunch and nutty flavor to complete the look and taste.
Step 5: Enjoy or Store
Your onigiri are now ready to be enjoyed fresh, perfect for any meal or snack. If you want to save some for later, wrap each rice ball tightly in plastic wrap to keep them moist and flavorful until you’re ready to delight in their customizable goodness.
How to Serve Delicious Onigiri: Japanese Rice Balls You Can Customize Today Recipe
Garnishes
While the basic onigiri is delicious on its own, garnishes can personalize each bite. Try adding a strip of pickled ginger on the side for tang, a dollop of spicy mayo for heat, or even a tiny smudge of miso paste inside for an unexpected twist. Each addition complements the mild rice and makes it feel truly special.
Side Dishes
Onigiri pairs wonderfully with simple sides that don’t overpower its delicate flavors. Miso soup, steamed edamame, or a light seaweed salad create a balanced meal that feels authentic and satisfying. These sides add freshness and nourishment, making your meal complete and enjoyable.
Creative Ways to Present
Think beyond the traditional wrapped rice ball. Serving onigiri in bento boxes alongside colorful vegetables or arranging a variety of fillings creates an inviting platter for gatherings. You can also serve them on skewers for bite-sized fun or press them into molds for cute shapes that make lunchtime extra exciting.
Make Ahead and Storage
Storing Leftovers
Leftover onigiri are best stored tightly wrapped in plastic wrap in the refrigerator to keep their moisture intact. Consume within one day to enjoy the freshest texture, as the rice can dry out or harden if left too long in the fridge.
Freezing
For longer storage, freeze wrapped onigiri in an airtight container or freezer bag. When frozen, they keep well for up to one month, making it easy to prepare batches in advance and have customizable snacks at the ready.
Reheating
To reheat, unwrap the onigiri, cover with a damp paper towel, and microwave on medium power in short bursts until warmed through. This method helps retain moisture so the rice stays tender, while the nori remains slightly crisp for a tasty experience.
FAQs
Can I use other seasonings instead of furikake for the Delicious Onigiri: Japanese Rice Balls You Can Customize Today Recipe?
Absolutely! While furikake is traditional and packed with flavor, you can try mixing in umeboshi (pickled plum), bonito flakes, or even a sprinkle of shichimi togarashi for a spicy kick. The beauty of this recipe is how adaptable it is to your taste buds.
Is there a preferred type of rice for making onigiri?
Yes, medium-grain Japanese rice or sushi rice is ideal because it sticks just enough to hold the shape without becoming mushy. Long-grain rice tends to be too fluffy and won’t bind properly for onigiri.
Can I add fillings inside the onigiri?
Definitely! Traditional fillings include tuna mayo, cooked salmon, pickled plum, or cooked vegetables. To add fillings, shape half the rice, create a small indentation, add your desired filling, then cover with more rice before shaping into a triangle.
How do I keep the nori crisp when serving onigiri later?
To keep the nori crisp, wrap it separately and add it to the onigiri right before eating. If wrapped too early, the seaweed can absorb moisture and become chewy, which affects the texture.
Are onigiri suitable for kids and picky eaters?
Absolutely! Onigiri’s mild flavor and fun shapes make them kid-friendly. Plus, you can customize fillings and seasonings to suit even the pickiest eaters, making them a versatile choice for family meals.
Final Thoughts
I can’t encourage you enough to dive into making the Delicious Onigiri: Japanese Rice Balls You Can Customize Today Recipe, whether you’re new to Japanese cuisine or a longtime enthusiast looking for an easy, flavorful snack. It’s simple, satisfying, and endlessly adaptable to whatever you have on hand or whatever flavor you’re craving. Once you try making and customizing these onigiri, they might just become your new go-to comfort food that’s perfect any time of day.
Print
Delicious Onigiri: Japanese Rice Balls You Can Customize Today Recipe
- Prep Time: 10 minutes
- Cook Time: 25 minutes
- Total Time: 35 minutes
- Yield: 4 servings (4 Onigiri rice balls)
- Category: Snack
- Method: No-Cook
- Cuisine: Japanese
- Diet: Gluten Free
Description
Discover the art of making delicious Japanese Onigiri rice balls. This customizable recipe features seasoned medium-grain rice combined with umami-packed furikake, shaped into perfect triangles and wrapped with roasted nori seaweed. Ideal for a quick snack or portable meal, these rice balls can be enjoyed fresh or stored for later.
Ingredients
Main Ingredients
- 2 cups Cooked medium-grain rice (freshly cooked)
- 2 tablespoons Furikake (Japanese seasoning blend)
- 1 teaspoon Kosher salt
For Shaping and Garnish
- 1 cup Water (to wet hands)
- 4 sheets Roasted nori (cut into strips)
- 2 tablespoons Sesame seeds (optional)
Instructions
- Mix Rice and Seasoning: In a large mixing bowl, combine the freshly cooked medium-grain rice with the furikake until evenly blended, ensuring the seasoning is well distributed.
- Prepare Hands: Wet your hands with water to prevent the rice from sticking, then lightly sprinkle a pinch of kosher salt on your palms to season the rice further while shaping.
- Form Onigiri: Scoop approximately 1/2 cup of the seasoned rice and gently press it into a compact triangle shape using your hands to ensure it holds together well.
- Refine Shape: Optionally, press the sides of the rice triangle against a flat surface to sharpen the edges and create a neat, uniform look.
- Wrap with Nori: Take a strip of roasted nori and wrap it around the base of the rice triangle, securing it. This not only adds flavor but also makes the Onigiri easier to hold.
- Add Sesame Seeds: If desired, sprinkle sesame seeds on top of the nori-wrapped Onigiri for a nutty finish and added texture.
- Serve or Store: Enjoy your Onigiri immediately while fresh, or wrap each rice ball tightly in plastic wrap and store in the refrigerator for later consumption.
Notes
- Use freshly cooked medium-grain rice for the best texture and stickiness.
- Furikake seasoning can be adjusted to taste or substituted with other Japanese seasonings or fillings like pickled plum or salmon flakes.
- Keep your hands wet and lightly salted to prevent sticking and to enhance flavor.
- Onigiri is best consumed fresh but can be stored wrapped in plastic for up to a day in the fridge.
- For portability, wrap each Onigiri individually to maintain shape and freshness.

