
If you are in search of a crowd-pleasing, flavor-packed appetizer, you can’t go wrong with this Baked Taco Dip Recipe. It combines the best of creamy textures, seasoned meat, melty cheese, and fresh toppings all baked to bubbly perfection. Whether it’s game day, a potluck, or casual get-together, this dip brings everyone together around the table. It’s easy to make, irresistibly tasty, and always disappears fast.
Ingredients You’ll Need
Getting this Baked Taco Dip Recipe just right starts with simple, honest ingredients that blend beautifully for layers of texture and flavor. Each element plays a vital role — from the savory seasoned beef to the luscious cream cheese base and vibrant fresh toppings that brighten every bite.
- Ground beef or turkey: Provides hearty, savory protein that anchors the dip.
- Taco seasoning packet: Adds classic Mexican-inspired spices for bold flavor.
- Water (1/2 cup): Helps the seasoning meld perfectly into the meat.
- Cream cheese (8 ounces, softened): Creates a rich, creamy base that ties the layers together.
- Sour cream (1 cup): Adds tanginess and smooth texture to balance spices.
- Salsa (1 cup): Brings a fresh, zesty kick and a lovely splash of color.
- Mexican blend cheese (2 cups, divided): Melts beautifully to give gooey, savory cheesiness.
- Chopped tomatoes (1/2 cup): Provides juicy freshness and vibrant color on top.
- Sliced black olives (1/4 cup): Adds briny contrast and eye-catching details.
- Green onions (2, sliced): Lends mild sharpness and crisp green appeal.
- Tortilla chips: Essential for scooping up every flavorful layer.
How to Make Baked Taco Dip Recipe
Step 1: Preheat and Prepare the Meat
Begin by preheating your oven to 375°F (190°C), making sure it’s ready to bake your dip to perfection. Meanwhile, brown the ground beef or turkey in a skillet over medium heat. Once cooked through, drain excess fat for a less greasy dip. Stir in the taco seasoning and water, then cook for an additional 2-3 minutes to let those spices fully meld with the meat. This step is crucial for infusing the heart of your Baked Taco Dip Recipe with authentic taco flavor.
Step 2: Make the Creamy Base
In a mixing bowl, whisk together the softened cream cheese, sour cream, and salsa until completely smooth and well combined. This luscious layer provides a cooling contrast to the seasoned meat and adds a dreamy texture that makes this dip so addictive. Spread this mixture evenly into the bottom of a 9×13-inch baking dish — it’s the foundation of all the delicious layers to come.
Step 3: Layer the Meat and Cheese
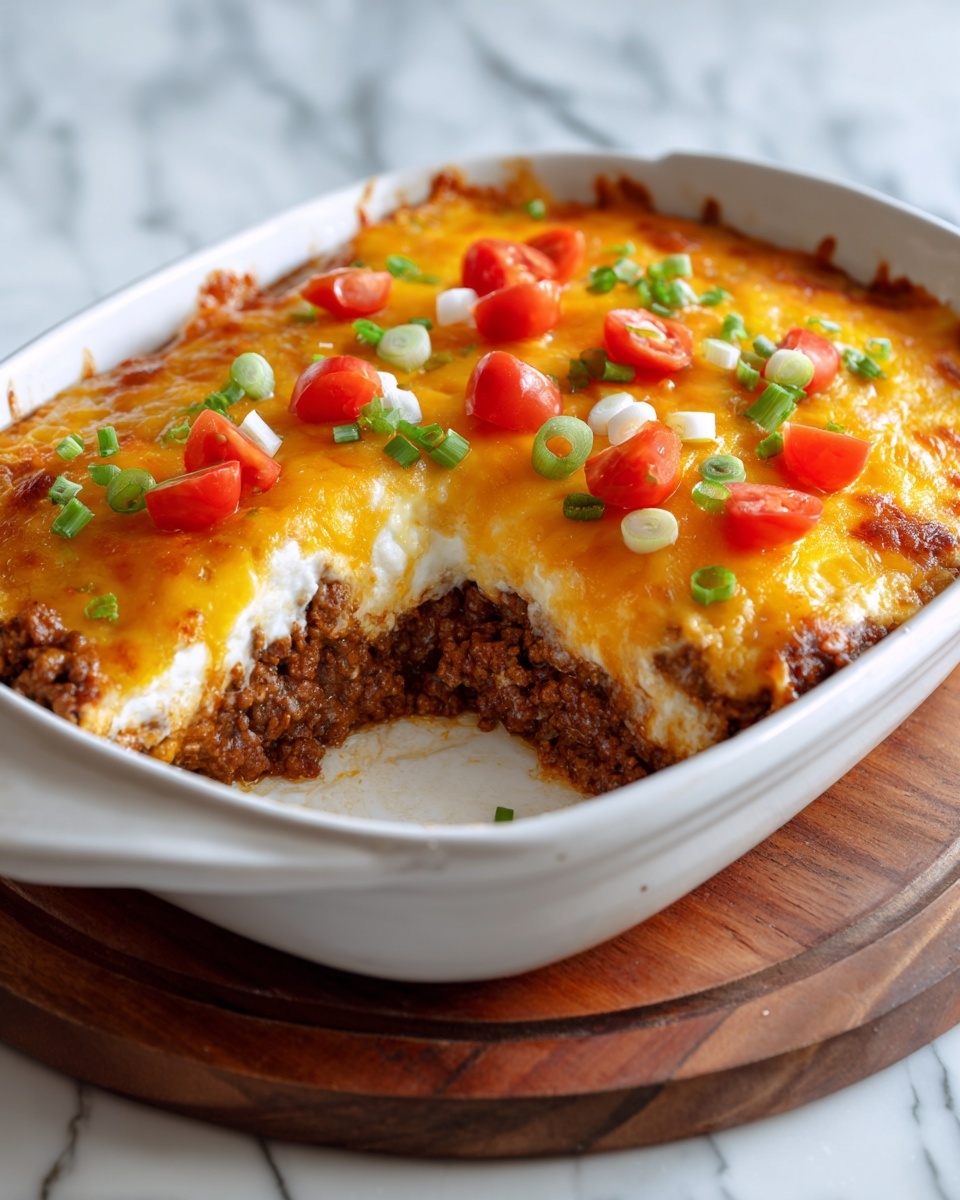
Next, evenly layer the cooked taco meat over the cream cheese base, ensuring every bite will have that perfect meaty punch. Then sprinkle 1 1/2 cups of the shredded Mexican blend cheese over the meat, preparing it for the melty magic to come. These layers build depth in flavor and make your Baked Taco Dip Recipe irresistibly hearty.
Step 4: Bake Until Bubbly
Pop the assembled dip into your preheated oven and bake for 15 to 20 minutes. The goal is to melt the cheese completely and achieve a bubbly, golden top that signals it’s ready. Keep an eye on it — you want that tantalizingly melted layer without burning. This bake step brings all the flavors and textures together in the most glorious way.
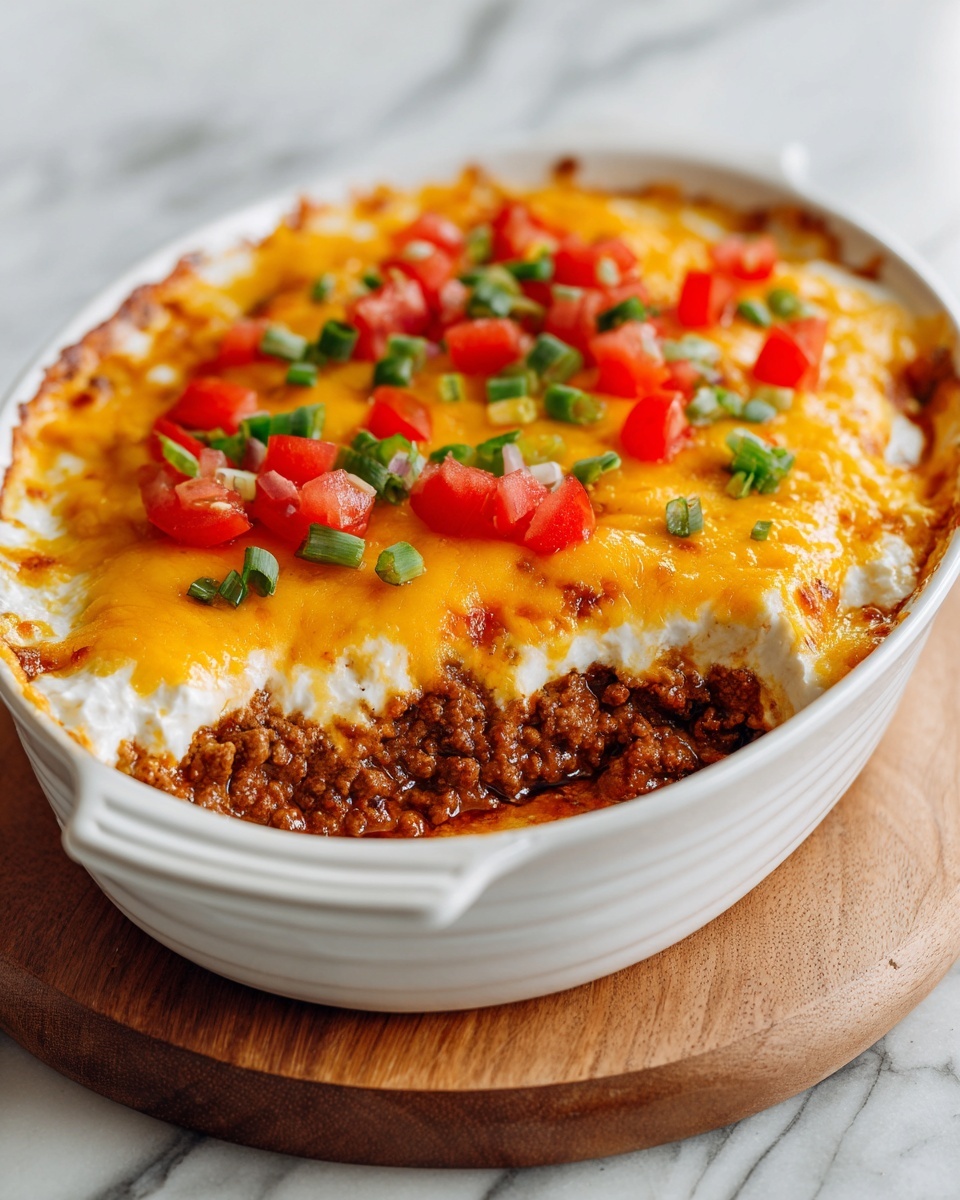
Step 5: Add Fresh Toppings and Serve
Once baked, remove from the oven and immediately sprinkle the remaining cheese, chopped tomatoes, sliced black olives, and green onions on top. These fresh ingredients add color, brightness, and balance to the creamy, cheesy richness below. Serve your Baked Taco Dip Recipe warm with plenty of tortilla chips for scooping up layers of great flavors and textures.
How to Serve Baked Taco Dip Recipe
Garnishes
Garnishing your dip with chopped tomatoes, black olives, and sliced green onions adds more than just visual appeal; it offers a refreshing contrast in flavor and texture. Consider adding a dollop of guacamole or a sprinkle of fresh cilantro for an extra burst of color and richness. These little finishing touches make every serving feel special and inviting.
Side Dishes
Serving this Baked Taco Dip Recipe alongside crunchy tortilla chips is a must, but you can also offer a variety of crisp vegetable sticks such as bell peppers, celery, or cucumber for a lighter option. A simple bowl of salsa and guacamole on the side will elevate your snack spread, turning it into a full fiesta of tastes that guests can customize to their liking.
Creative Ways to Present
For a fun twist, serve the dip in a hollowed-out bread bowl or mini cast iron skillets to keep it warm and festive. You can also layer it in clear glass dishes or trifles so guests can admire each colorful layer before diving in. Setting up a taco dip bar with a selection of toppings allows everyone to build their perfect bite, turning your Baked Taco Dip Recipe into an interactive and memorable appetizer experience.
Make Ahead and Storage
Storing Leftovers
If you happen to have any leftovers (though that’s rare!), store them in an airtight container in the refrigerator for up to 3 days. Keeping the dip chilled preserves its freshness and flavors, but be sure to cover it tightly so it doesn’t absorb other fridge odors.
Freezing
This Baked Taco Dip Recipe isn’t the best candidate for freezing due to its creamy dairy-based layers, which may separate when thawed. For best results, enjoy it fresh or within a few days of making it to savor all its textures and flavors at their peak.
Reheating
When ready to enjoy leftovers, warm the dip gently in a preheated oven set to 350°F (175°C) until heated through and bubbly again, about 10-15 minutes. Avoid the microwave if possible to maintain the dip’s creamy texture and prevent uneven heating. Add fresh toppings after reheating for that fresh finish.
FAQs
Can I use ground chicken instead of beef or turkey?
Absolutely! Ground chicken works well in this recipe and offers a lighter alternative while still soaking up the taco seasoning beautifully.
Is it possible to make this dip vegetarian?
Yes, simply replace the meat with seasoned cooked beans or a plant-based crumbled meat substitute. It keeps all the flavors and layers intact.
Can I prepare this dip ahead of time?
You can assemble the layers up to a day in advance and refrigerate, but bake it right before serving to keep it fresh and melty.
What is the best cheese to use?
A Mexican blend cheese is ideal for its balanced flavor and excellent melting quality, but cheddar or Monterey Jack can also work well.
How spicy is this dip?
The spice level depends on your taco seasoning and salsa choices; you can adjust to your preference by selecting mild, medium, or hot seasonings and salsas.
Final Thoughts
This Baked Taco Dip Recipe is a guaranteed winner that brings comfort, zest, and joy to any gathering. It’s simple to make but loaded with layers of flavor that everyone will love. Give it a try at your next party or casual get-together and prepare for lots of compliments and repeated requests – it’s just that good!
Print
Baked Taco Dip Recipe
- Prep Time: 10 minutes
- Cook Time: 25 minutes
- Total Time: 35 minutes
- Yield: 8 servings
- Category: Appetizer
- Method: Baking
- Cuisine: Mexican
Description
This delicious Baked Taco Dip is a crowd-pleasing appetizer perfect for gatherings and game days. It combines seasoned ground beef or turkey with a creamy base of cream cheese, sour cream, and salsa, topped with melty Mexican blend cheese and fresh vegetables. Served warm alongside crispy tortilla chips, this easy-to-make dip is flavorful, cheesy, and sure to be a hit at any party.
Ingredients
Meat Layer
- 1 pound ground beef or turkey
- 1 packet taco seasoning
- 1/2 cup water
Creamy Base
- 8 ounces cream cheese, softened
- 1 cup sour cream
- 1 cup salsa
Cheese and Toppings
- 2 cups shredded Mexican blend cheese, divided
- 1/2 cup chopped tomatoes
- 1/4 cup sliced black olives
- 2 green onions, sliced
To Serve
- Tortilla chips
Instructions
- Preheat the oven: Set your oven to 375°F (190°C) to ensure it’s ready for baking the taco dip later.
- Cook the meat: In a skillet over medium heat, brown the ground beef or turkey. Once cooked through, drain any excess fat. Stir in the taco seasoning and water, and continue cooking for 2-3 minutes until the seasoning is well incorporated and the mixture is slightly thickened.
- Prepare the creamy layer: In a mixing bowl, combine the softened cream cheese, sour cream, and salsa. Mix until smooth and evenly blended. Spread this mixture evenly into the bottom of a 9×13-inch baking dish.
- Layer the meat: Spoon and spread the cooked taco meat over the creamy base layer in the baking dish, creating a uniform layer.
- Add cheese and bake: Sprinkle 1 1/2 cups of the shredded Mexican blend cheese evenly over the meat layer. Place the dish into the preheated oven and bake for 15-20 minutes, or until the cheese is melted, bubbly, and lightly golden.
- Top with fresh ingredients: Remove the dip from the oven and immediately sprinkle the remaining 1/2 cup shredded cheese on top along with the chopped tomatoes, sliced black olives, and sliced green onions for a burst of color and flavor.
- Serve warm: Serve the baked taco dip warm alongside tortilla chips for dipping. Enjoy this flavorful, cheesy appetizer perfect for sharing!
Notes
- You can substitute ground turkey with ground beef or a plant-based meat alternative.
- For a spicier dip, add chopped jalapeños to the toppings or mix in some hot salsa.
- Prepare the dip a few hours in advance, then refrigerate and bake just before serving.
- Use any Mexican cheese blend or cheddar cheese as preferred.
- For a gluten-free version, ensure the taco seasoning and tortilla chips are gluten-free.


