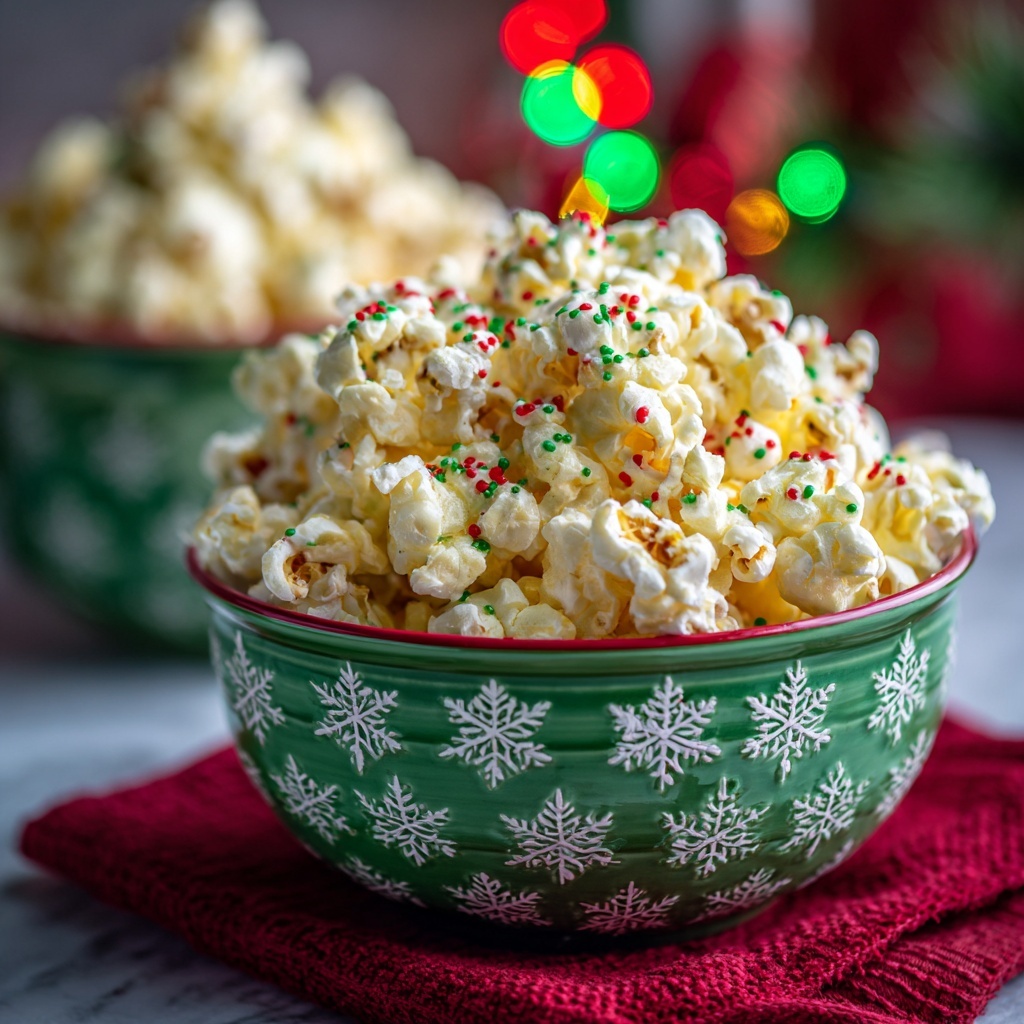
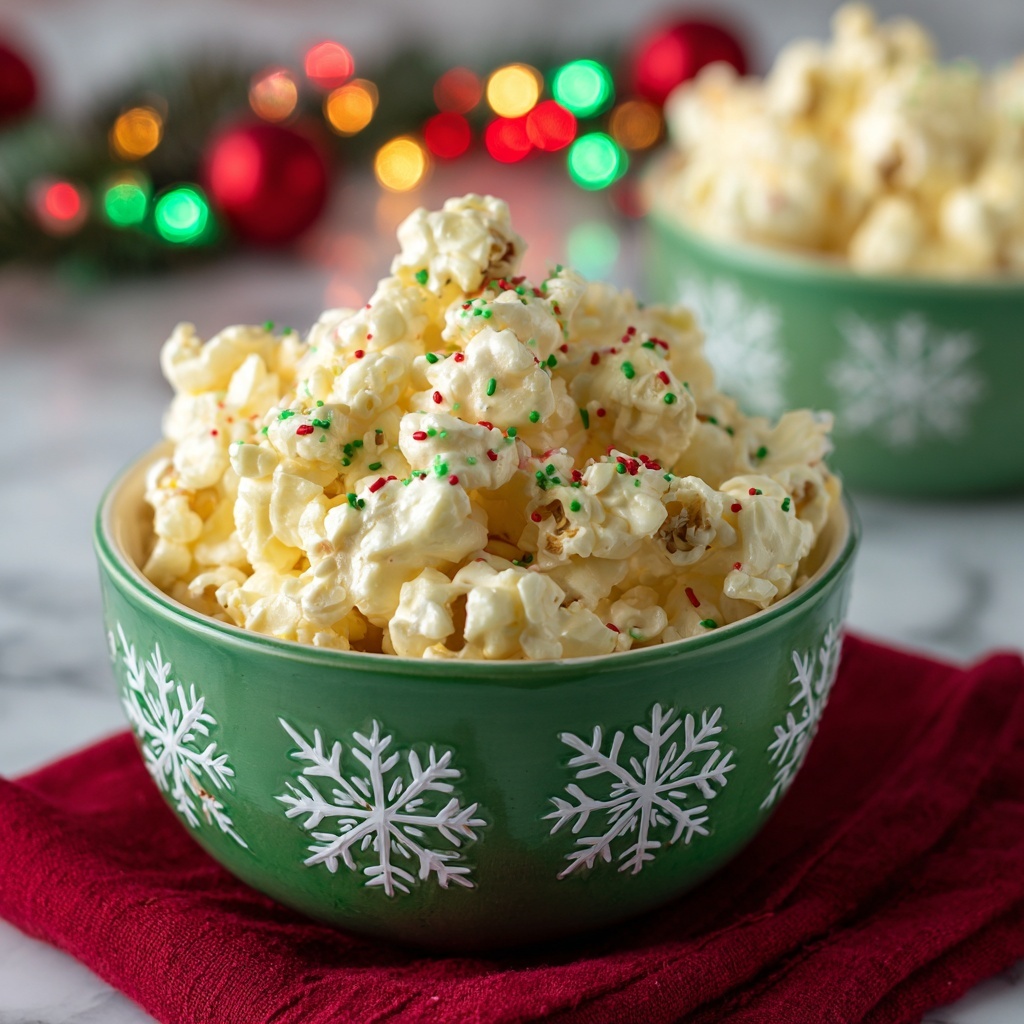
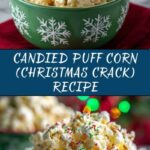
If you’re on the hunt for a snack that perfectly captures the joy and sparkle of the holiday season, look no further than this Candied Puff Corn (Christmas Crack) Recipe. Imagine buttery puff corn enveloped in sweet, creamy vanilla candy coating with a dash of festive sprinkles for a pop of color and crunch. It’s delightfully simple to make yet incredibly addicting, offering a crunchy, sweet-tart experience that’s perfect for gift-giving, parties, or cozy nights at home. This treat truly embodies all things merry and bright with every crunchy, sugary bite.
Ingredients You’ll Need
The magic of this recipe lies in its simplicity. Just a few accessible ingredients come together to create a stunning burst of flavor and texture. Each component plays a crucial role in making your Candied Puff Corn shine, from the buttery puff corn’s light crunch to the luscious creaminess of the vanilla candy coating and the joyful touch of sprinkles.
- Butter flavored puff corn (2 bags, 3.25 ounces each): Choose a quality butter flavored puff corn like Chester’s for that perfect buttery base that’s light yet flavorful.
- Vanilla flavored candy coating (1 box, 16 ounces): This melts down smoothly and hardens into a shiny, sweet shell that clings beautifully to the puff corn.
- Sprinkles: Add as much or as little as you like for festive color and extra crunch.
How to Make Candied Puff Corn (Christmas Crack) Recipe
Step 1: Prepare Your Workspace and Puff Corn
Start by grabbing a very large pan or bowl—this ensures you have plenty of room to mix without making a mess. Pour the puff corn straight in, spreading it out evenly. Lay down two large sheets of wax paper on your countertop, which will be your canvas for spreading out the coated puff corn later.
Step 2: Melt the Candy Coating
Place your vanilla flavored candy coating in a microwave-safe bowl and melt it according to the package instructions. The key here is stirring occasionally to prevent burning and to achieve a smooth, velvety texture that will wrap around each piece of puff corn.
Step 3: Combine and Coat
Drizzle the melted candy coating generously over the puff corn. Quickly but gently stir it together so that every crunchy piece is evenly coated in that glossy sweet vanilla layer. Speed is important here because the coating will start to set once it cools.
Step 4: Spread and Decorate
Immediately transfer the coated puff corn onto the wax paper, spreading it out into a single layer. This helps it cool uniformly and maintain that irresistible crunch. Now’s the time to sprinkle your colorful decorations all over—just enough to bring holiday cheer without overpowering the flavor.
Step 5: Cool and Store
Let the mixture cool completely at room temperature until the candy coating hardens. Once set, break into pieces or leave as a slab depending on your preference. Store your Candied Puff Corn (Christmas Crack) Recipe in an airtight container to keep it fresh, ideally consuming it within a week.
How to Serve Candied Puff Corn (Christmas Crack) Recipe

Garnishes
Though the sprinkles add the perfect festive touch, you can also consider adding crushed peppermint candies or mini chocolate chips on top for a seasonal twist. Fresh cranberries or edible glitter could elevate your presentation for a party treat that dazzles both eyes and palate.
Side Dishes
This sweet snack pairs beautifully alongside warm beverages like hot cocoa or spiced cider. It also balances savory finger foods such as cheese platters or charcuterie boards, making your holiday spread colorful and crowd-pleasing.
Creative Ways to Present
Serve the Candied Puff Corn in mason jars tied with ribbon for charming gifts, or fill clear cellophane bags for easy party favors. Layer it in glass bowls on your dessert table to showcase its vibrant sprinkles and inviting texture—guaranteed to catch everyone’s eye.
Make Ahead and Storage
Storing Leftovers
Keep your Candied Puff Corn (Christmas Crack) Recipe fresh by storing it in an airtight container at room temperature. This preserves the candy coating’s crunch and the puff corn’s lightness for up to one week.
Freezing
While this treat is best enjoyed fresh, you can freeze it by placing pieces in a freezer-safe container separated by parchment paper. Thaw at room temperature before serving, though keep in mind the texture may soften slightly after freezing.
Reheating
Since this snack is designed to be enjoyed cold and crunchy, reheating is not recommended. However, if it softens, placing it in a low oven for a few minutes can help restore some of the crispness without melting the coating.
FAQs
Can I use a different type of puffed snack for this recipe?
Absolutely! While butter flavored puff corn gives the perfect buttery base, try cheese puffs or kettle corn if you want a salty-sweet twist—just be mindful that it will change the final flavor profile.
Is there a way to make this recipe nut-free and allergy-friendly?
Yes, this recipe is naturally nut-free as long as you check your candy coating and sprinkles for cross-contamination warnings. Using allergy-friendly sprinkles helps keep this treat safe for everyone.
How long does the candy coating take to harden?
Typically, it sets within 20 to 30 minutes at room temperature. Cooler environments or spreading the mixture thinner can speed up this process.
Can I add flavors to the coating?
Definitely! Stir in a few drops of peppermint or almond extract to the melted candy coating before drizzling for a festive flavor kick.
What’s the best way to break the candy-coated puff corn into pieces?
Once fully cooled and hardened, gently break it apart by hand or use a knife to cut it into manageable chunks—just be careful not to crush the puff corn.
Final Thoughts
This Candied Puff Corn (Christmas Crack) Recipe is a shining star of holiday snacks and sweet treats, combining effortless preparation with irresistible flavor and festive cheer. I encourage you to give it a try because it has that perfect combination of sweet, buttery, crunchy, and colorful that never fails to bring smiles. Once you taste it, I promise it will become a favorite to make and share year after year.
Print
Candied Puff Corn (Christmas Crack) Recipe
- Prep Time: 5 minutes
- Cook Time: 15 minutes
- Total Time: 20 minutes
- Yield: 15 servings
- Category: Snack
- Method: No-Cook
- Cuisine: American
- Diet: Vegetarian
Description
Deliciously sweet and crunchy Candied Puff Corn, also known as Christmas Crack, is an easy-to-make treat perfect for holiday celebrations. This recipe combines buttery puff corn with a smooth vanilla candy coating and festive sprinkles for a delightful snack that can be prepared in just 20 minutes.
Ingredients
Ingredients
- 2 (3.25-ounce) bags butter flavored puff corn (such as Chester’s Puffcorn)
- 1 (16-ounce) box vanilla flavored candy coating
- Sprinkles, for decorating (optional)
Instructions
- Prepare Puff Corn: Add the puff corn to a very large pan or bowl, ensuring there is enough space to coat the corn evenly. Lay two large sheets of wax paper out on the counter to prepare for the coated puff corn.
- Melt Candy Coating: Melt the vanilla flavored candy coating in the microwave following the package instructions. This usually involves heating the candy in short intervals and stirring until smooth.
- Coat Puff Corn: Drizzle the melted candy coating over the puff corn. Quickly stir the mixture to combine well and ensure each piece of puff corn is thoroughly coated with the candy.
- Spread and Decorate: Spread the coated puff corn mixture evenly in a single layer onto the wax paper. If desired, sprinkle colorful sprinkles on top for a festive touch.
- Cool and Store: Allow the mixture to cool completely and harden. Once cooled, break into clusters if needed and store in an airtight container for up to a week to maintain freshness.
Notes
- Be sure to stir quickly when coating the puff corn, as the candy coating sets fast.
- Use high-quality vanilla candy coating for best flavor and texture.
- Store the candied puff corn in a cool, dry place to keep it crisp.
- Feel free to customize with different colored sprinkles or drizzle melted chocolate for a festive variation.