
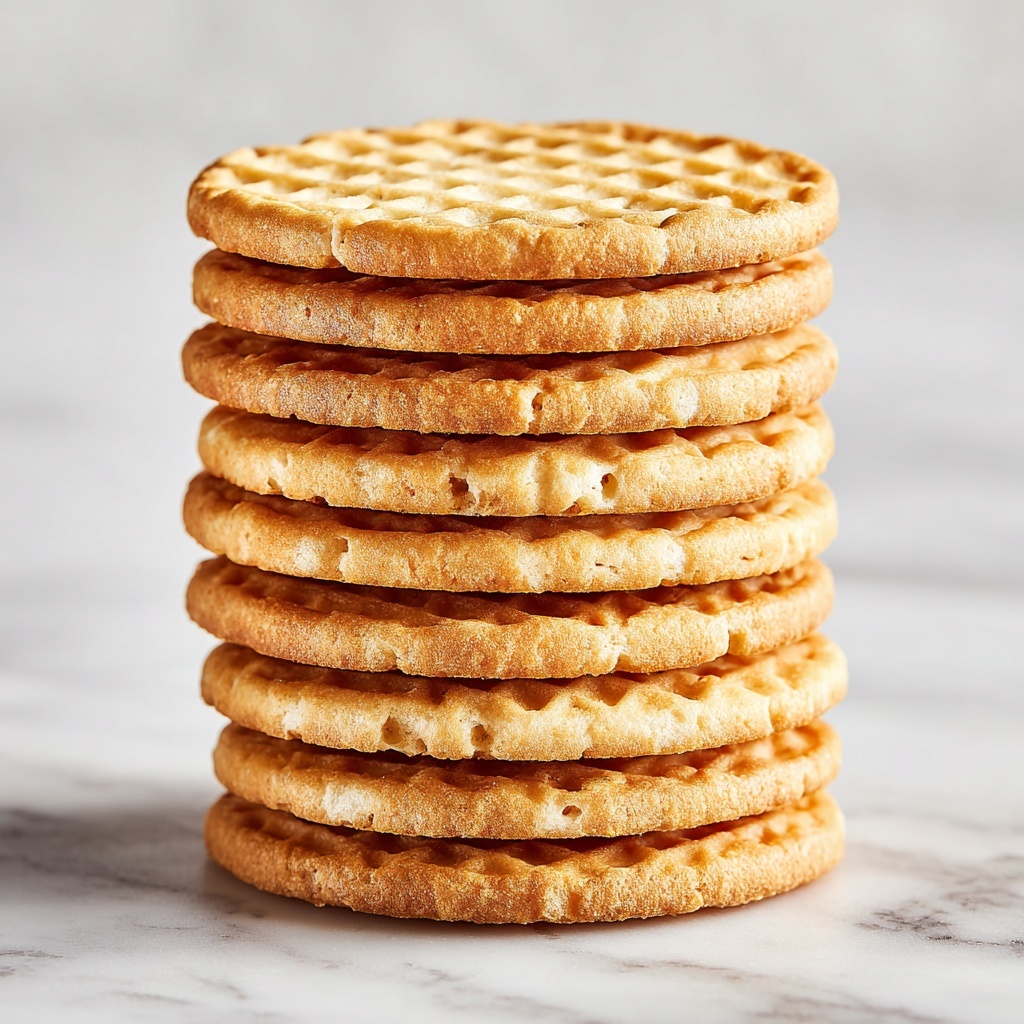
If you have a soft spot for delicate, crisp cookies that melt in your mouth and carry a warm, inviting aroma, then you are going to fall head over heels for this Classic Pizzelle Recipe. These Italian waffle cookies boast a perfect balance of buttery richness and subtle anise flavor, making every bite a nostalgic little celebration. Whether it’s a holiday tradition or a spontaneous treat, pizzelle deliver a joyful crunch with each bite, charming everyone from kids to seasoned foodies alike.
Ingredients You’ll Need
Gathering simple, pantry-friendly ingredients is your first step to creating these charming cookies. Each component plays its own crucial part in delivering the perfect texture, taste, and that lovely golden color you want on your Classic Pizzelle Recipe.
- 3 large Eggs: Provide structure and richness, ensuring your pizzelle hold their delicate shape.
- 3/4 cup Granulated Sugar: Sweetens the dough perfectly without overpowering the subtle flavors.
- 1/2 cup Unsalted Butter, melted: Adds a luscious buttery undertone and contributes to crispness.
- 1 teaspoon Vanilla Extract: Lends warmth and depth to the flavor profile.
- 1 teaspoon Anise Extract: Gives pizzelle their classic anise flavor; almond extract is a lovely alternative for variation.
- 1 3/4 cups All-Purpose Flour: The base ingredient that binds everything together with the right lightness.
- 1 1/2 teaspoons Baking Powder: Helps create a delicate lift for a light texture.
- Pinch of Salt: Balances sweetness and enhances all flavors.
- Powdered Sugar, for dusting (optional): A pretty finishing touch that adds a hint of extra sweetness.
How to Make Classic Pizzelle Recipe
Step 1: Preheat Your Pizzelle Iron
Start by heating your pizzelle iron according to the manufacturer’s instructions. This step ensures your cookies cook evenly, developing their signature crisp edges and whistle-thin texture. If you don’t have a pizzelle iron, a waffle maker can work in a pinch, though the design will differ.
Step 2: Mix the Wet Ingredients
In a medium bowl, whisk together the eggs and granulated sugar until the mixture becomes light and frothy—this incorporates air that gives pizzelle their tender crumb. Then stir in the melted butter, vanilla extract, and your choice of anise or almond extract, blending everything thoroughly to infuse that classic pizzelle aroma.
Step 3: Combine the Dry Ingredients
Sift the flour, baking powder, and salt into a separate bowl to remove lumps and aerate the flour. Gradually add the dry mixture to the wet ingredients, stirring gently to create a smooth, vibrant batter that is ready for cooking.
Step 4: Cook the Pizzelle
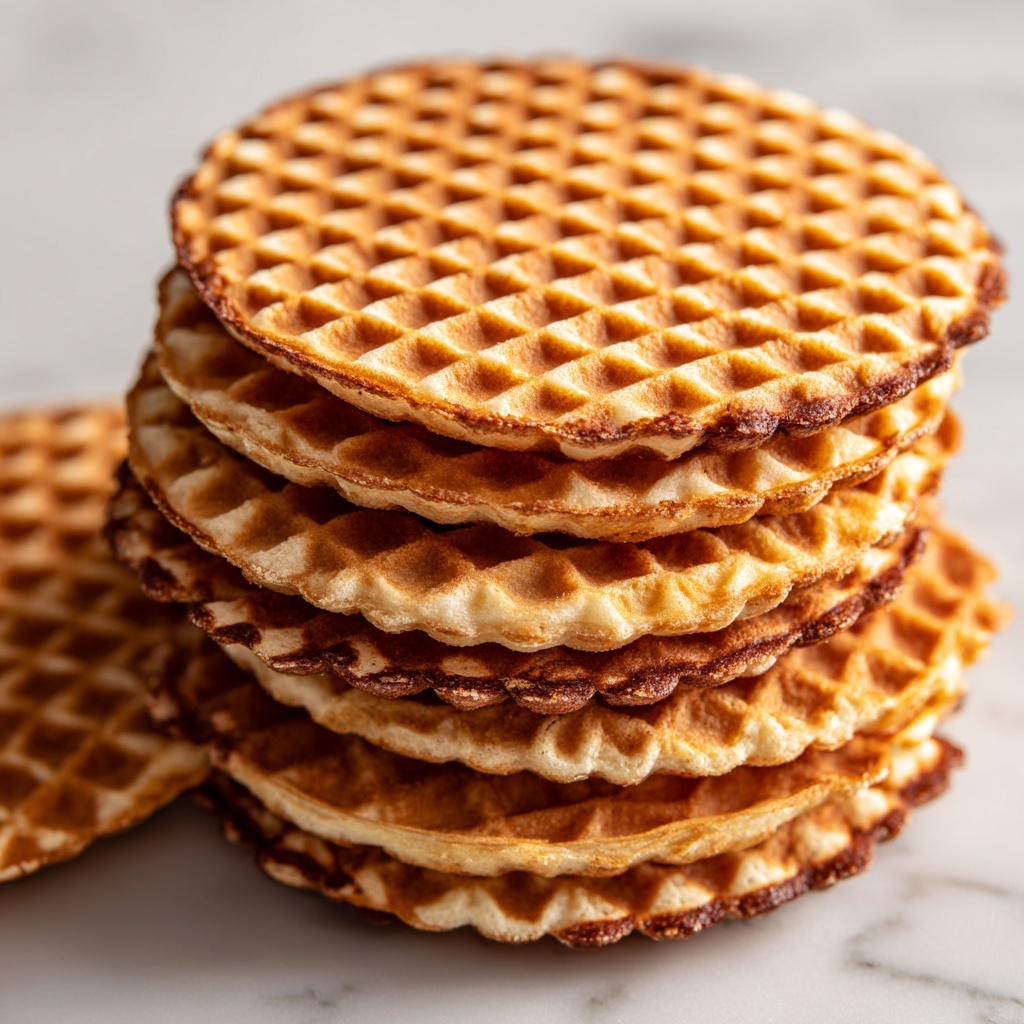
Lightly grease the preheated iron with cooking spray or brush on melted butter to prevent sticking. Spoon about one tablespoon of batter into the center of the iron. Close it gently and cook for about 30 seconds to 1 minute, or until the pizzelle turns a beautiful golden brown, showcasing crisp edges and delicate patterns.
Step 5: Cool Your Pizzelle
Once cooked, carefully remove each pizzelle and place it on a wire rack to cool. This resting period is crucial because it allows the cookies to crisp up perfectly, transforming from soft when hot to delightfully crunchy once cooled. If you want, a light dusting of powdered sugar adds the perfect finishing touch before serving.
How to Serve Classic Pizzelle Recipe
Garnishes
Pizzelle shine wonderfully on their own, but sprinkling powdered sugar brings an elegant, snowy look that’s especially lovely for festive occasions. You can also drizzle melted chocolate or dip the edges in colored icing for a sweet decorative twist that kids adore.
Side Dishes
These crisp cookies pair beautifully with a dollop of whipped cream or a scoop of gelato, making for an indulgent dessert that balances the warmth of the pizzelle’s anise flavor with creamy coolness. They also complement a rich espresso or a lightly brewed herbal tea perfectly for an inviting snack.
Creative Ways to Present
Try rolling your warm pizzelle around the handle of a wooden spoon right after cooking to create delicate waffle cones or cookie cups. Fill them with mascarpone and fresh berries for a charming dessert. Another fun idea is layering several pizzelle with pastry cream or Nutella to make a playful, textured cake alternative.
Make Ahead and Storage
Storing Leftovers
Keep your leftover pizzelle in an airtight container at room temperature. Stored properly, their wonderful crispness holds for up to a week, making them the perfect make-ahead treat for whenever a sweet craving strikes.
Freezing
If you want to save them longer, pizzelle freeze beautifully. Just separate layers with parchment paper to prevent sticking, seal them tightly in a freezer-safe bag, and store for up to three months. Thaw at room temperature before serving to regain their crisp texture.
Reheating
To refresh your pizzelle and regain that freshly-made crispness, pop them in a preheated oven at 300°F (150°C) for about 5 minutes. This light warming revives their delicate crunch without making them hard or overcooked.
FAQs
Can I use almond extract instead of anise extract in the Classic Pizzelle Recipe?
Absolutely! Almond extract is a popular alternative that lends a slightly different, but equally delicious, flavor to your pizzelle. It creates a nutty sweetness that pairs beautifully with the buttery dough.
What if I don’t have a pizzelle iron? Can I use something else?
If you don’t own a pizzelle iron, a waffle maker can be a substitute, though the pattern and thickness will vary. For traditional thin, crisp pizzelle, investing in a dedicated pizzelle iron might be worthwhile if you plan to make them regularly.
How can I make my pizzelle crisp and not chewy?
The key is to cook them until just golden and let them cool completely on a wire rack. The cooling process allows the steam to escape, turning the cookies wonderfully crispy rather than soft or chewy.
Can I flavor pizzelle other than with anise or almond extract?
Yes! While anise and almond add the classic pizzelle flavor, you can experiment with lemon zest, cinnamon, or even a touch of cocoa powder for a modern twist that still respects the cookie’s delicate nature.
How long do pizzelle last when stored properly?
Stored airtight at room temperature, pizzelle typically stay crisp and fresh for up to a week, making them an excellent treat to bake ahead for special occasions or everyday indulgences.
Final Thoughts
There is something truly magical about making and sharing this Classic Pizzelle Recipe. The process is straightforward, the ingredients are simple, and the reward is a delightful cookie that brings joy to any table. Whether you make them for holidays, gifts, or just because, pizzelle are bound to become one of your favorite handmade treats to share with friends and family. Give them a try—you might just find yourself hooked!
Print
Classic Pizzelle Recipe
- Prep Time: 20 minutes
- Cook Time: 30 minutes
- Total Time: 50 minutes
- Yield: 20 servings
- Category: Dessert
- Method: Baking
- Cuisine: Italian
Description
Classic Pizzelle are traditional Italian waffle cookies known for their delicate crisp texture and subtle flavors of anise and vanilla. These thin, round cookies are made using a specialized pizzelle iron, creating beautiful patterned treats perfect for dusting with powdered sugar or serving with sweet fillings like whipped cream or chocolate.
Ingredients
Wet Ingredients
- 3 large Eggs
- 3/4 cup Granulated Sugar
- 1/2 cup Unsalted Butter, melted
- 1 teaspoon Vanilla Extract
- 1 teaspoon Anise Extract (or almond extract as an alternative)
Dry Ingredients
- 1 3/4 cups All-Purpose Flour
- 1 1/2 teaspoons Baking Powder
- Pinch of Salt
For Serving
- Powdered Sugar, for dusting (optional)
Instructions
- Preheat the Pizzelle Iron: Preheat your pizzelle iron according to the manufacturer’s instructions. If you don’t have a pizzelle iron, a waffle maker can be used as a substitute.
- Mix the Wet Ingredients: In a medium bowl, whisk together the eggs and granulated sugar until the mixture becomes light and frothy. Then add the melted butter, vanilla extract, and anise extract (or almond extract) and stir until the mixture is well combined.
- Add the Dry Ingredients: In a separate bowl, sift together the all-purpose flour, baking powder, and a pinch of salt. Gradually add the dry ingredients to the wet ingredients, stirring gently until a smooth batter forms without overmixing.
- Cook the Pizzelle: Lightly grease the pizzelle iron with cooking spray or brush it with melted butter. Spoon approximately 1 tablespoon of batter onto the center of the iron, adjusting the amount depending on the size of your pizzelle iron. Close the lid and cook for about 30 seconds to 1 minute, or until the pizzelle turn a golden brown color, following your iron’s specific guidance.
- Cool the Pizzelle: Carefully remove the cooked pizzelle from the iron and place them on a wire rack to cool. As they cool, they will become crisp. If desired, dust them with powdered sugar before serving.
- Serve: Enjoy the pizzelle on their own as a delightful snack or use them as a base for various sweet fillings such as whipped cream, mascarpone cheese, or melted chocolate.
Notes
- If you don’t own a pizzelle iron, a waffle maker can be used as an alternative, though the shape and pattern will differ.
- You can swap anise extract for almond extract to change the flavor profile.
- Ensure not to overmix the batter to keep the pizzelle light in texture.
- Lightly greasing the iron prevents sticking and helps achieve an even crispness.
- Pizzelle crisp up as they cool; remove them promptly to avoid burning.
- Store pizzelle in an airtight container to maintain their crispness.


