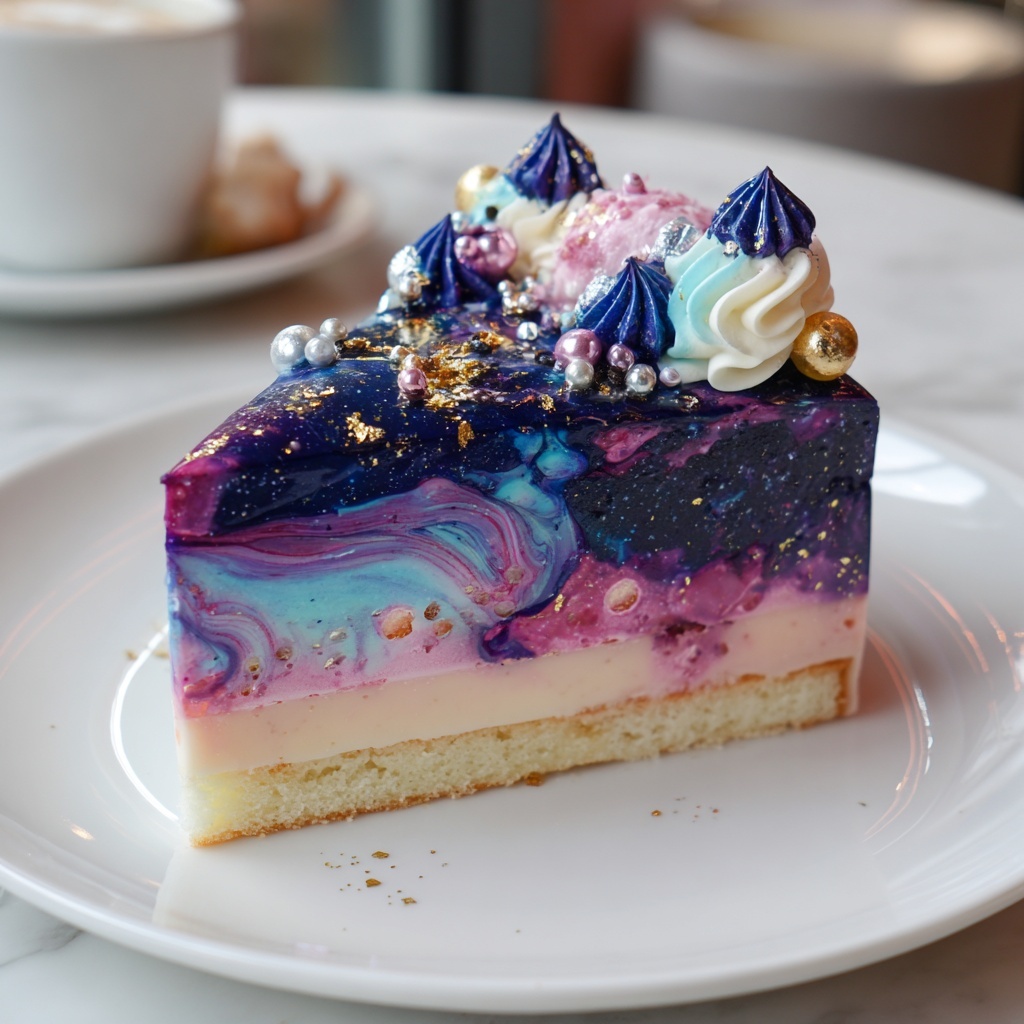
If you are craving a dessert that’s as stunning to look at as it is delicious, the Galaxy Ripple Ice Cream Cake Recipe is exactly what you need. This dreamy, no-bake treat combines the creamy smoothness of vanilla ice cream with chunks of rich Galaxy Ripple chocolate bars, set on a chocolate cookie crumb crust that’s simple but full of texture. Swirled with luscious chocolate syrup and topped with fluffy whipped cream and extra candy pieces, this cake feels like a celebration on every forkful. Whether you’re surprising guests or treating yourself, this dessert brings an irresistibly fun and indulgent experience that’s sure to make any occasion sparkle.
Ingredients You’ll Need
The ingredients for this recipe are straightforward yet carefully chosen to create a perfect balance of flavors and textures. Each element plays a crucial role—from the crunchy cookie crust providing a firm base, to the rich chocolate pieces folded through the ice cream, and the silky drizzle that ties it all together visually and taste-wise.
- 1.5 quarts vanilla ice cream (softened): The creamy foundation that’s easy to spread and melts beautifully on the palate.
- 1 cup Galaxy Ripple chocolate bars (roughly chopped): Adds delightful pockets of chocolate and caramel flavor throughout the cake.
- 1 cup chocolate cookie crumbs: Creates a crunchy, chocolatey crust that contrasts the soft ice cream.
- 3 tablespoons melted butter: Binds the cookie crumbs together for a solid, buttery base.
- 1/2 cup chocolate syrup: Provides a sweet, glossy swirl that enhances both presentation and richness.
- 1 cup whipped cream or topping: Adds a light, airy finishing touch that balances the chocolate.
- Extra Galaxy Ripple pieces for garnish: Elevates the look and adds extra bursts of chocolate delight.
How to Make Galaxy Ripple Ice Cream Cake Recipe
Step 1: Prepare the Crust
Begin by lining an 8-inch springform pan with parchment paper or plastic wrap, making sure the sides and bottom are well-covered for easy removal later. Mix the chocolate cookie crumbs and melted butter in a bowl until the crumbs are evenly moistened, then firmly press this mixture into the base of your pan. Pop the pan into the freezer for about 10 minutes to let the crust set firmly—this will create the perfect foundation for the rest of your cake.
Step 2: Mix Ice Cream and Chocolate
While your crust chills, let the softened vanilla ice cream sit at room temperature for 10 to 15 minutes, which makes it easier to fold in the chocolate pieces without melting the ice cream. Roughly chop the Galaxy Ripple bars and gently fold them into the ice cream until evenly distributed. This step is what gives the cake its signature ripple and delicious bursts of caramel and chocolate.
Step 3: Assemble the Cake
Pour the ice cream and chocolate mixture over the chilled crust, smoothing the top with a spatula for an even surface. Drizzle the chocolate syrup across the ice cream layer. Then, using a knife, gently swirl the syrup into the ice cream in a figure-eight or circular motion to create a beautiful ripple effect that looks as magical as it tastes.
Step 4: Freeze Until Set
Cover the pan with plastic wrap or a lid to prevent freezer odors from seeping in and freeze the cake for at least four hours, although overnight is best for a firm set. This allows the flavors to meld perfectly and the ice cream to harden enough to slice cleanly.
Step 5: Garnish and Serve
Once frozen solid, remove the sides of the springform pan carefully. Top the cake generously with whipped cream and scatter additional Galaxy Ripple pieces over the top for an eye-catching and tasty finish. Slice with a warm knife to get neat pieces and serve immediately for the ultimate indulgence.
How to Serve Galaxy Ripple Ice Cream Cake Recipe

Garnishes
While whipped cream and candy pieces are classic, feel free to add a sprinkle of edible glitter or a few fresh berries to elevate the look. You can also drizzle extra chocolate syrup or even a caramel sauce for an additional layer of sweetness and shine.
Side Dishes
This ice cream cake shines best on its own but pairs wonderfully with a cup of bold coffee or a fresh fruit salad that cuts through the sweetness with tartness and brightness. A scoop of sorbet can also complement the rich chocolate flavors without overwhelming the palate.
Creative Ways to Present
Consider serving individual slices on dark plates to highlight the colors of the ripple design or plate with edible flowers for a whimsical touch. For parties, cut small squares and serve on spoons as sophisticated bite-sized treats that capture the Galaxy Ripple Ice Cream Cake Recipe’s essence in one perfect mouthful.
Make Ahead and Storage
Storing Leftovers
If you have any leftovers, cover the cake tightly with plastic wrap or place it in an airtight container to prevent freezer burn and absorption of other flavors. Store in the freezer and consume within a week for best taste and texture.
Freezing
This cake freezes beautifully thanks to its no-bake nature. To maintain the best texture, avoid thawing and refreezing multiple times. Freeze it well-wrapped immediately after assembling for optimal freshness.
Reheating
Since this is a frozen dessert, reheating isn’t necessary. Instead, let slices sit at room temperature for a few minutes before serving to soften slightly, making cutting easier and enhancing flavor release without melting it completely.
FAQs
Can I use other flavors of ice cream for this recipe?
Absolutely! While the original Galaxy Ripple Ice Cream Cake Recipe calls for vanilla, swapping in chocolate, caramel, or even coffee ice cream can give you a delicious twist that complements the chocolate bars beautifully.
How long can I store the cake in the freezer?
You can keep the cake frozen for up to one week. Just make sure it’s well-wrapped or stored in an airtight container to avoid ice crystals and flavor loss.
Is it necessary to use a springform pan?
A springform pan makes removal easier, especially for this ice cream cake. If you don’t have one, you can line a regular pan very well with parchment paper, but be careful when removing the cake.
Can I prepare this cake the day before a party?
Yes, and in fact, making it the day before gives the ice cream plenty of time to set properly, resulting in neater slices and better flavor integration. Just remember to keep it tightly covered in the freezer.
What’s the best way to get neat slices?
Run a sharp knife under hot water, then quickly dry and slice. The heat helps the knife glide through the ice cream without cracking it, giving you clean, beautiful slices every time.
Final Thoughts
There’s something truly special about the Galaxy Ripple Ice Cream Cake Recipe—it looks like a work of art but comes together with surprisingly simple steps and ingredients. Perfect for warm days or when you want to wow your guests without turning on the oven, it’s a dessert you’ll find yourself making again and again. I hope you give this cake a try and enjoy every delicious, chocolatey, creamy bite as much as I do!
Print
Galaxy Ripple Ice Cream Cake Recipe
- Prep Time: 20 minutes
- Cook Time: 0 minutes
- Total Time: 4 hours 20 minutes
- Yield: 8 servings
- Category: Dessert
- Method: Freezing
- Cuisine: British-Inspired
- Diet: Vegetarian
Description
Indulge in this Galaxy Ripple Ice Cream Cake, a no-bake frozen dessert featuring creamy vanilla ice cream swirled with rich Galaxy Ripple chocolate pieces and drizzled with decadent chocolate syrup atop a crunchy chocolate cookie crust. Perfect for warm weather or any celebration, this British-inspired treat is a delightful blend of smooth, crunchy, and chocolaty flavors that freezes into a luscious cake.
Ingredients
Crust
- 1 cup chocolate cookie crumbs
- 3 tablespoons melted butter
Ice Cream Filling
- 1.5 quarts vanilla ice cream, softened
- 1 cup Galaxy Ripple chocolate bars, roughly chopped
Topping
- 1/2 cup chocolate syrup
- 1 cup whipped cream or topping
- Extra Galaxy Ripple pieces for garnish
Instructions
- Prepare the Pan and Crust: Line an 8-inch springform pan with parchment paper or plastic wrap to prevent sticking. In a bowl, mix the chocolate cookie crumbs with melted butter until the mixture is well combined and holds together when pressed.
- Form the Crust: Press the crumb mixture firmly into the bottom of the prepared pan to create an even crust layer. Freeze the crust for 10 minutes to set firmly before adding the filling.
- Mix Ice Cream and Chocolate Pieces: In a large bowl, gently fold the roughly chopped Galaxy Ripple chocolate bars into the softened vanilla ice cream, ensuring the chocolate is evenly distributed without melting the ice cream.
- Assemble the Cake: Pour the ice cream mixture over the chilled crust in the pan and smooth the top with a spatula. Drizzle chocolate syrup evenly across the surface, then use a knife or skewer to gently swirl the syrup into the ice cream, creating a ripple effect.
- Freeze the Cake: Cover the cake securely and place it in the freezer for at least 4 hours or overnight to allow the cake to fully set and firm up.
- Decorate and Serve: Before serving, carefully remove the cake from the springform pan. Top with whipped cream and scatter extra Galaxy Ripple pieces on top for garnish. Slice into 8 portions and enjoy immediately.
Notes
- Allow the ice cream to soften at room temperature for 10–15 minutes prior to assembling to make spreading easier.
- You can substitute vanilla ice cream for chocolate or caramel-flavored ice cream if you prefer a richer taste.
- Ensure the crust is firmly packed and chilled well to avoid sogginess once layered with the ice cream.
- For easier removal, chill your cutter or knife in warm water before slicing.


