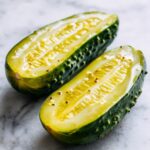
Description
This recipe for Traditional Kosher Dill Pickles guides you through the process of naturally fermenting crisp, tangy pickles using simple ingredients like fresh cucumbers, garlic, dill, and spices. The pickles develop flavor over several days of fermentation, resulting in a classic, crunchy, and flavorful condiment perfect for snacking or accompanying your meals.
Ingredients
Primary Ingredients
- Small cucumbers (Kirby or pickling cucumbers work best) – amount depending on jar size
- Garlic cloves, smashed – 2 to 4 cloves
- Fresh dill heads or sprigs – 2 to 3 sprigs
- Whole black peppercorns – 1 teaspoon
- Kosher salt (non-iodized) – 3 tablespoons
- Filtered or dechlorinated water – 4 cups
Optional Ingredients
- Mustard seeds – 1 teaspoon
- Red pepper flakes – 1/2 teaspoon
- Grape leaf or bay leaf – 1 leaf
Equipment
- Wide-mouth jar (1 quart or larger, depending on batch size)
- Fermentation weight or small jar for weighing down cucumbers
Instructions
- Prepare the Brine: Dissolve the kosher salt completely in filtered or dechlorinated water by stirring thoroughly. This creates the salty liquid essential for fermenting the cucumbers.
- Prepare the Cucumbers: Wash the cucumbers thoroughly under running water. Trim only the blossom end of each cucumber carefully to help prevent the pickles from becoming soft during fermentation.
- Pack the Jar: Place smashed garlic cloves, fresh dill heads or sprigs, whole black peppercorns, and any optional spices such as mustard seeds, red pepper flakes, or a grape or bay leaf at the bottom of your wide-mouth jar.
- Add Cucumbers: Pack the cucumbers tightly into the jar, arranging them vertically or in whatever way fits best to maximize the number of cucumbers while maintaining space for brine to cover them.
- Add Brine: Pour the prepared brine over the packed cucumbers until they are completely submerged. Ensuring full submersion is critical for proper fermentation and to prevent mold.
- Weigh Down: Use a fermentation weight or place a small jar inside the larger jar to keep the cucumbers submerged below the brine level throughout the fermentation.
- Cover: Loosely cover the jar with a lid or a clean cloth secured by a rubber band. This allows gases produced during fermentation to escape, preventing pressure buildup while keeping contaminants out.
- Ferment: Leave the jar at room temperature, ideally between 65–75°F (18–24°C), for 4 to 7 days. Begin sampling the pickles after 3 to 4 days to check for your preferred level of tanginess and crunchiness. Once ready, transfer the jar to the refrigerator to slow the fermentation and preserve the pickles.
Notes
- Use non-iodized kosher salt to avoid cloudiness and off-flavors in the brine.
- Filter or dechlorinate water to prevent chemical interference with fermentation.
- Trimming only the blossom end helps keep pickles firm because the blossom end contains enzymes that promote softness.
- Make sure cucumbers stay submerged under the brine at all times to prevent mold growth.
- Fermentation times vary based on room temperature; warmer temperatures speed up fermentation.
- Once refrigerated, pickles will continue to develop flavor slowly and can be stored for several weeks.
- Optional spices can be adjusted for taste or omitted.

